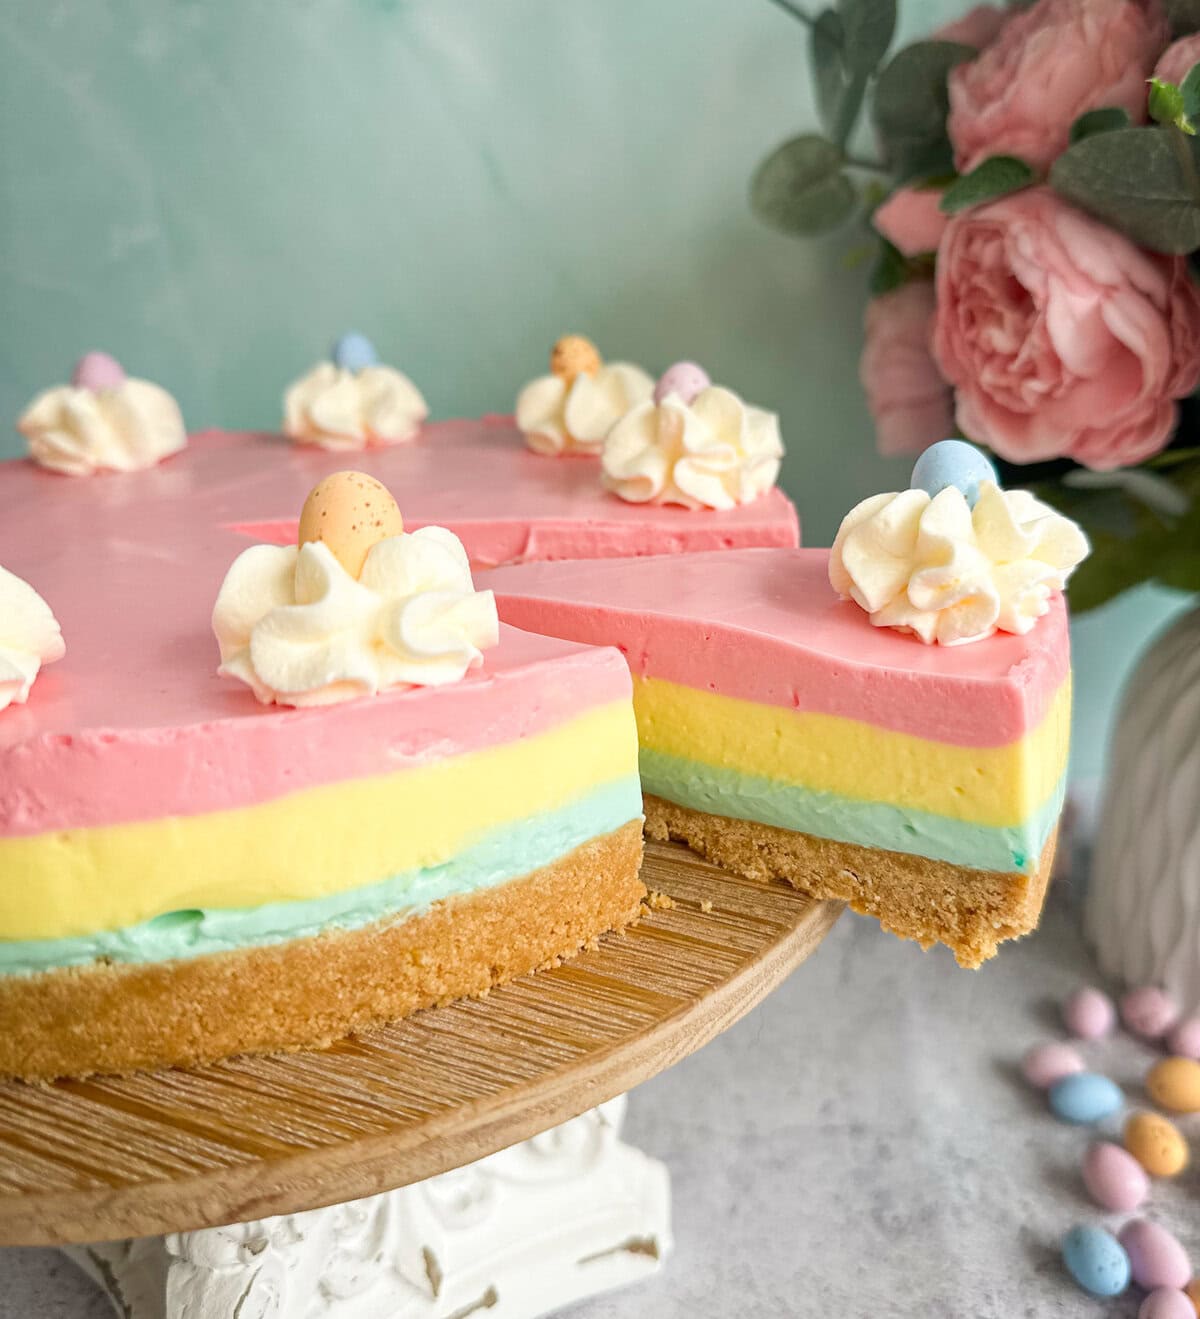
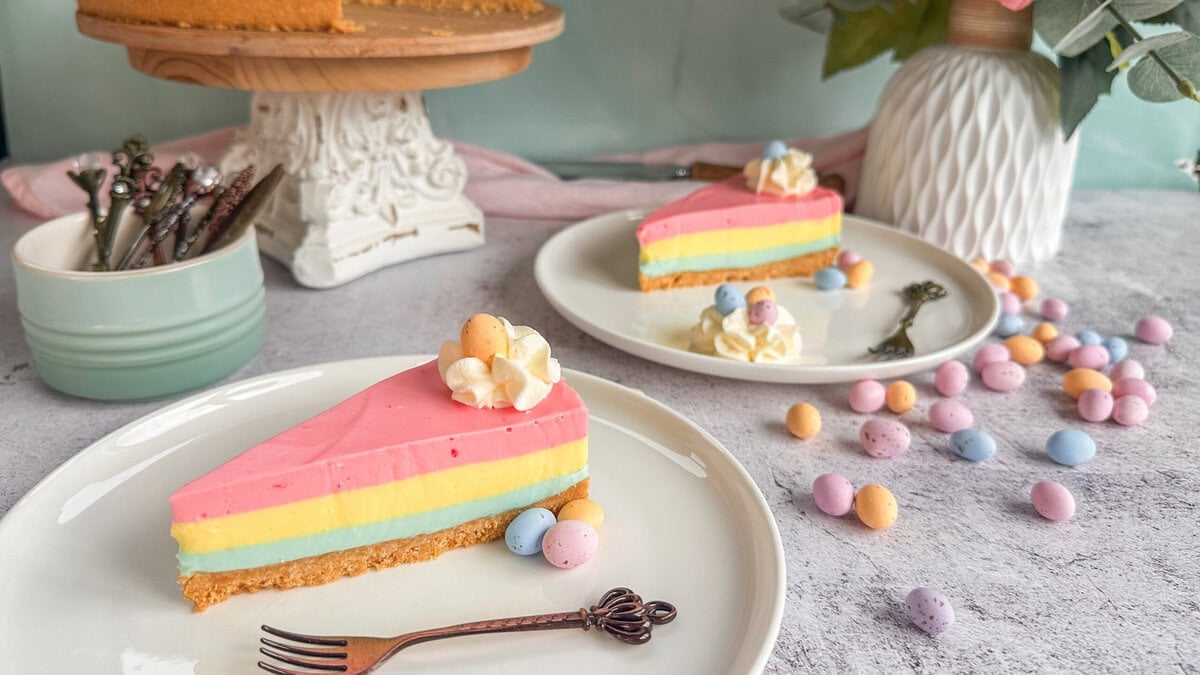
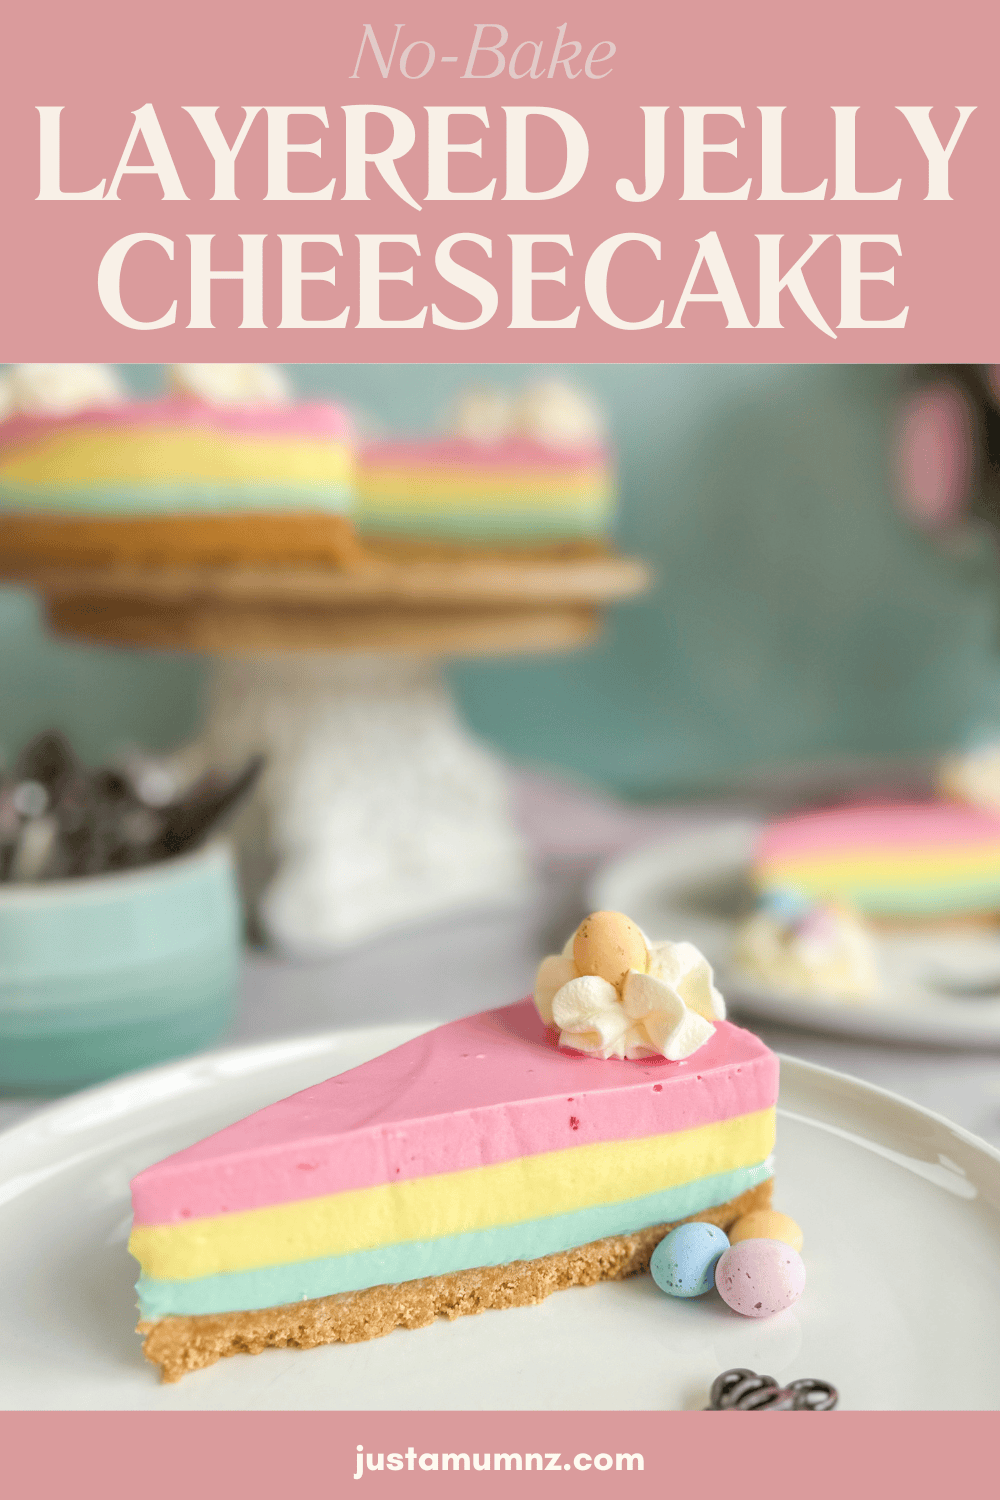
I am delighted to share with you this delicious no-bake layered jelly cheesecake just in time for Easter, possibly the prettiest recipe I have on the website!
I often have big showstopper dessert ideas stuck in my head for years, especially for seasonal occasions, and this is one of those recipes. I have been thinking about this recipe for so long, it was time to finally see if I could pull it off!
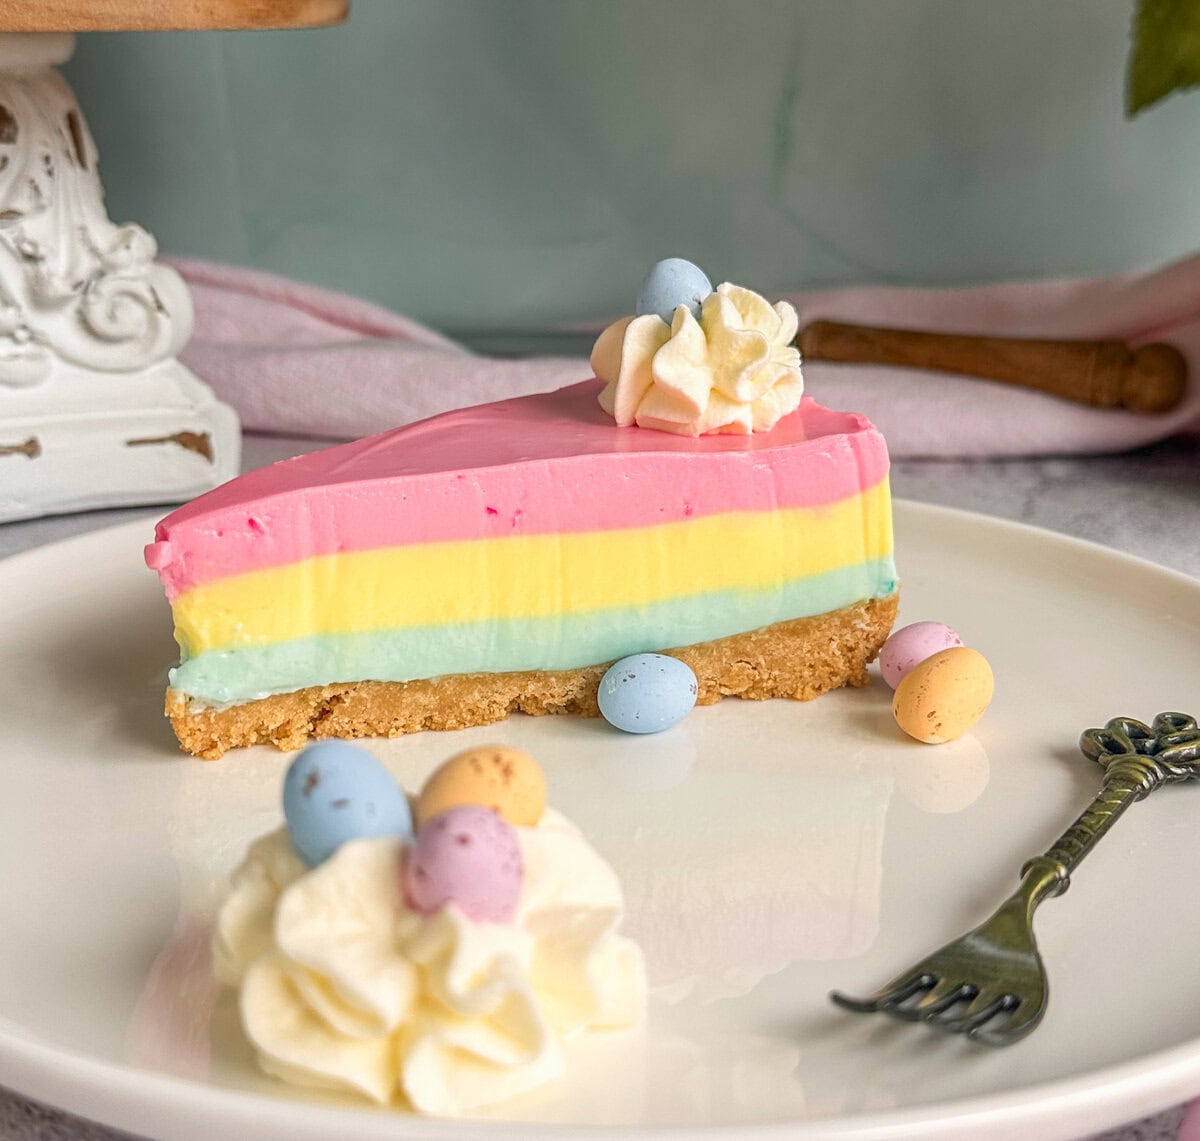
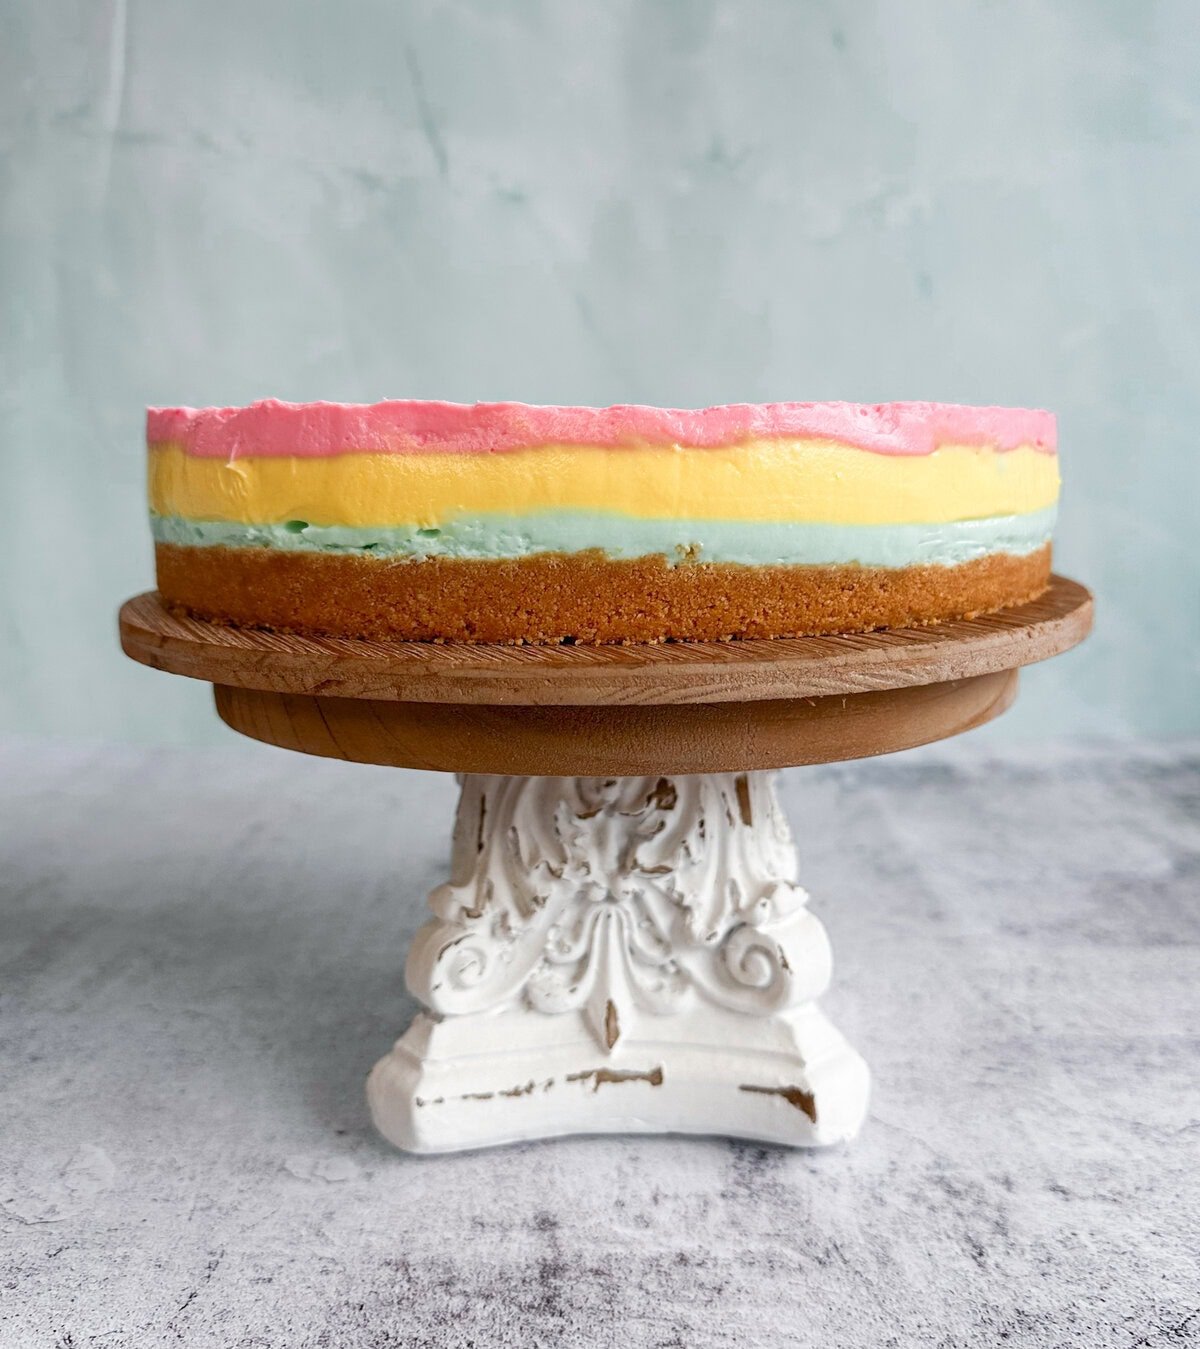
This cheesecake is made with a lovely simple creamy filling, split into three distinct layers each flavoured with its own jelly. Today I have used blueberry, lemon and raspberry jelly because they work with the Easter theme, but you can mix it up to suit your occasion.
It is a bit of faffing, preparing the jelly, coloring each portion and then waiting for it to chill before adding each layer, but for a special occasion or to impress the family I think it’s great! Time consuming but very easy.
You can only imagine how pleased I was when I peeled off the paper to see it worked! The colours are lovely and the flavours come through without overpowering each other, with a few tricks to get them there.
My Tips and Tricks for making the best No-Bake Layered Jelly Cheesecake
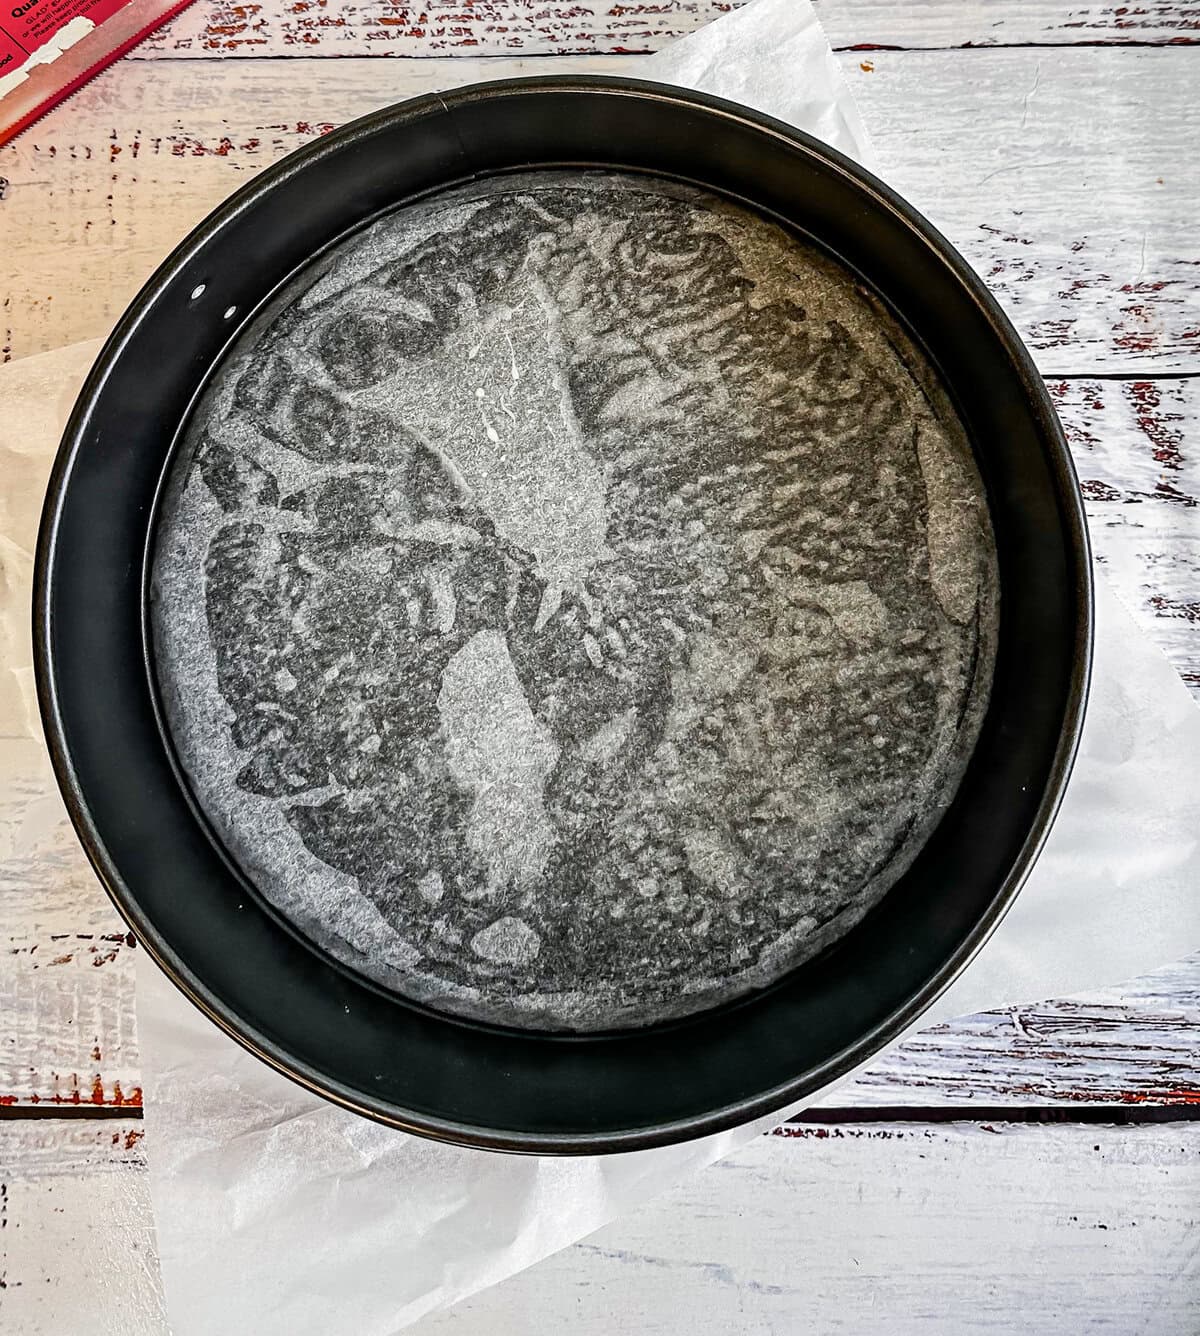
No-bake cheesecakes are so lovely and easy to make, there are a few tricks to getting them perfect every time. First tip is the tin you use, I use a spring form tin with the base inverted, sprayed well with cooking spray to help the paper stick.
Then you place paper over the base and then secure the rim over this. Makes it much easier to get the base off at the other end! Then I line the sides with baking paper.
Next is the perfect crust to filling ratio – it provides such a nice contrast to the rich creaminess to have a good base. It’s easy to make using crushed biscuits and melted butter, and in this case some lemon zest to cut through the sweetness.
I use any simple vanilla biscuit, there are lots of varieties depending where you live, Vanilla Wine, Super Wine, Marie, Arrowroot, Rich Tea Biscuit, even Biscoff works well too.

Press the crushed biscuit mixture evenly across the base, I use a the base of a small measuring cup to help get into the corners and press it firmly and evenly to ensure it sets hard and not crumble.
Then the for the filling, always use room temperature cream cheese, and the blocks work best rather than containers. Cream cheese in containers can contain additives that make them more spreadable but this isn’t ideal for cheesecakes.
What sets this cheesecake is a combination of the whipped cream and the jelly which contains gelatin. Then setting it overnight or at least 12 hours before serving ensures it is beautiful and holds its shape.
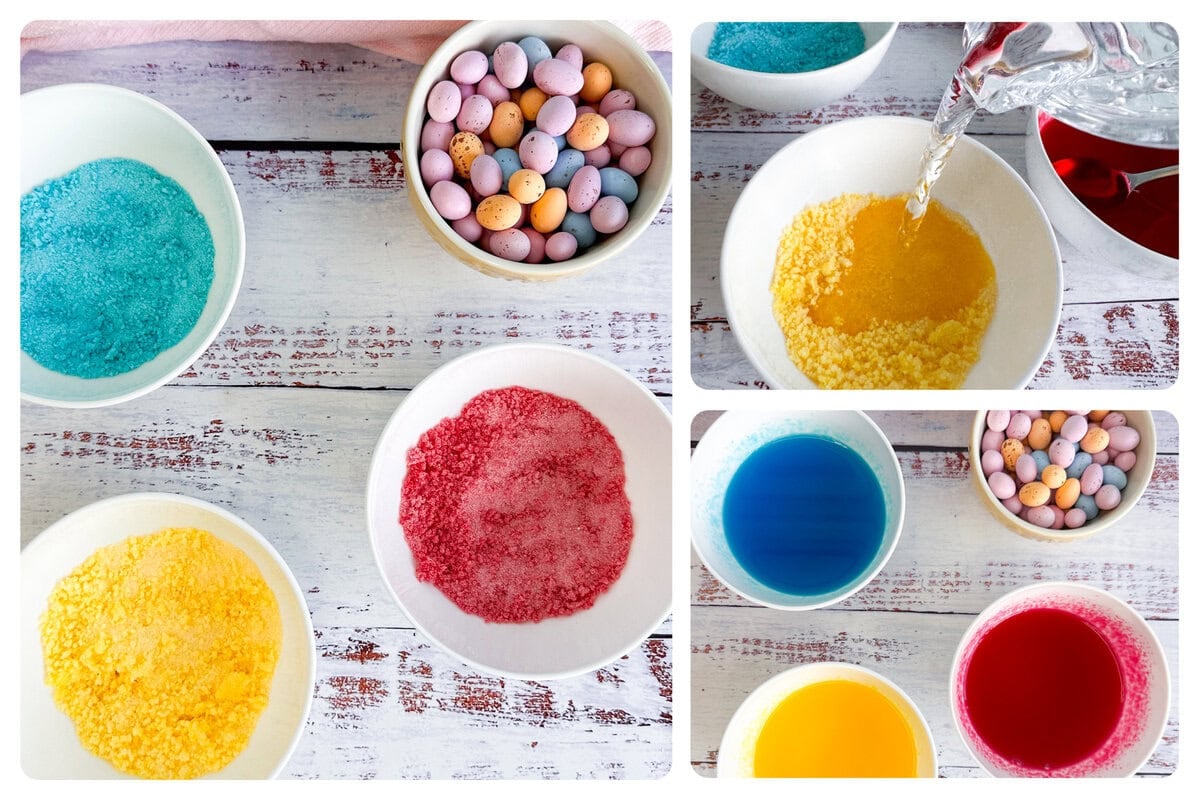
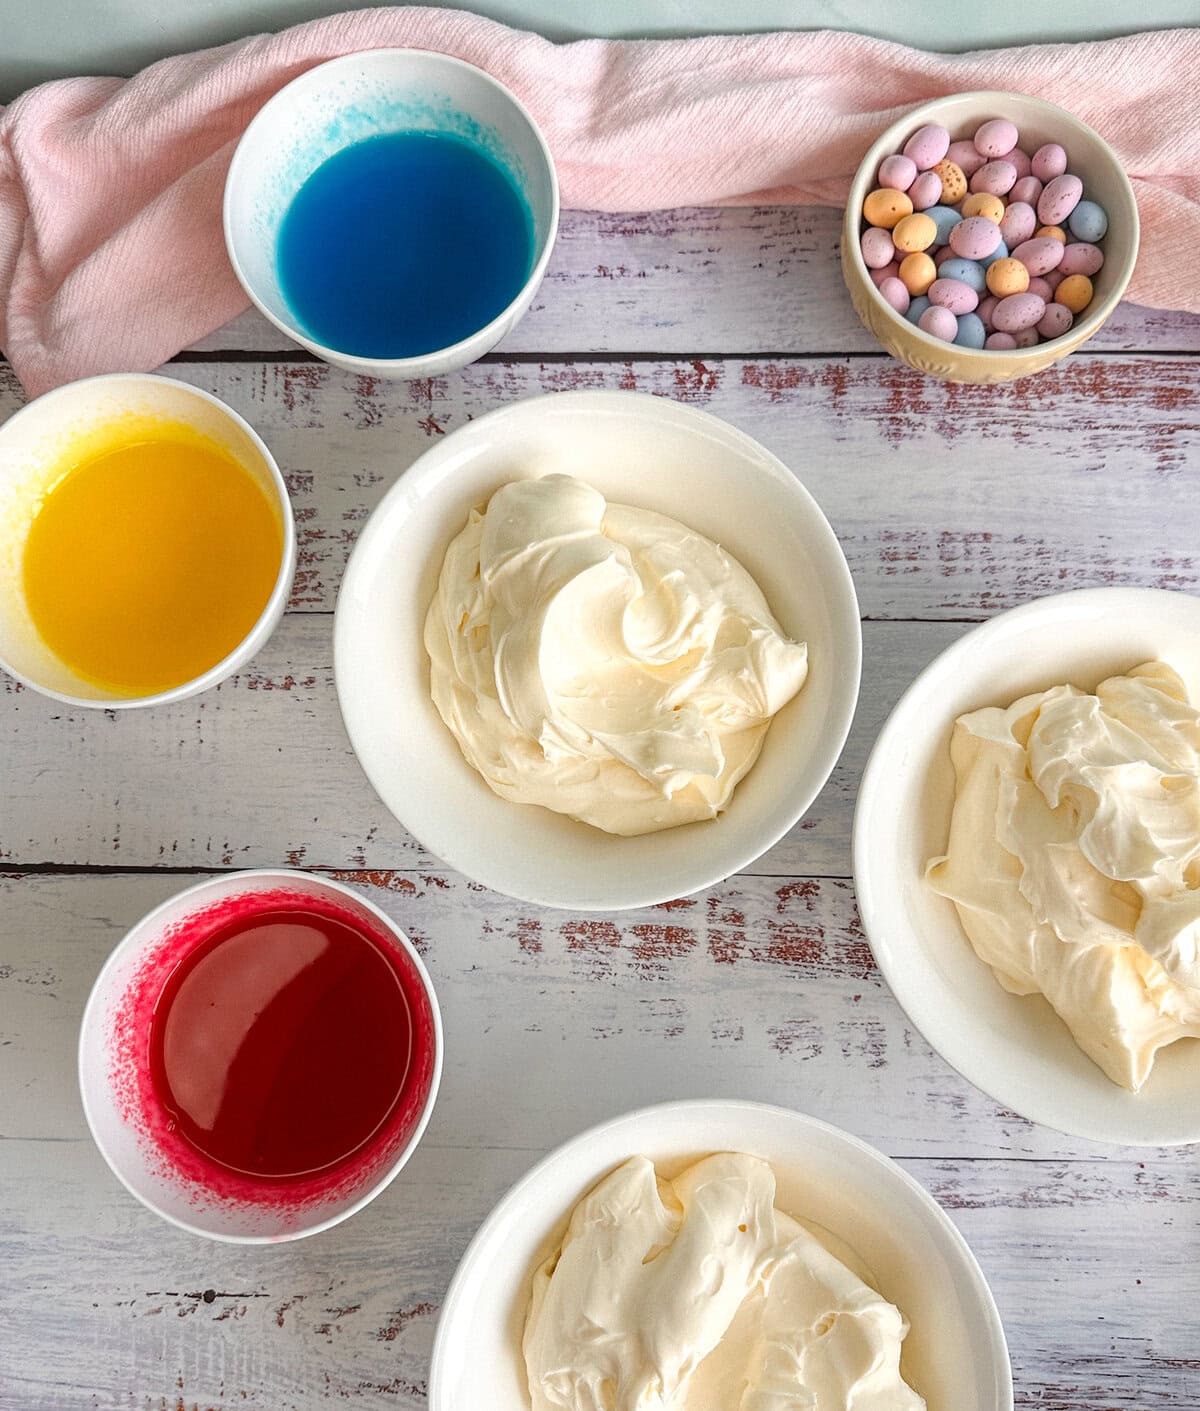
First I make the jellies, 40 grams is using half a packet of jelly to a 1/4 cup of boiling water, whisking well to ensure it dissolves fully and set it aside to cool while you prepare the rest of the filling. Then whip the cream to firm peaks, then pop that aside.
You can over whip cream cheese, so while it is important to beat it until it is smooth and silky do not over do it, 2 minutes is about right initially, then I add the icing sugar and vanilla essence and mix to combine. Then carefully fold through the whipped cream into the cream cheese.
The next step takes a bit of time, but is easy, you want each layer to set a little before adding the next. Divide the mixture evenly into 3 big bowls, add the cooled blueberry jelly to the first bowl and mix well until evenly mixed, then pour it onto the base and spread until smooth using an offset spatula or the back of a spoon.
Give it a gentle bang on the bench and a jiggle to spread evenly and remove air pockets, then pop it in the freezer for 20 minutes or until it is not sticking to your finger when you lightly press it. If you don’t have freezer space then your fridge will do fine.
This step helps if you want perfect separate layers. It is ok for the remaining cheesecake mix to sit out for an hour or so while each layer sets as long as your house is not too hot.
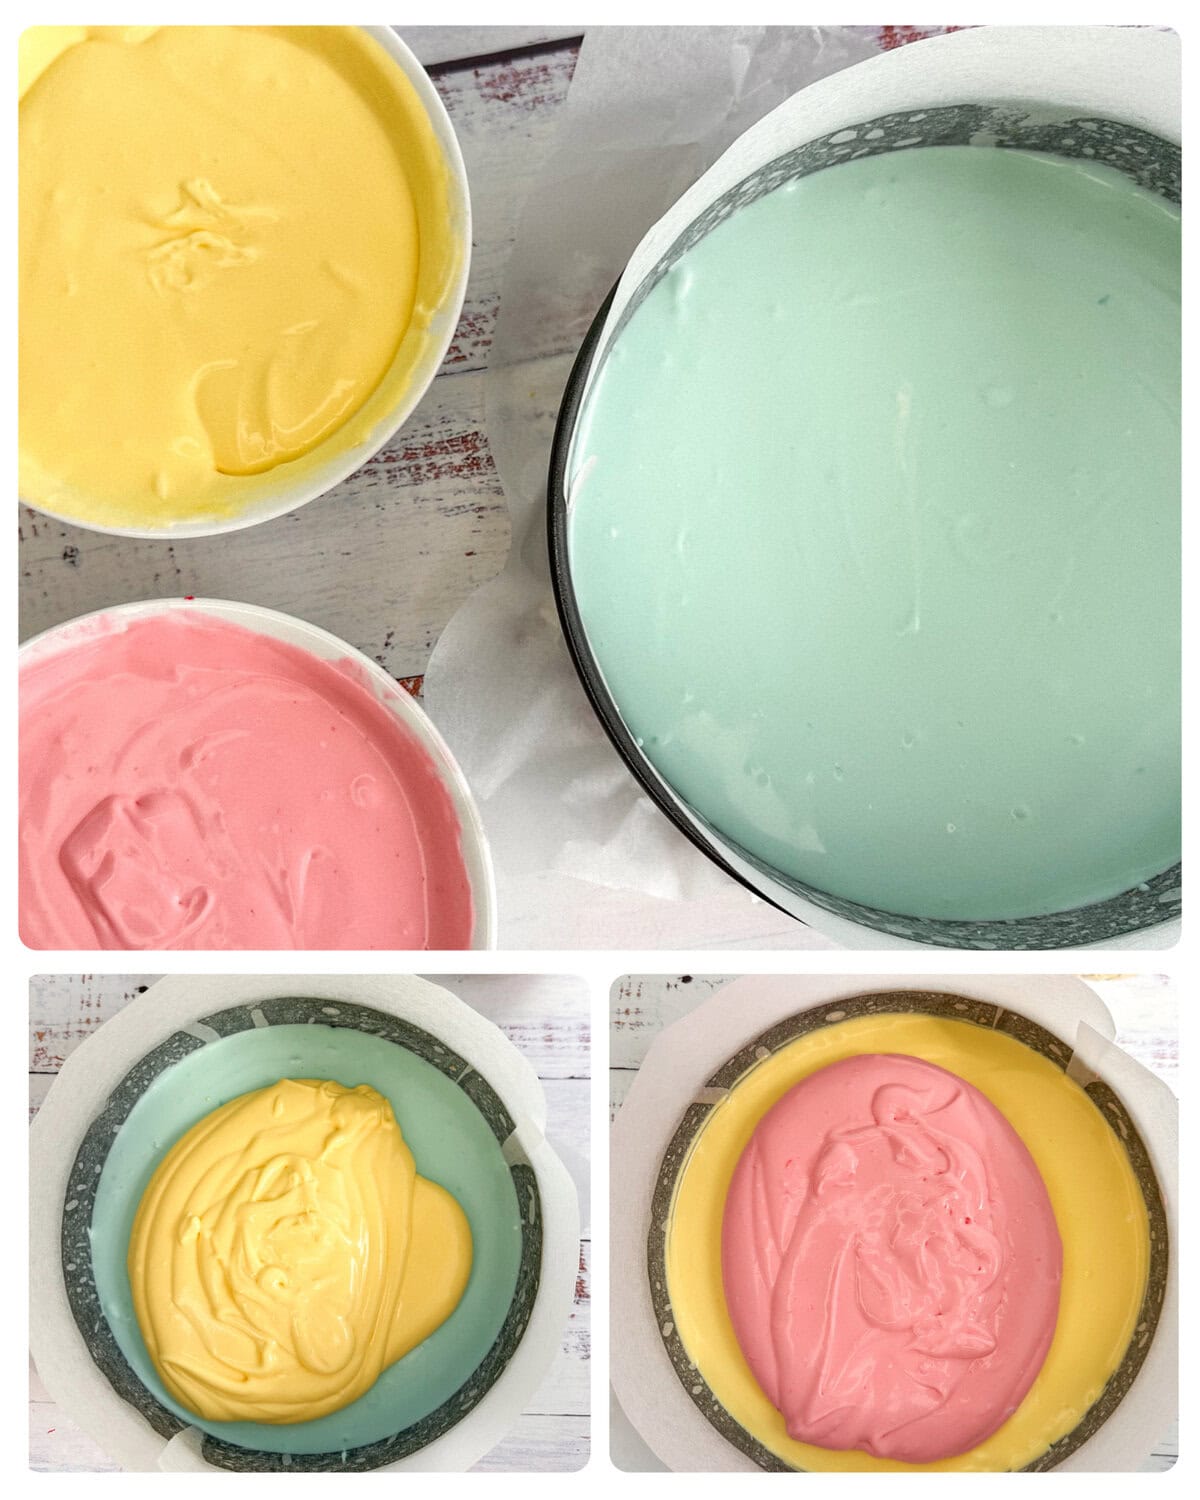
Then mix in the lemon jelly, since it does not have as much colour, I add a few drops of yellow food coloring to get the colour brighter and some lemon juice, give it a taste as you go to ensure you are happy it has enough flavour.
Then pour this over the cooled blue layer, and gently spread it to the edges, freeze for 20 minutes or until firm enough to spread the final layer.
For the raspberry layer, mix through the raspberry jelly, give it a taste and if needed add a little raspberry essence a few drops at a time until it has a sweet raspberry taste. Pour this over the cooled yellow layer and spread evenly.
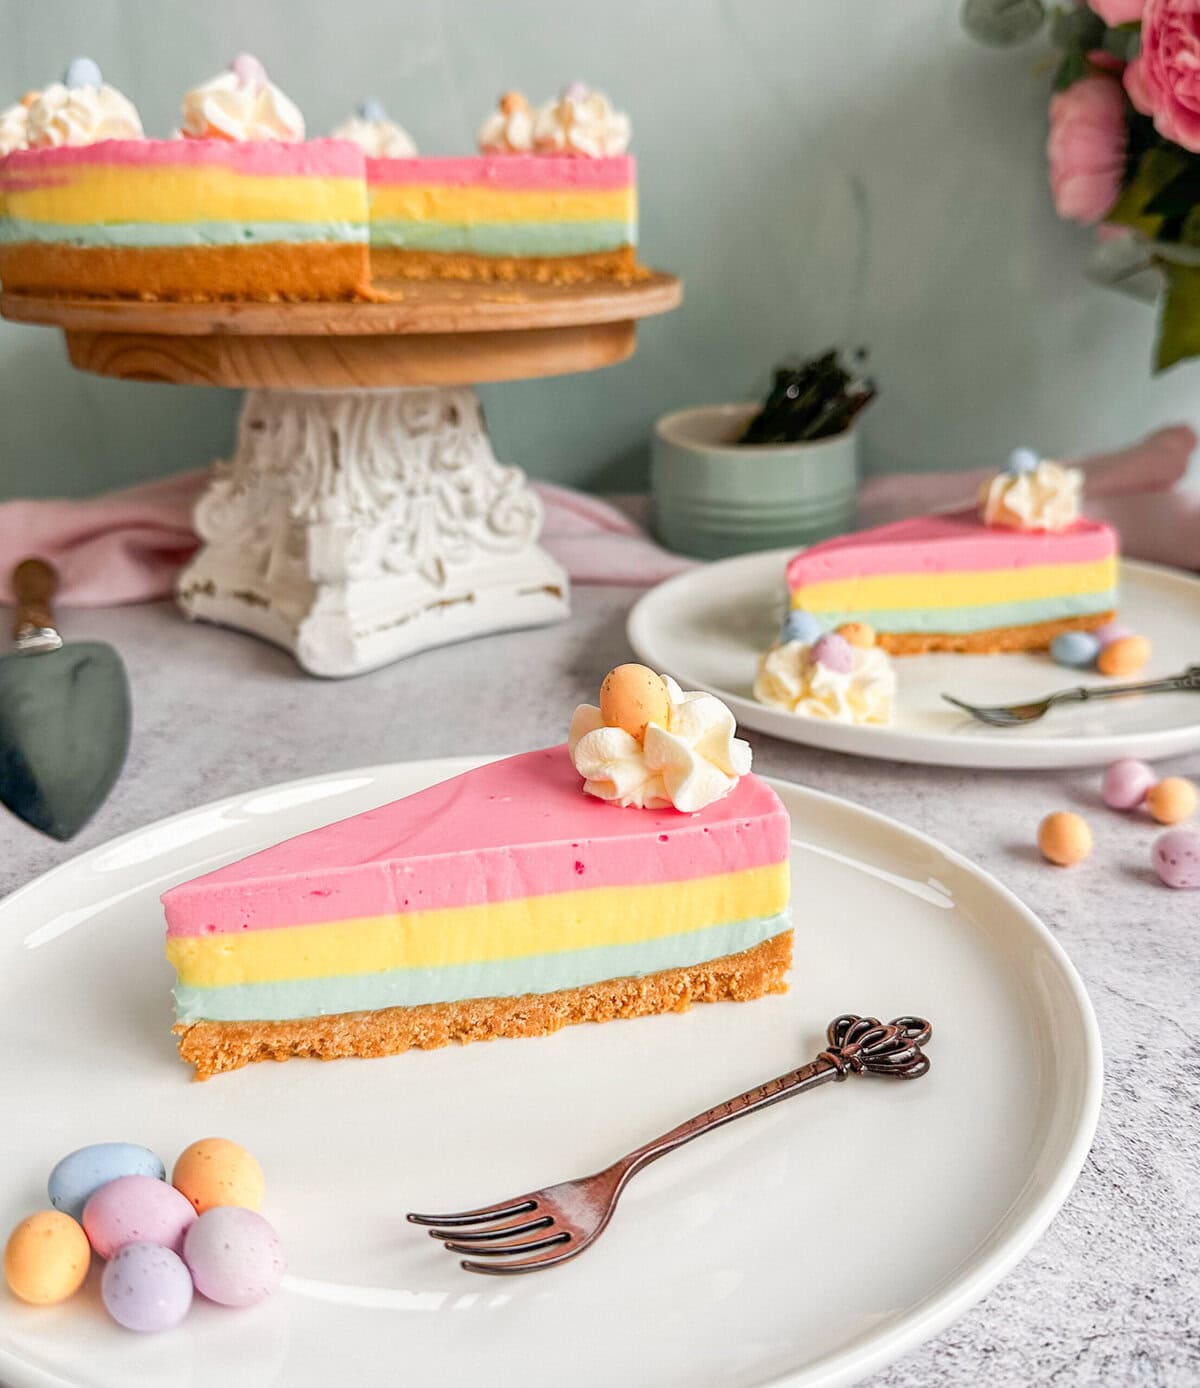
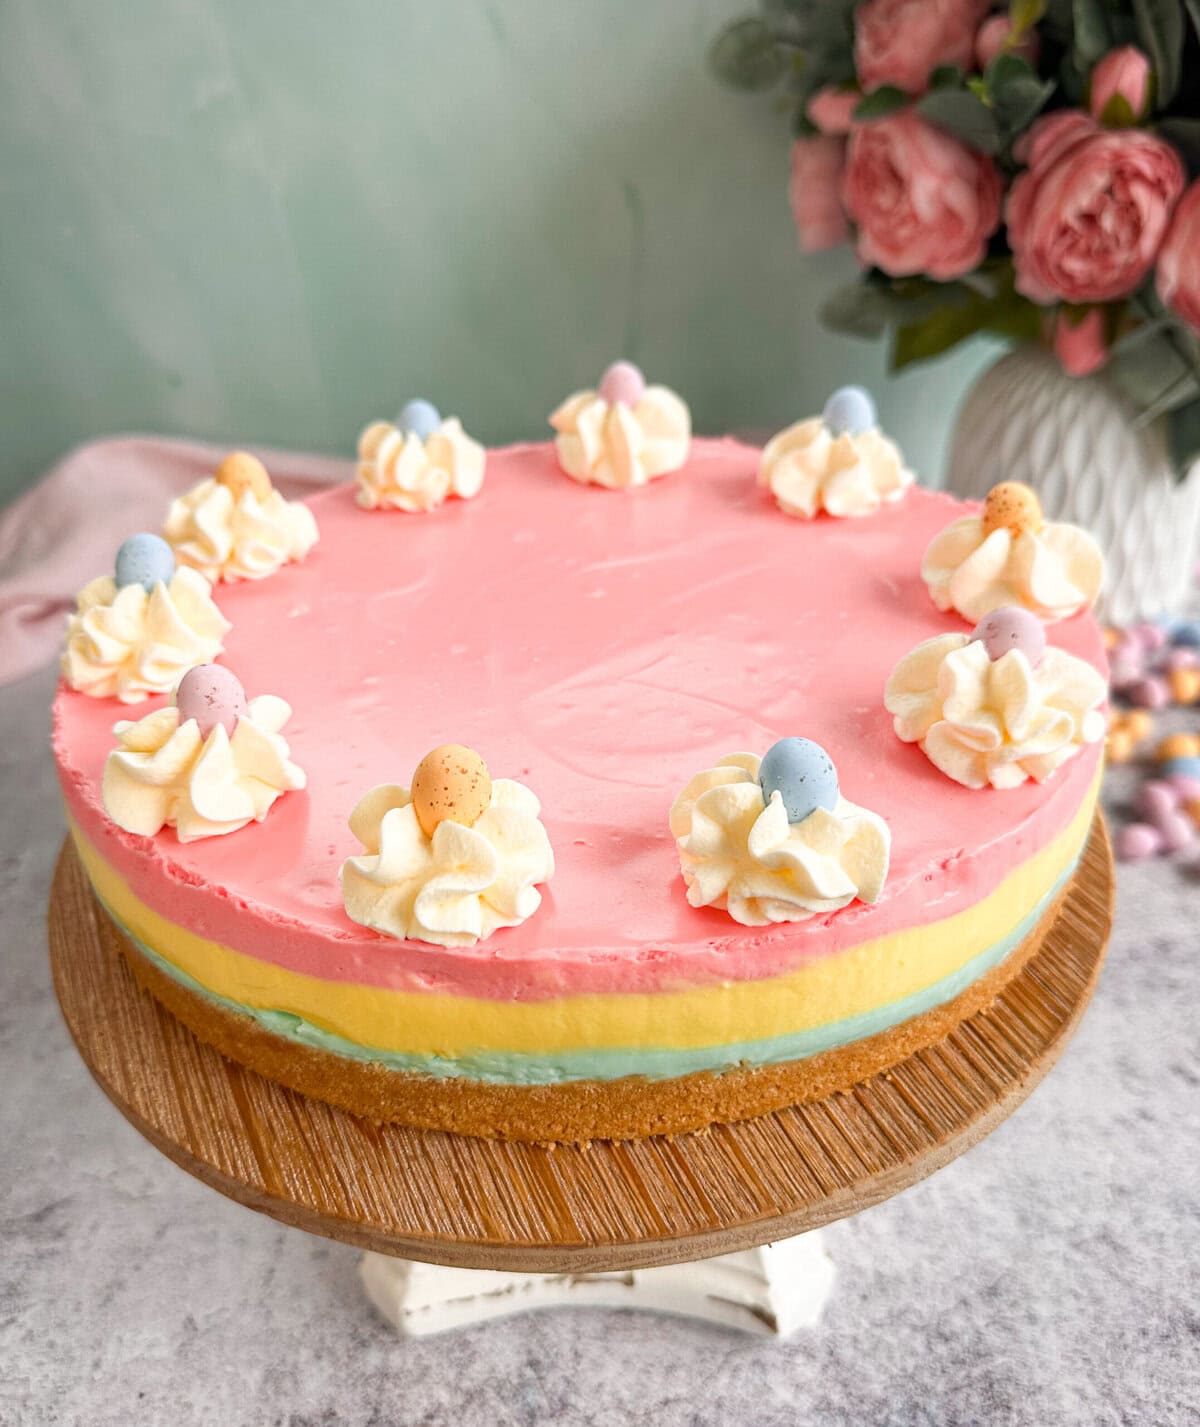
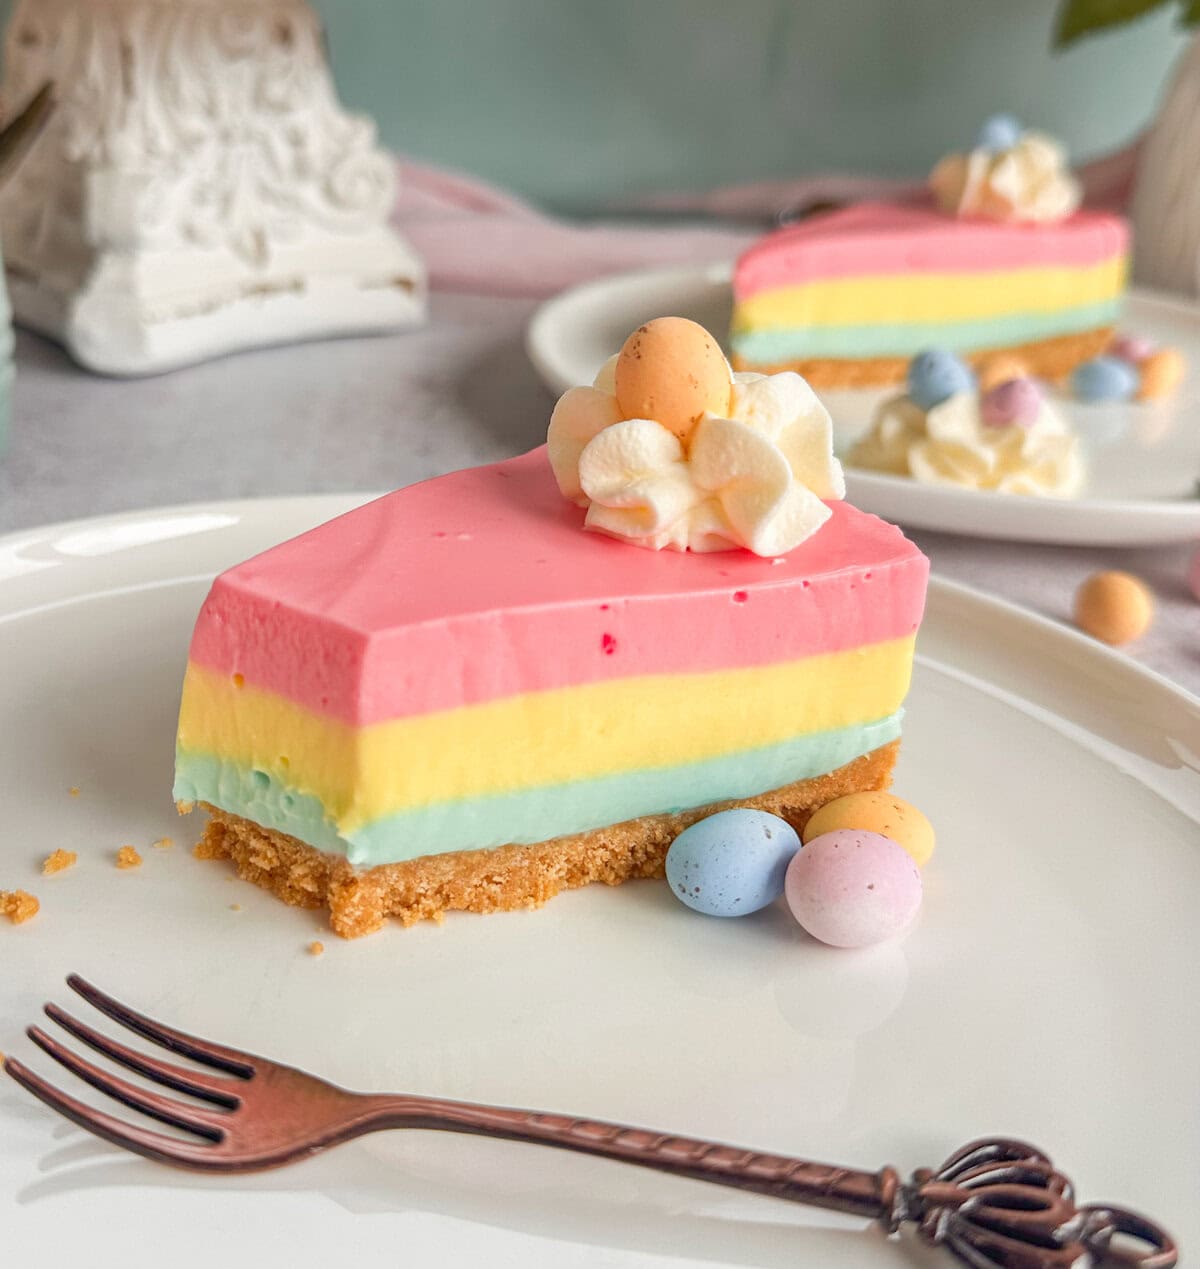
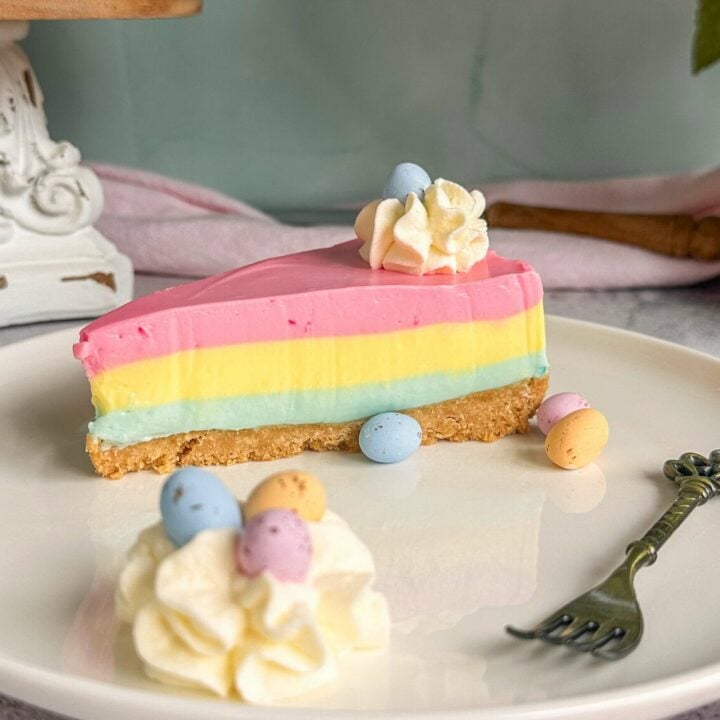
Lightly cover the cheesecake and chill overnight or at least 12 hours. When you are ready to serve, you can add some swirls of whipped cream and easter eggs, or something matching the occasion. Use a large metal spatula to help separate the crust from the base to carefully slide onto a serving dish.
This is a lovely sweet cheesecake on its own, silky and flavourful. But feel free to serve it with a dessert topping, strawberry or passionfruit if you desire.
I have lots of other lovely Easter recipes, be sure to check them out too!
I hope you love this recipe for Layered Jelly Cheesecake, it is a fun process and the end result is so worth it.
No-Bake Layered Jelly Cheesecake
Delicious creamy cheesecake flavoured with jelly to create 3 beautiful layers. It takes some time for the process but so worth it.
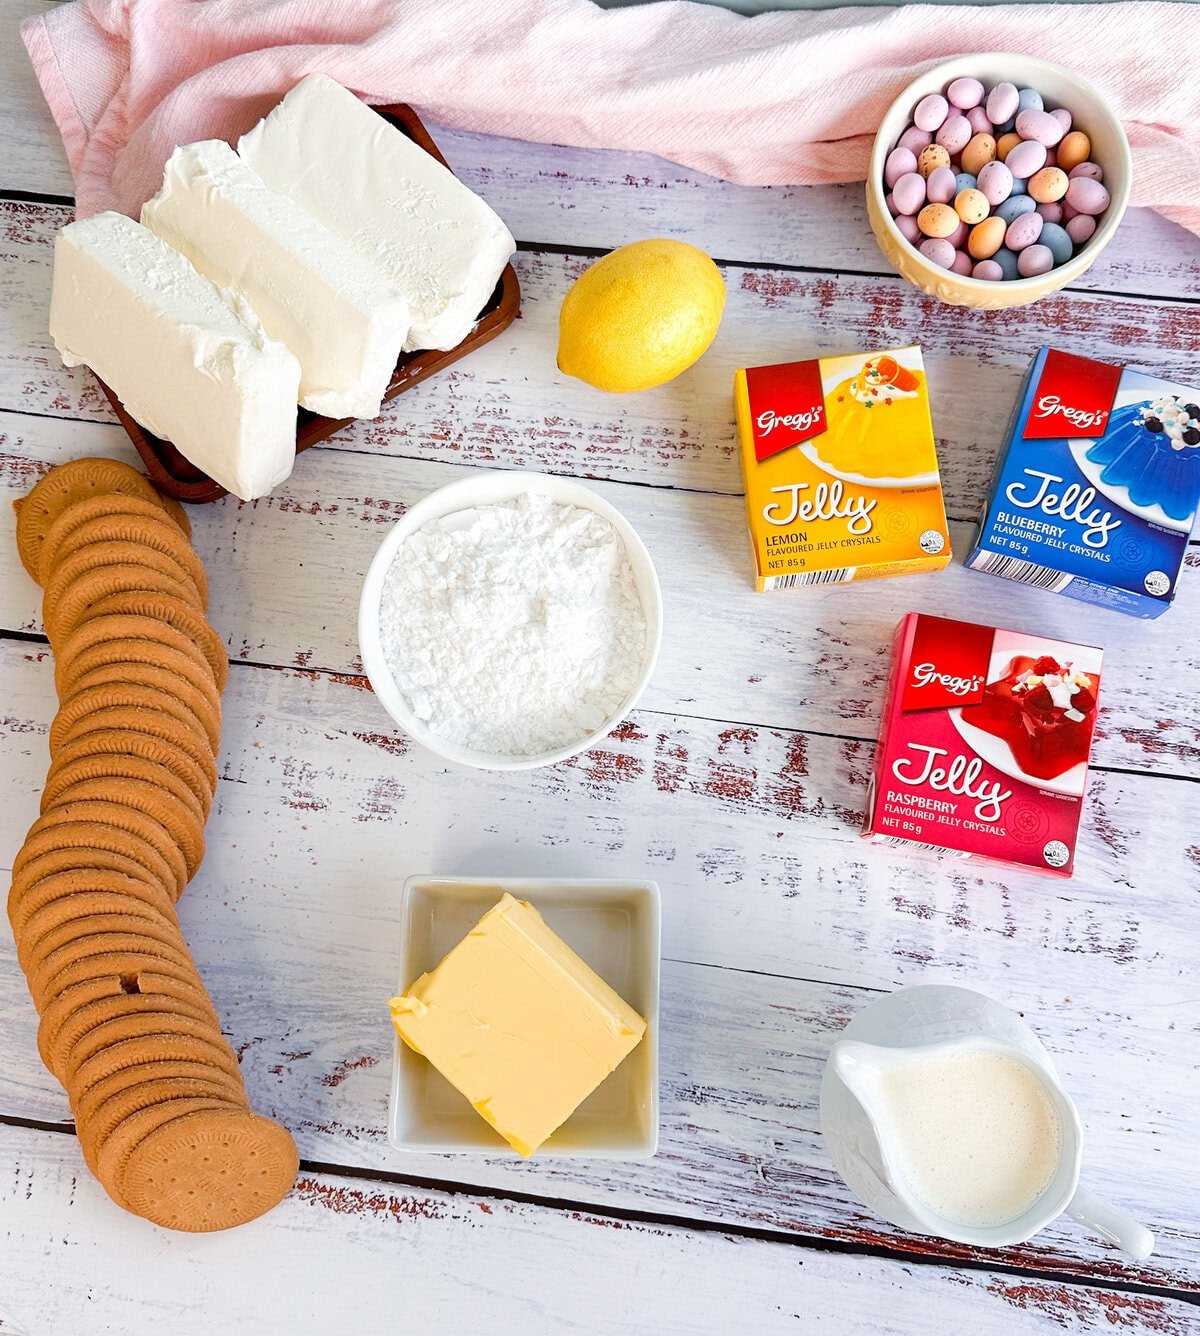
Ingredients
- 40 grams Blueberry Jelly crystals
- 40 grams Lemon Jelly crystals
- 40 grams Raspberry Jelly crystals
- 1/4 Cup Boiling Water for each jelly
Base
- 250 grams Vanilla Biscuits
- 125 grams Butter, melted
- 1 Tablespoon Lemon Zest
Filling
- 1/2 Cup Cream
- 675 grams Cream Cheese, 3 x 225 g blocks
- 1 Cup Icing Sugar, 140 grams
- 1 1/2 teaspoons Vanilla Essence
For the Lemon Jelly Layer
- Few drops of Lemon Food Colouring
- 1-2 teaspoons of lemon juice - to taste
For the Raspberry Jelly Layer
- 1/4 - 1/2 teaspoon of Raspberry Essence - to taste if needed
Optional Topping
- 2/3 Cup Cream
- 2 Tablespoons Icing Sugar
- 1/2 teaspoon Vanilla Essence
- Mini Candy Easter Eggs
Instructions
- Ensure your blocks of cream cheese are out of the fridge being bought up to room temperature, this can take an hour
- In three small bowls add each of the jelly crystals to its own bowl
- Pour in 1/4 cup of boiling water to the first colour and mix very well to ensure all of the crystals have dissolved and set aside, repeat with the next colour, then the final colour. Set these aside at room temp while you prepare the next steps
- Prepare a 23cm spring form tin, invert the base and spray the base and sides with cooking spray. Cover the base in a large square of baking paper and place the spring form ring over this and close around the base, then line the sides of the tin.
- In a food processor add the biscuits and crush to a fine crumb, add to this the lemon zest and melted butter and blitz again to combine.
- Pour this into the prepared tin and using a small measuring cup press the biscuit mixture into a smooth, even firm layer, place the tin in the refrigerator while you prepare the next steps.
- In a stand mixer bowl, add the cream and whip on high speed with a whisk attachment until you have stiff peaks and scrape this into a small bowl and set aside.
- In the same bowl, with the paddle attachment, beat the cream cheese for 2 minutes at medium speed or until smooth and creamy, scrape down the bowl and paddle
- Add to this the icing sugar and vanilla essence and beat slowly to combine then increase speed for a further minute until well combined, light and fluffy
- Remove the bowl from the stand mixer and fold through the cream with a large metal spoon until evenly combined.
- Separate the filling mixture into 3 medium sized bowls, approx 310 grams in each bowl, I use scales to be accurate.
- Stir the blueberry jelly and add it to the first bowl of cheesecake filling, stir well to combine until uniform in colour, then pour this onto the base, spread with an offset spatula or back of a spoon, jiggle the pan and tap it on the bench gently to remove any air pockets.
- Place this in the freezer for 20 minutes or until it no longer sticks to your finger when lightly pressed, creating a firm base for the next layer (if no freezer space the fridge is fine)
- While this is setting make the next two flavours of jelly fillings now. For the lemon layer, stir the lemon jelly then add to one of the remaining cream cheese fillings and mix well until uniform in colour, if desired add a few drops of yellow food colouring to lift the colour. Then add a teaspoon or two of lemon juice to taste to enhance the flavour.
- For the raspberry filling, stir the jelly, then add this to it's cream cheese mixture, stir to combine well, then if desired after tasting add a dash of raspberry essence, less is more as it is a strong essence, taste as you go.
- Set these two bowls of filling aside until the blue is lightly set, then stir the lemon filling and pour this over the blue, then lightly spread this to the edges, jiggle it and gently bang it on the bench. Chill for 20 minutes or until it is no longer as sticky.
- Then repeat with the raspberry filling, mix it, pour this over the lightly set lemon layer, lightly spread to the edges evenly, then jiggle it to settle and a gentle bang on the bench.
- Lightly cover the cheesecake and place in the refrigerator overnight or at least 12 hours before serving.
- Use a large metal spatula to help separate the crust from the base to carefully slide the cheesecake onto a serving dish
- If you wish, before serving, make a small amount of whipped cream and use a piping bag and star nozzle to create a swirl pattern around the edge of the cheesecake to decorate, add easter eggs or seasonal decorations if desired.
- Lovely served as is or use a strawberry or passionfruit dessert topping if desired.
- Store well covered in the refrigerator for up to 3 days.
- Enjoy!
Nutrition Information:
Yield: 16 Serving Size: 1Amount Per Serving: Calories: 389Total Fat: 28gSaturated Fat: 17gTrans Fat: 0gUnsaturated Fat: 9gCholesterol: 91mgSodium: 218mgCarbohydrates: 23gFiber: 0gSugar: 18gProtein: 4g
JustAMumNZ.com, occasionally offers nutritional information for recipes contained on this site. This information is provided as a courtesy and is an estimate only. This information comes from online calculators. Although justamumnz.com attempts to provide accurate nutritional information, these figures are only estimates.
I hope you love this one! It is quite an effort but easy and so pretty! Be sure to rate it in the stars in the recipe card above and definitely share photos of this one!
Thank you so much for stopping by to check out this recipe, you can follow me on Facebook & Instagram and also follow this blog via email to receive all my recipes as I publish them so check out the subscription box below.
Happy Baking!
Anna
Pin It!
I love hearing from you! What do you think of this recipe?