I had a photography explosion doing this experiment – I loved it almost as much as the kids – the colours, the textures, the patterns – it is seriously cool! Who knew Salt & Ice would be so fun!
We are proud geeks here in the Just a Mum house – it’s so fun to try different ideas and figure out how stuff works. So this idea was an extension of something I used to do when the kids were little and had questions about ice, things that sink or float & icebergs etc. We would fill up balloons with water and freeze it then pop it in the bath to answer why an iceberg doesn’t sink and also why only a small part of the iceberg is above the water etc.
So this time I did some Googling to see if we could extend this a little further and one idea that my son liked was using Salt to melt the snow – then using food colouring to highlight the melted area.
So first things first the ingredients – you will need balloons, water, food colouring & salt. I made 6 as I knew I had room in my chest freezer for the entire washing basket! But you can also do this by simply filling different sized containers with water & freezing. Freeze for 2 days at least ahead of time.
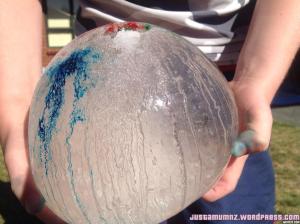
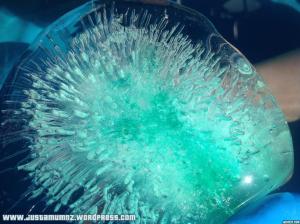
When I filled the balloons I put in the balloon a few drops of food colouring – this was interesting in itself as I presumed the colouring would mix equally with the water but more often than not it was left in a small part at the bottom of the balloon which actually looked awesome when we peeled the balloon off.
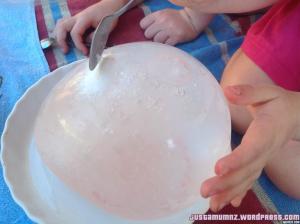
I gave each child a container with sides and a frozen balloon – they peeled off the balloon and were delighted with the patterns, how heavy and cold it was and the weird things the food colouring had done when I filled the balloons
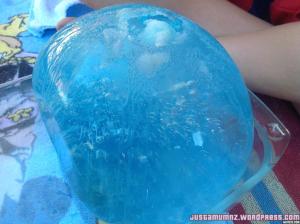
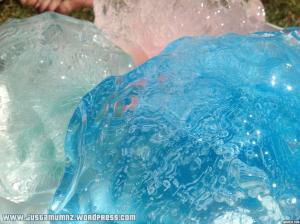
We then added drops of food colouring onto the ice to highlight the ice rivers and tracks – and generally because food colouring seems to make everything more fun!
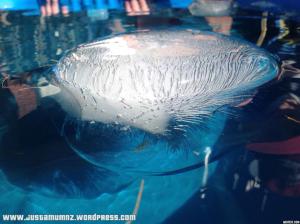
So this done we took the ice balloons over to the pool – filled to the top so the ice would float – and let the fun begin!
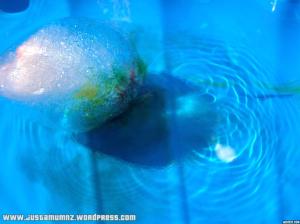
First the food colouring flowed out into the water which looked amazing so don’t hurry this part so they can see how the food colouring acts in the water gently floating away.
The ice then began to melt in the coolest ways – depending on the salt patterns the kids had created before they melted and began to look like pumpkins, golf balls and even hedgehogs!
I had so much fun watching the ice and the kids that I came over all photographer like and couldn’t resist snapping dozens of photos – I can imagine people using a fancy schmancy camera would have a blast!
The kids had a ball – in fact once the initial sciencey bit was over they had so much fun with the ice in the paddling pool, delighting in the food colouring as it floated out of the ice, watching it melt, the different shapes the ice balloons became as they melted – which was so random – racing ice boats & seeing which ones made the biggest splash! Then they played a delightful game they called “hypothermia death” (???????) Which is sitting in the ice water pool to see how long they could stay in before they got too cold – the ideas the kids come up with on their own are way cooler and stranger than mine!
So really all you need to do is freeze some water – whether it be balloons, in containers, even just ice cubes – it is such a cool medium for the kids to play with. Adding salt & food colouring was really cool and wonderful sensory experience too with the difference between the smooth cool ice to the warmer coarse salt. But even just putting ice balloons in the kids bath is fun on its own!
The best bit was the kids using their imagination and coming up with so many questions about why the ice was behaving the way it was.
I hope you have enjoyed my post today – feel free to wander around my blog for other fun kids activities & yummy recipes.
You can also follow me on Facebook for Just a Mum to keep up to date on my posts and other fun Mum stuff.
Thanks 🙂










Tisha says
Awww looks suoer fun! Thanks for connecting Anna 🙂
BeBetsy - Smashingly Good Living says
Wow! That is so cool. Love it. Come by and check out our Simply BeBetsy and set up your Gallery to share with us and the world and promote your wonderful ideas. We do not put links in comments (not a good practice) but here is the url for you to copy and paste http://bebetsy.com/be/faq/
Sincerely hope to see you there. You are perfect! Hugs ~ sharon and denise
Erlene says
This looks like a fun activity for the kids. Pinned it to my Pinterest boards. Thanks for stopping by my FB page.
Tracey says
Looks awesome! Next hot day I’m all over this one!