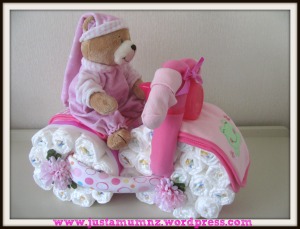
I am so delighted that my guest blogger Lee-Anne from New Zealand has offered to share a tutorial of her very clever creations – Nappy Bikes or Diaper Bikes depending where in the world you are. Check it out – just HOW cute they are! Imagine walking into a baby shower with this – you would be the talk of the day.
Lee-Anne has prepared step by step instructions for you to be able to make these amazing gifts yourself for your friends and family.
Items you will need:
• 48 nappies/diapers (I like to use the Budget brand as they are plain white and don’t clash with the overall look of the bike! They are also the nappy I have used for my 4 babies and I think they are good quality. Keeps the costs of the gift down too. Medium size 6-11kg. I find that the newborn size don’t roll as well and most babies don’t stay long in that size)
• 2 bibs or burp cloths with cute designs on the front
• 2 muslin wraps/swaddling cloths
• A pair of socks for on the handlebars
• A sippy cup with handles
• A teddybear or similar (you could buy a newborn outfit and dress the bear if you wanted to add more to the gift)
• Rubber bands
• Till paper roll (I don’t know what it is called – the paper you put in the cash register!)
• Cellotape and double sided sticky squares
• Curling ribbon and ribbons/trims to use for decoration
• Fake Flowers
• Cellophane for wrapping
Method
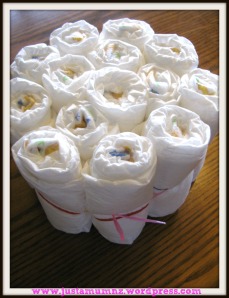
Begin by rolling each nappy starting at the patterned front band so that the gathered back is on the outside of the roll and secure with a rubberband. When you get half way, pull on the end to straighten the nappy out a bit so it rolls easier. For the two back wheels you will need 14 nappies each wheel and for the larger front wheel, you will need 20.
Start by putting a big rubberband around 7 nappies (one in the middle and 6 around the outside). Then slot the rest in going around in a circle – leaving one out. Tie tightly with curling ribbon. Turn the nappies so that the fronts are neat on the outside of the wheel. Squash the last nappy in after you have tied tightly – this increases stability.
Measure the till roll paper around your wheels and cut three strips. Decorate the paper with ribbon, sticking on with double sided tape or glue. Place the strips around the wheels – securing the join with a thick piece of cellotape.
Now you are ready to decorate your bike! I always like this part the best! Roll the muslin wraps along the length and secure each end with a rubberband.
Take your big front wheel and thread one wrap through the wheel. Thread the handles of the sippy cup through the wraps and secure with a rubberband.
Adjust the ‘handlebars’ so that they are pointing flat as they should and cover the rubberband with a bow of ribbon (or a flower or some other decoration).
Tuck one of the bibs in over the wheel under the cup. You can stick a bit of cellotape under it to hold it if you want. Lastly, arrange a sock on each of the handlebars. Next one I make I am going to attach shiny coloured ribbons to the ends – it reminds me of a tri-cycle that I had when I was little!
A similar thing happens with the back wheels. Take a piece of cardboard kitchen towel tube or similar and cover it with a piece of your wide ribbon. Use it to keep the back wheels separated. Thread the wrap through the wheels and then attach and tuck under the front wheel.
Make the seat out of the second bib, securing on each wheel with some tape. Pop the teddy on top and you are done!
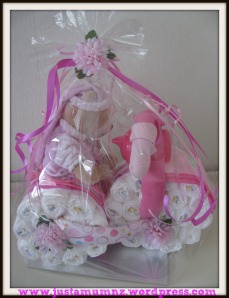
I put it on a cakeboard before I wrap up for stability and then finish with cellophane, curling ribbon and a flower.
How amazing is that Just a Mum readers!!! Everything included in the bike is practical for a new Mum whether it is baby number one or six! I would have been delighted to receive this when I had my babies. I imagine it would be hard to use the stuff that’s in it – so that is another good reason to buy the next size up from newborn nappies so they can enjoy looking at it for a bit longer.
The colour scheme is totally up to you, pink, blue, yellow or green, it would look gorgeous in any shade so even if you do not know the sex of the baby this is such a lovely gift idea.
Thanks so much to Lee-Anne for sharing this tutorial with us, if only I was having another baby one day!
Thank you so much for stopping by to check out this recipe, you can follow me on Facebook & Instagram and also follow this blog via email to receive all my recipes as I publish them so check out the subscription box below.
Happy Baking!
Anna


I love hearing from you! What do you think of this recipe?