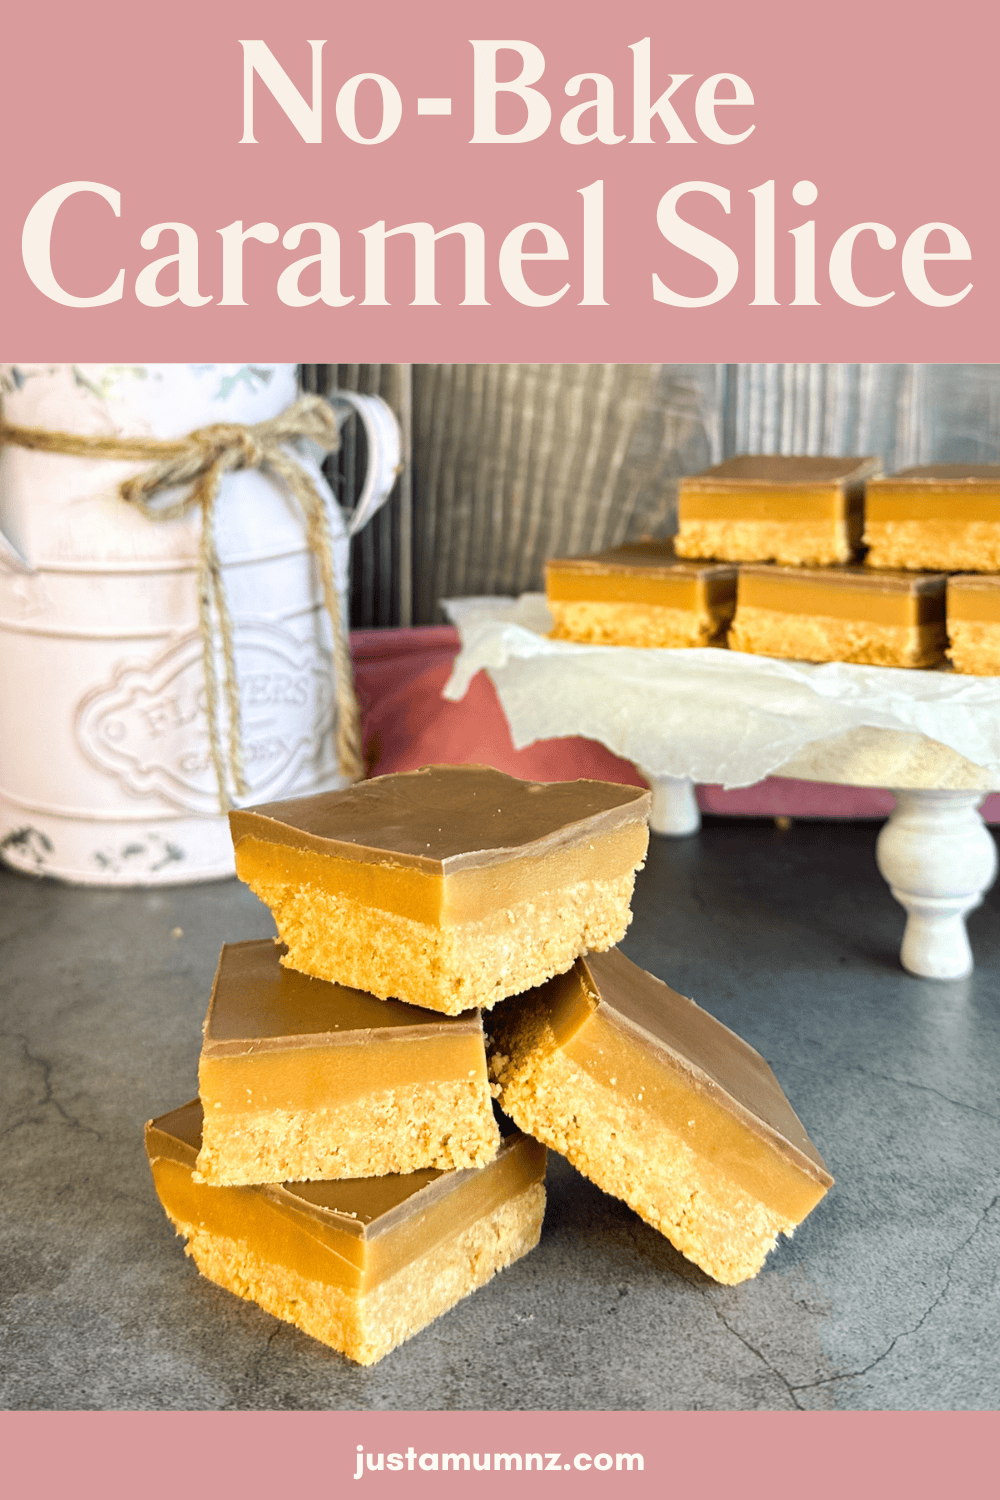
This is a delicious easy version of a no-bake caramel slice, with just a few simple pantry ingredients and best of all for some…..no coconut needed!
With my new video series up and running I have been thinking about caramel slice. The first video I shared in my Sunday series was a classic Caramel Slice. The main comments always are what can I use instead of coconut in the base.
So while I will share a classic baked caramel slice with no coconut, someone also suggested a simple biscuit and butter base, so I thought I would share an entirely no bake recipe.
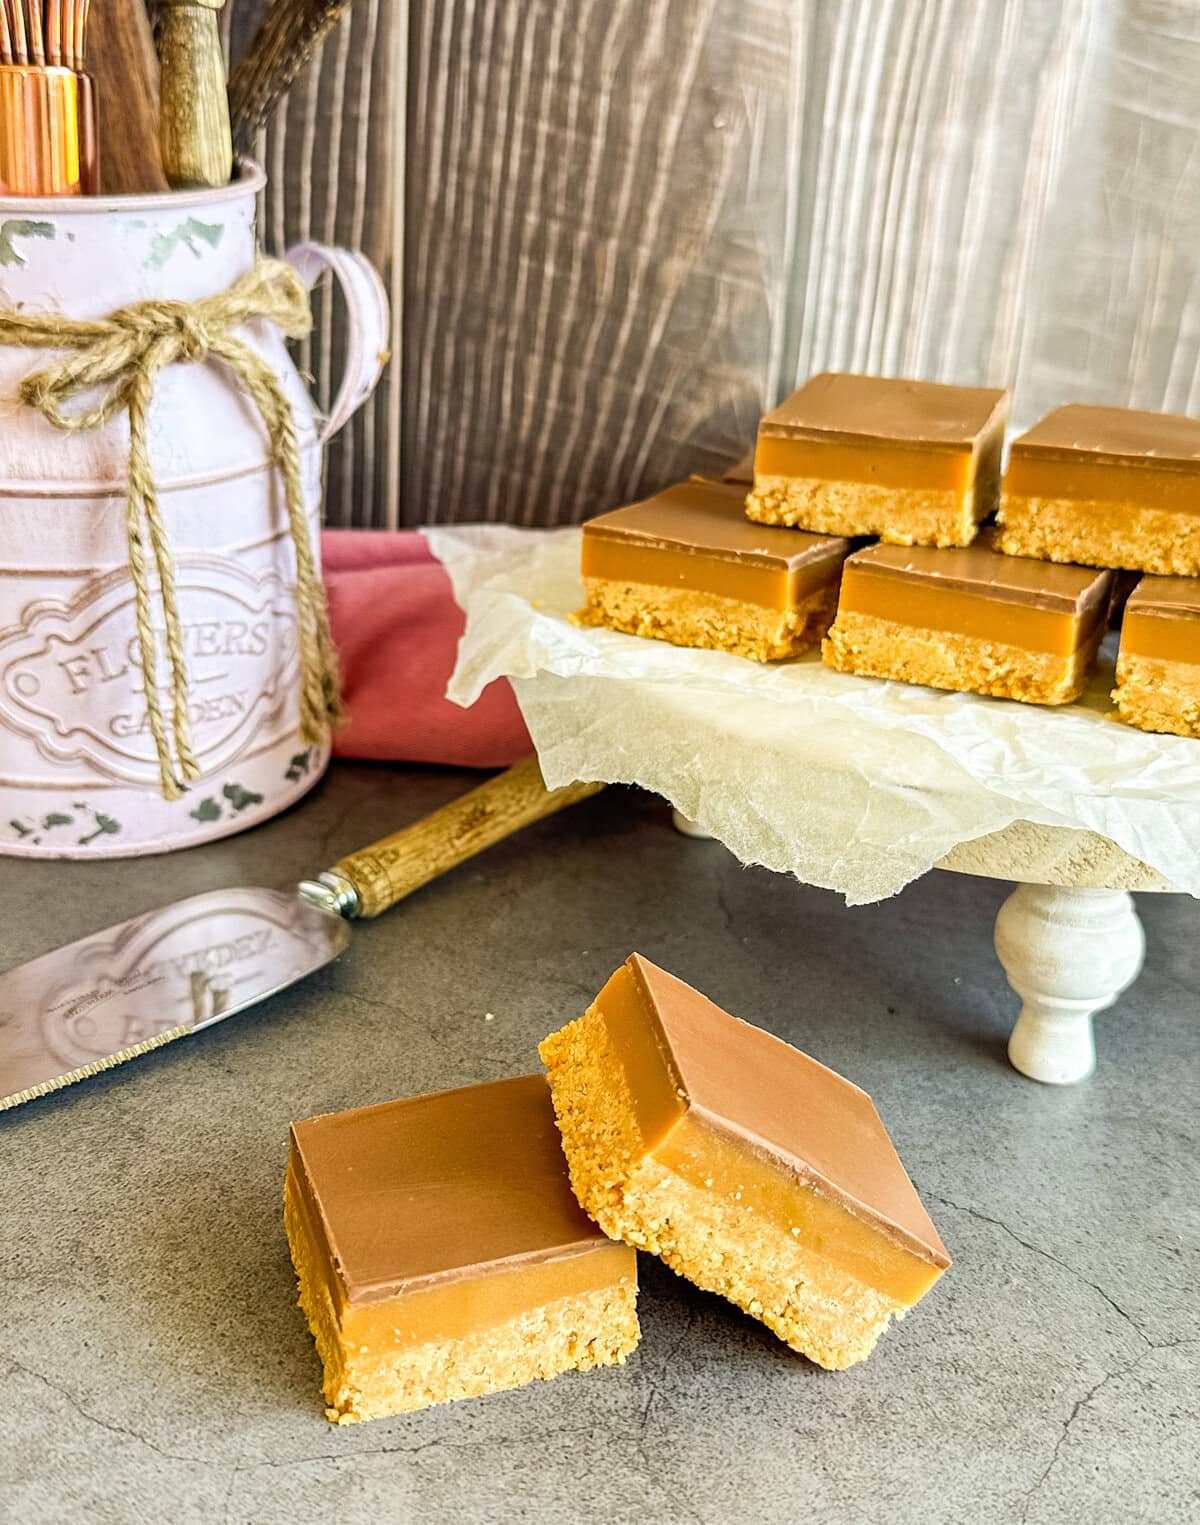
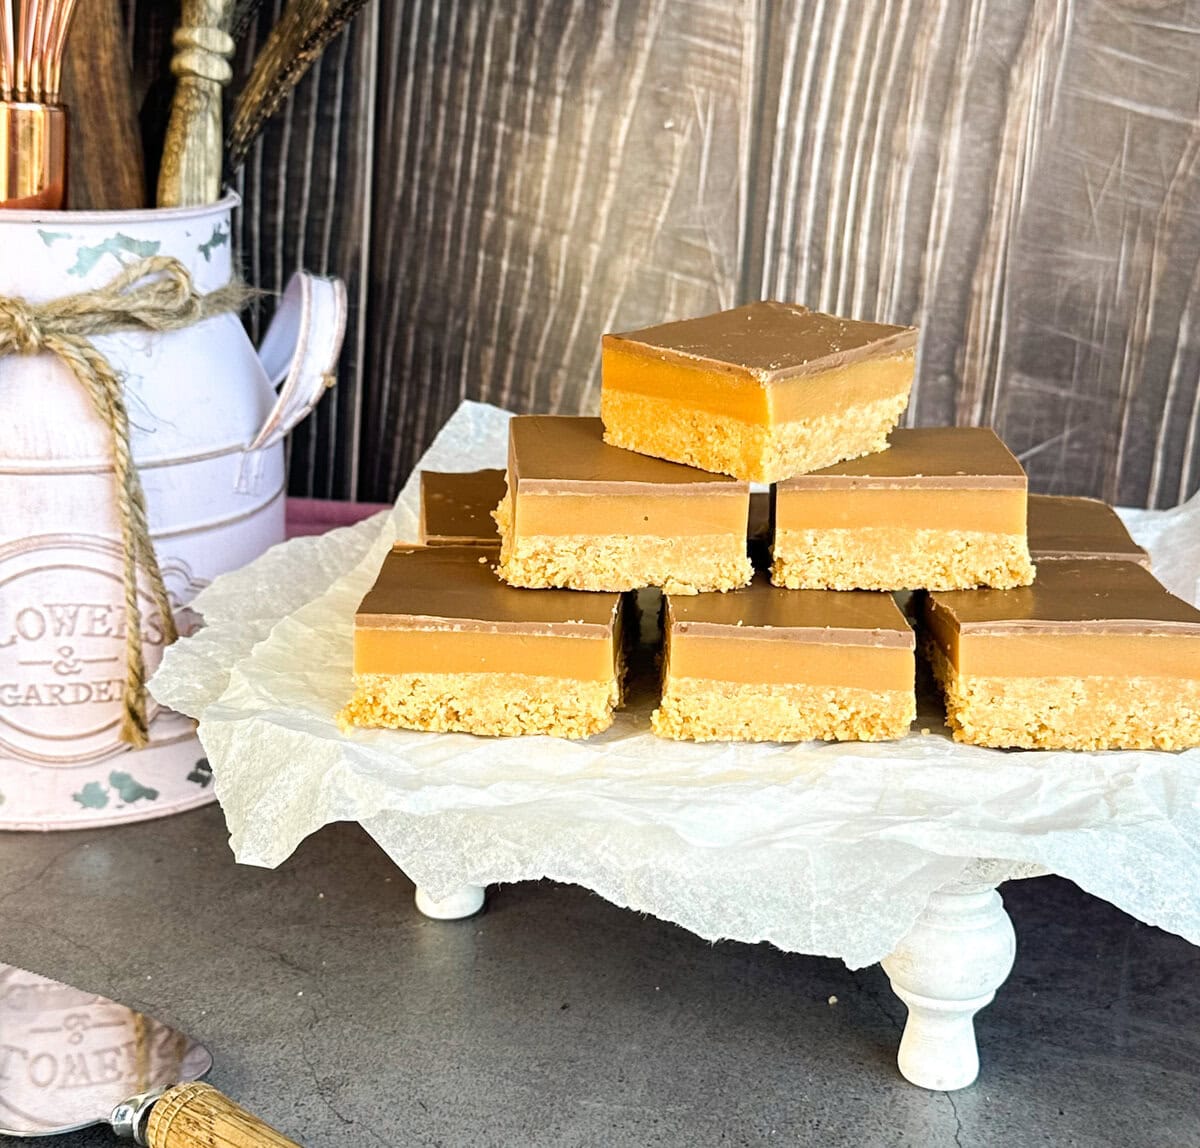
A classic caramel slice is a shortcake style base with a twice cooked caramel on top, first heated on the stove, then baked in the oven to create the most beautiful rich dark caramel. Then topped with chocolate.
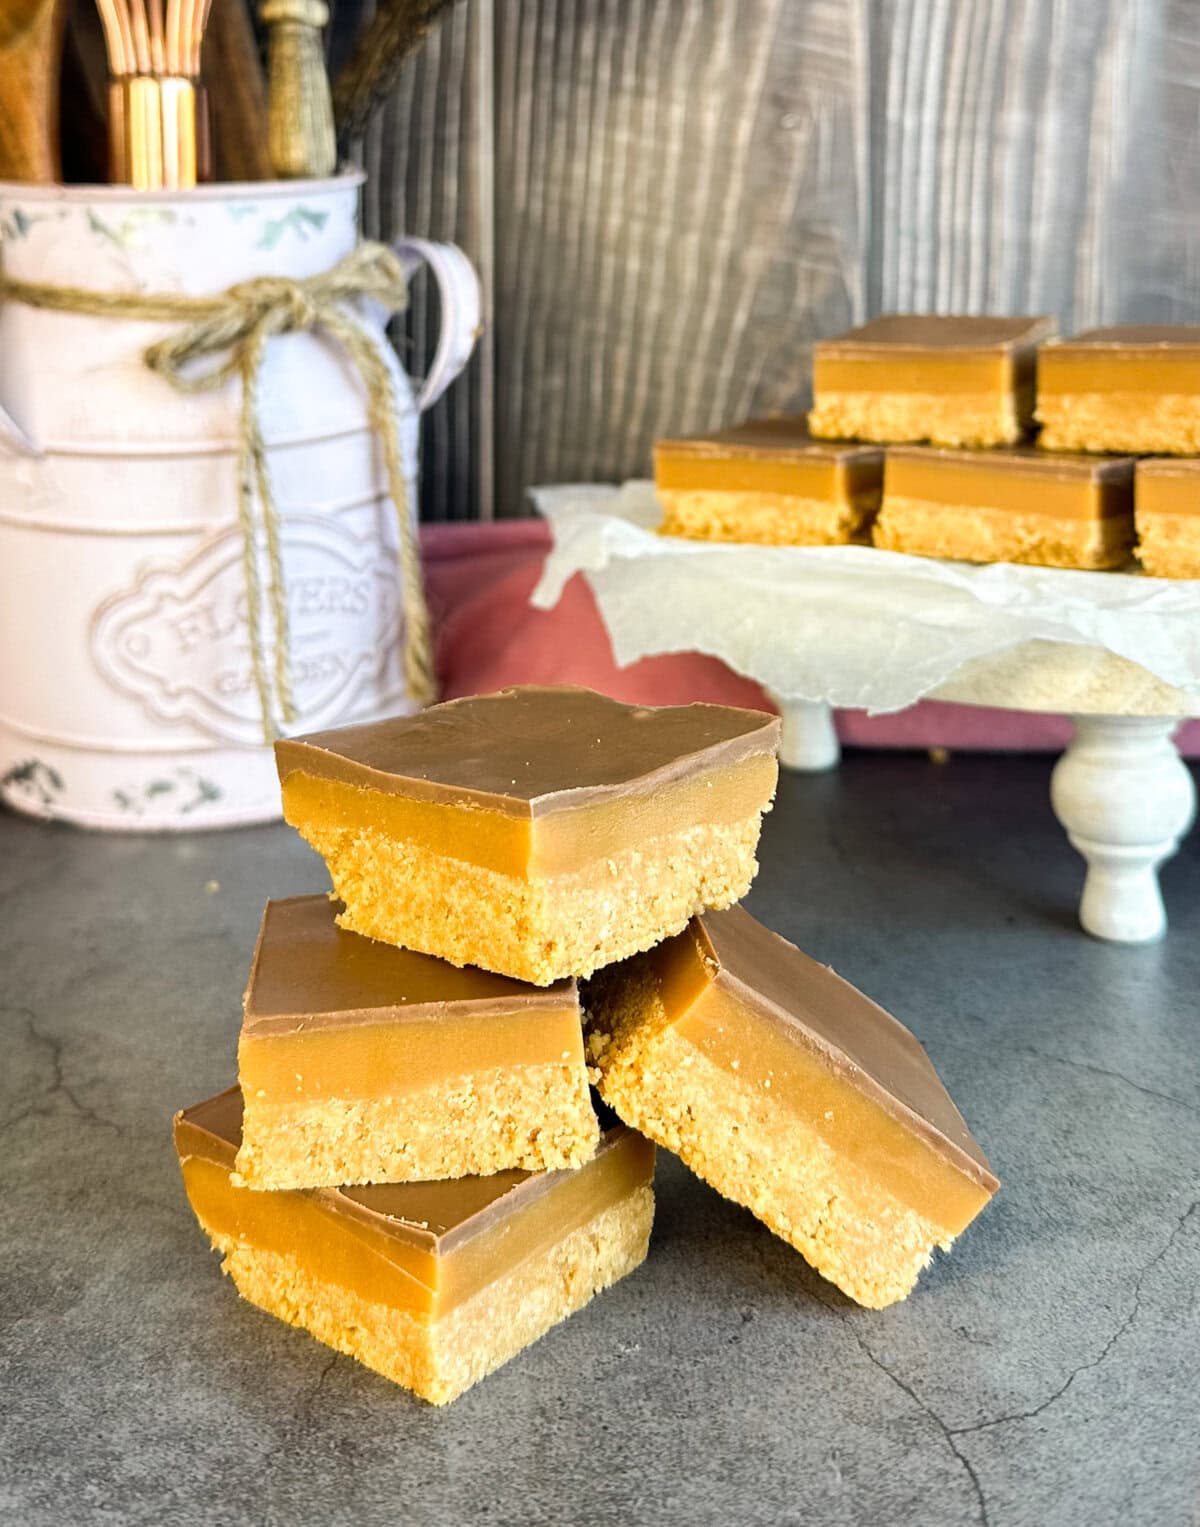
In this version I have used a vanilla biscuit, crushed, with melted butter as the base, exactly like I do for my cheesecake bases. But I have made the caramel slightly differently, all on the stove top.
For the base you can use any basic sweet vanilla biscuit in the base, here in New Zealand that will be a Vanilla or Superwine, or elsewhere a Marie, Arrowroot, Rich Tea, Biscoff, Digestive or even a chocolate digestive!
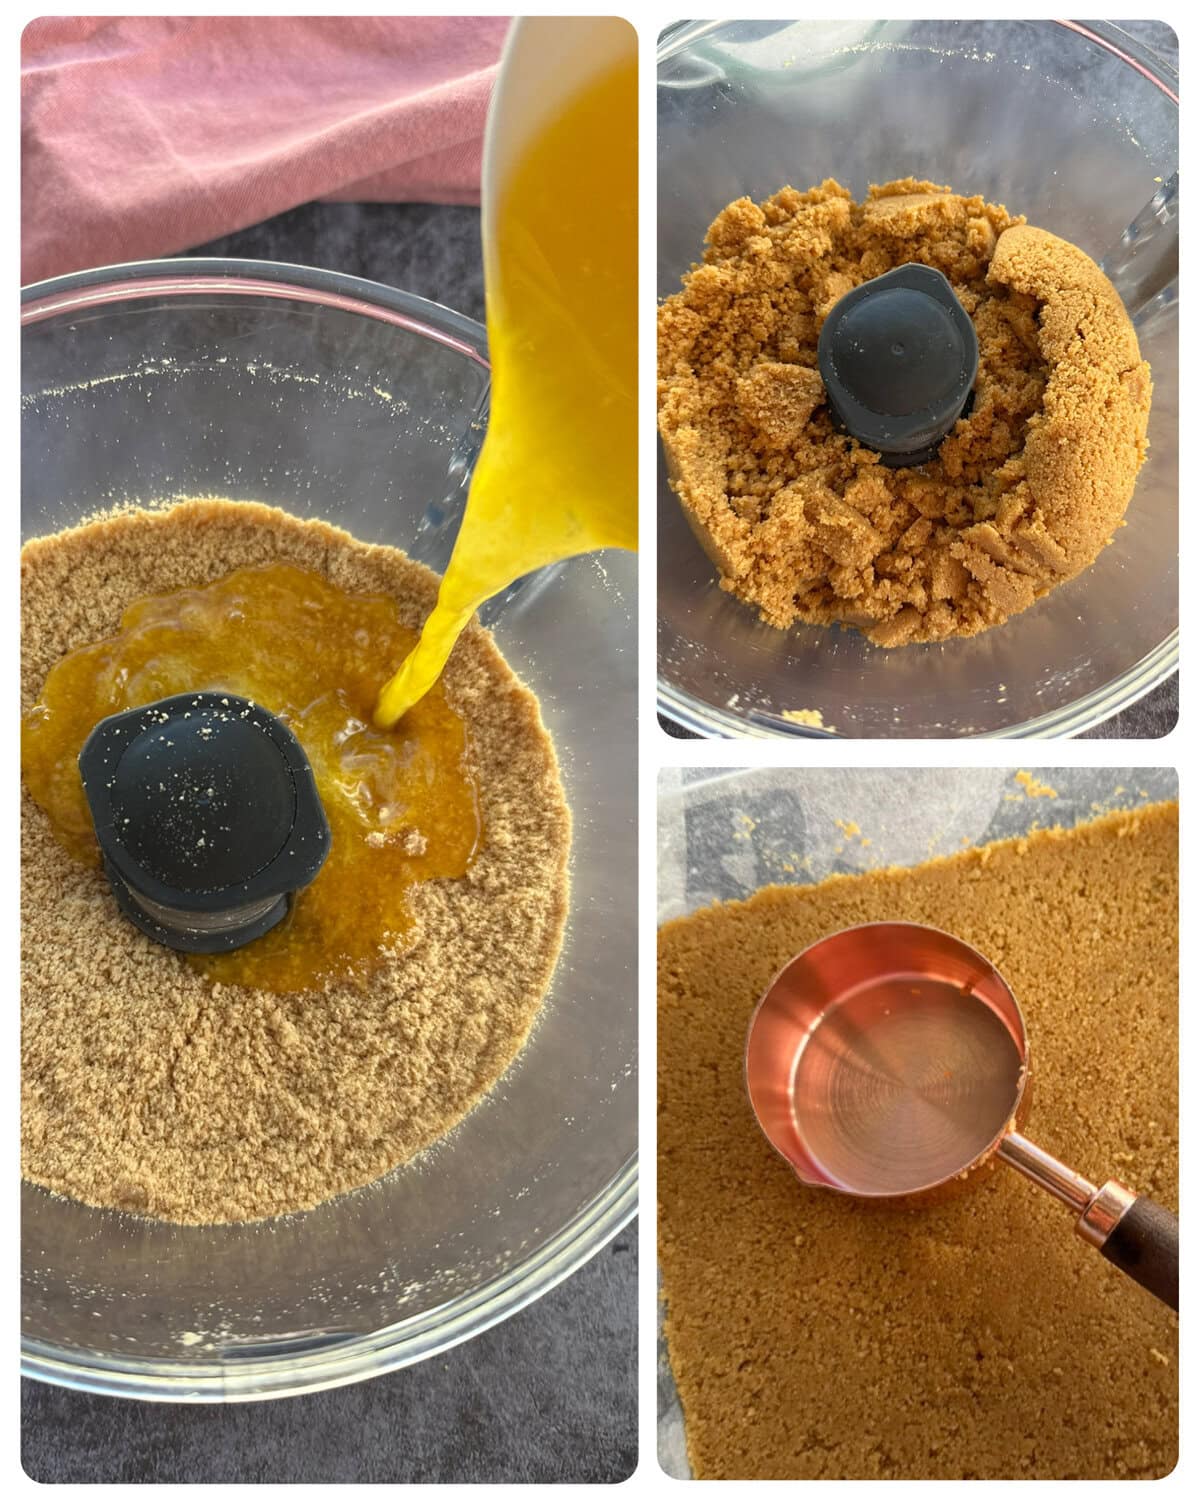
Combine the crushed biscuits with butter and a bit of vanilla to lift the flavour. The amount of butter is higher than usual due to this being served at room temperature unlike a cheesecake, it will be much less crumbly.
How to create caramel that will set, on the stove top?
Making caramel this way is such a lovely process, it takes time standing at the stove top and your wrist may be sore from all the stirring but it is so worth it! You need to invest the time so the caramel sets and creates a lovely thick appearance and that deep caramel flavour.
The method for the caramel is lovely and easy, but will take time, patience and a strong wrist as you are constantly going to need to stir and scrape the pan as you go to ensure it does not catch as it can do so very quickly. Caramel is HOT, so please take so much care preparing this one.
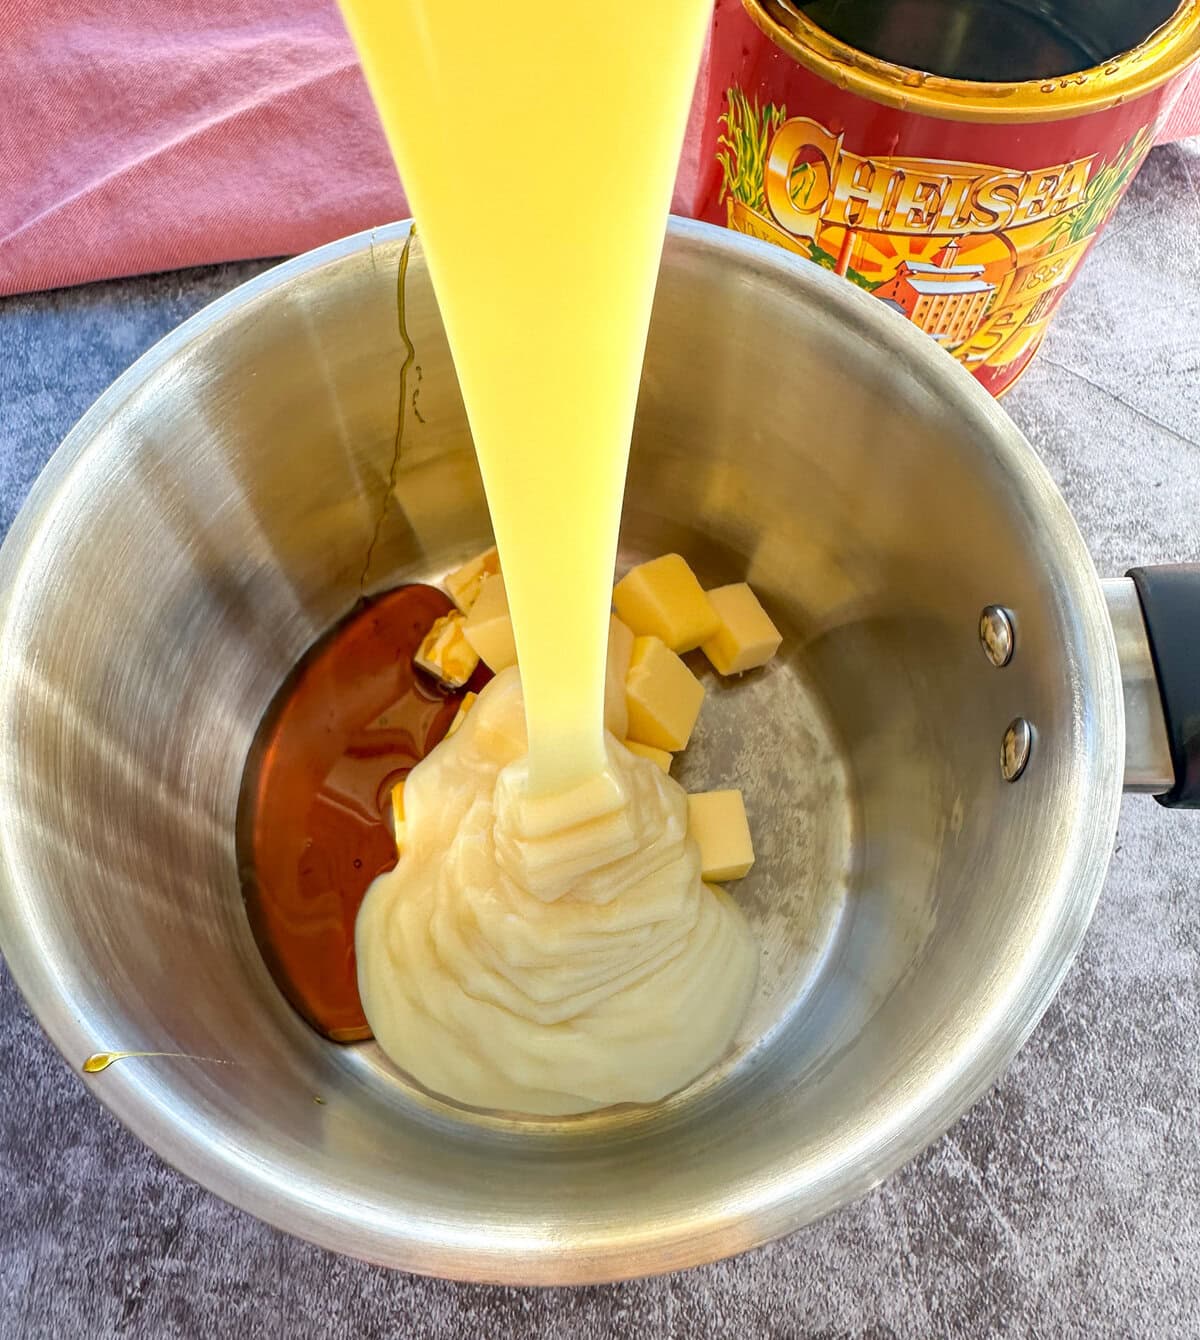
First step is to combine the condensed milk, cubes of butter and golden syrup, then begin to slowly melt in the butter over a medium low heat. Again, using a heat proof spatula with a flat end to scrape the sides, corners and base of the pan constantly.
Once the butter is melted in, you scrape around the pan constantly for ten minutes, the mixture will bubble lightly and begin to change colour to a more golden shade. I like to adjust my stove temperature so that it has slow bubbles not vigorous.
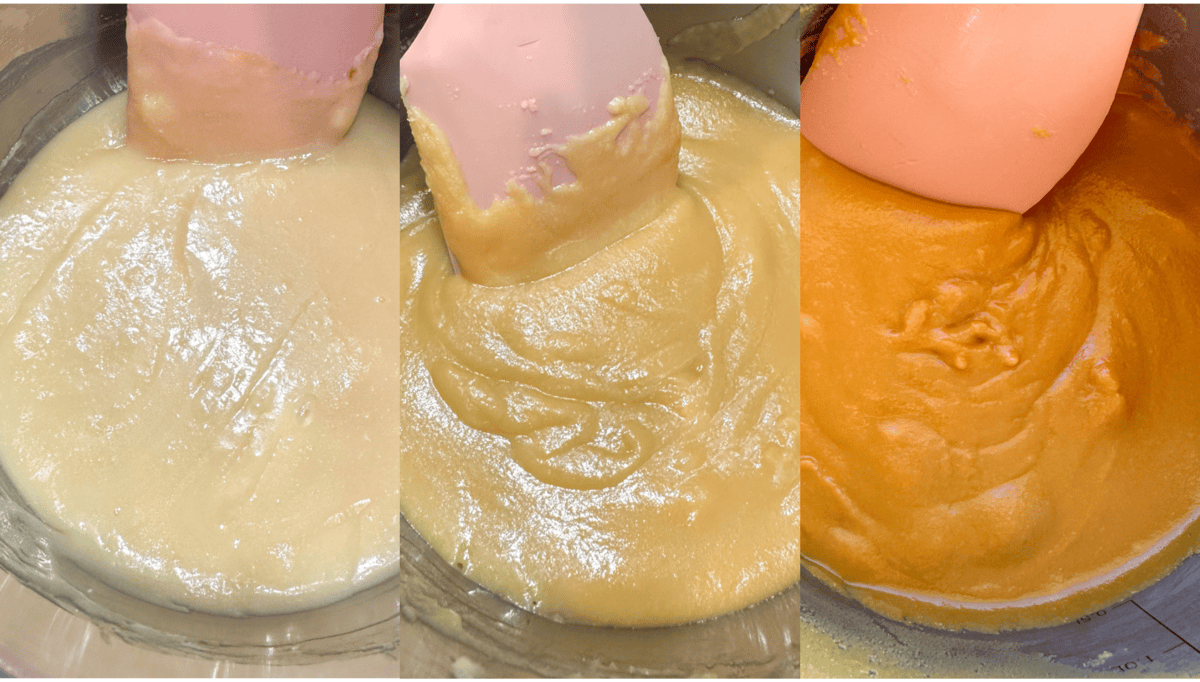
Then after the first ten minutes, for 5-7 minutes longer you will reduce the temperature a little further and continue to scrape and stir until it begins to thicken and become a lovely deeper golden amber colour.
This long slow heating time ensures that the caramel sets. Anything less than 15 minutes and it is unlikely to set or hold up to being sliced. This is why my original version is baked after being heated – it takes it to the next stage to hold its shape.
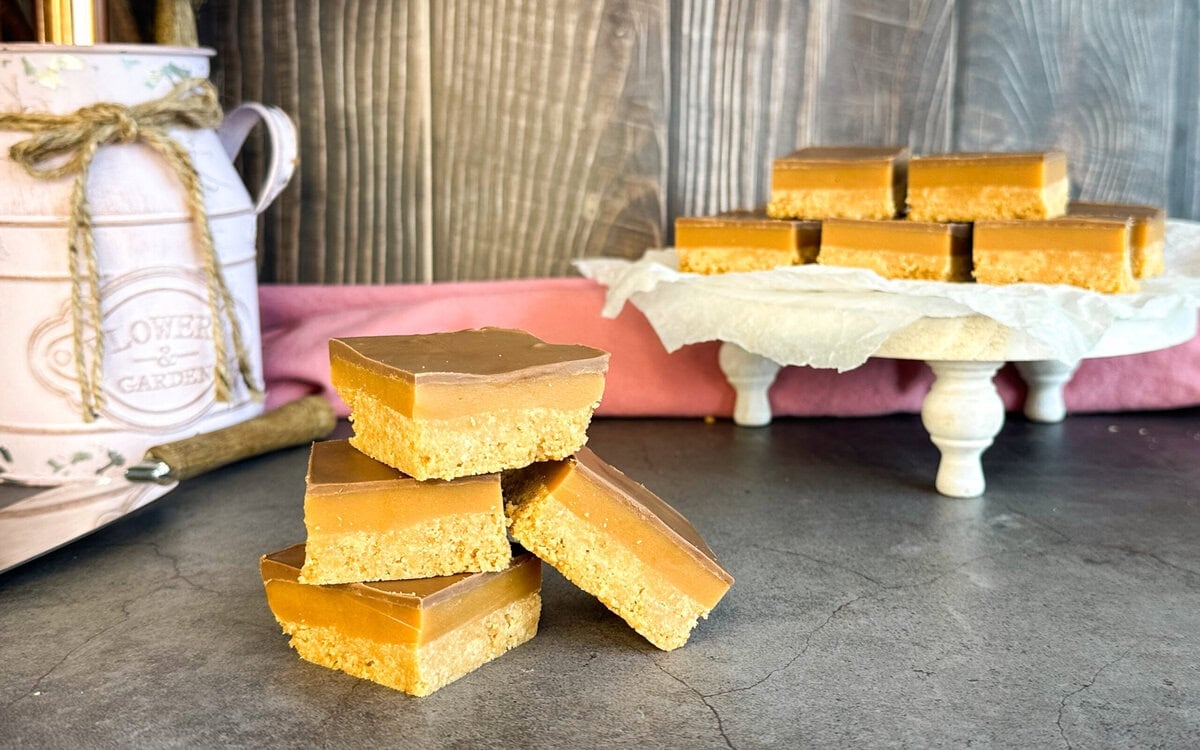
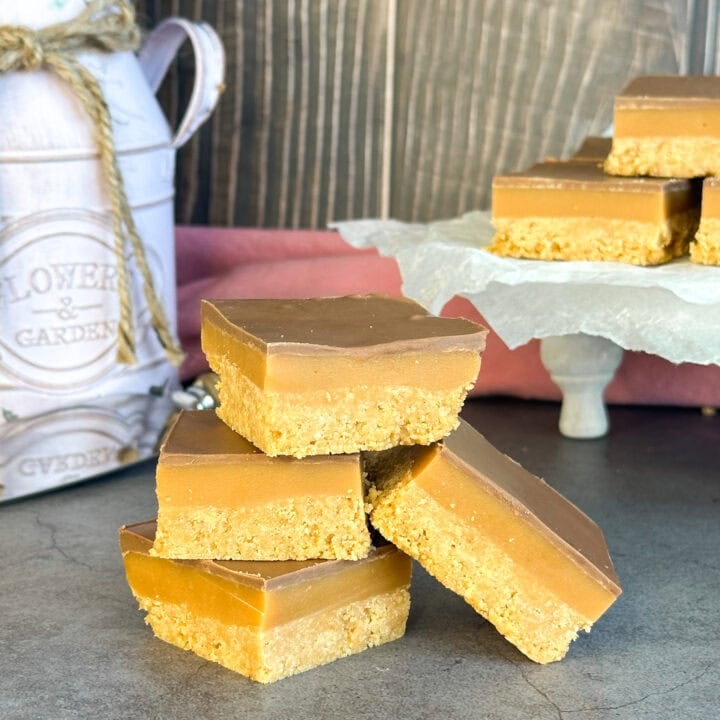
Then I allow it to cool slightly before topping it with milk or dark chocolate, then a 6 hour, or overnight setting in the fridge before slicing.
Always bring slices out of the fridge 20 minutes before you cut into them, this ensures that they come slightly up to room temperature to ensure that they do not crack. A little oil in the chocolate helps with this also.
Onto my recipe for No-Bake Caramel Slice
No Bake Caramel Slice
Delicious No Bake Caramel Slice, with a biscuit base, golden caramel filling and a chocolate topping.
Ingredients
Base
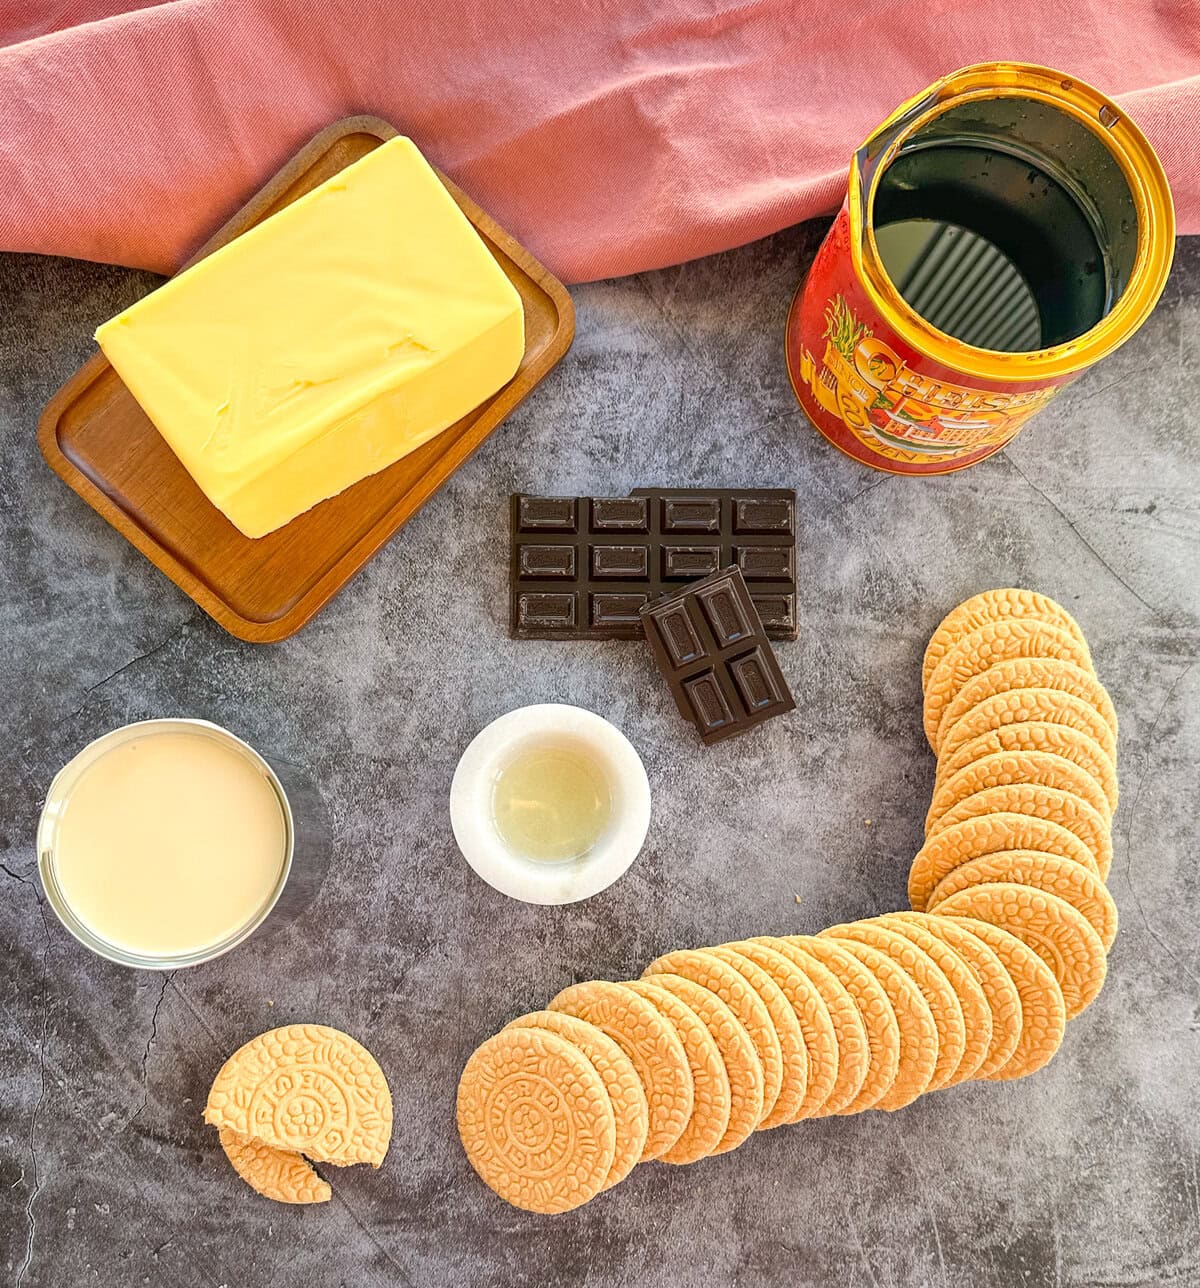
- 250 grams Vanilla Wine Biscuits, or Marie, Arrowroot, Digestive, Rich Tea etc
- 155 grams Butter, melted
- 1 teaspoon Vanilla Flavoured Essence
- (optional - 2 Tablespoons Finely Desiccated Coconut)
Filling
- 1 x395 gram Can Sweetened Condensed Milk
- 60 grams Butter, cubed
- 2 Tablespoons Golden Syrup (30mls)
- Pinch Salt
Topping
- 125 grams Milk or Dark Chocolate
- 1 teaspoon Oil (vegetable or coconut)
Instructions
- Line a 20 or 23 cm square baking tin with baking paper (20cm for a thick slice, 23cm for thin) and set aside
- Melt the butter in a small bowl, in 20-30 second bursts in the microwave, then add to this the vanilla and set aside to cool slightly while you prepre the biscuits.
- In a food processor or blender add the biscuits and crush to a fine crumb. pour the butter mixture into the biscuits and blend well. (if using coconut add this now also)
- Tip this into the lined tin and gently press this into a flat layer, then using the back of a measuring cup or similar press the crumbs into an even compact layer, not too firm but well packed
- Pop this into the fridge while you prepare the caramel.
- In a small saucepan, add the condensed milk, cubes of butter, golden syrup and a pinch of salt.
- You will need to use a heat-proof rubber spatula, with a square-ish end, to constantly scrape the sides, base and corners of the saucepan, never leaving the pan during the cooking time or it will quickly catch and burn. Caramel is HOT
- On the stove top, on a medium/low heat begin to melt the butter into the mixture, constantly scraping the base, sides and corners of the saucepan to ensure it does not catch. Once the butter has melted, set a timer for 10 minutes, and the mixture will come to a gentle bubble, adjusting the temperature down if need be. Continue to scrape and stir constantly, the colour will begin to change.
- At the ten minute mark, reduce the temp a little further and continue to cook and scrape for 5-7 minutes more until the caramel really starts to thicken and become a lovely golden colour.
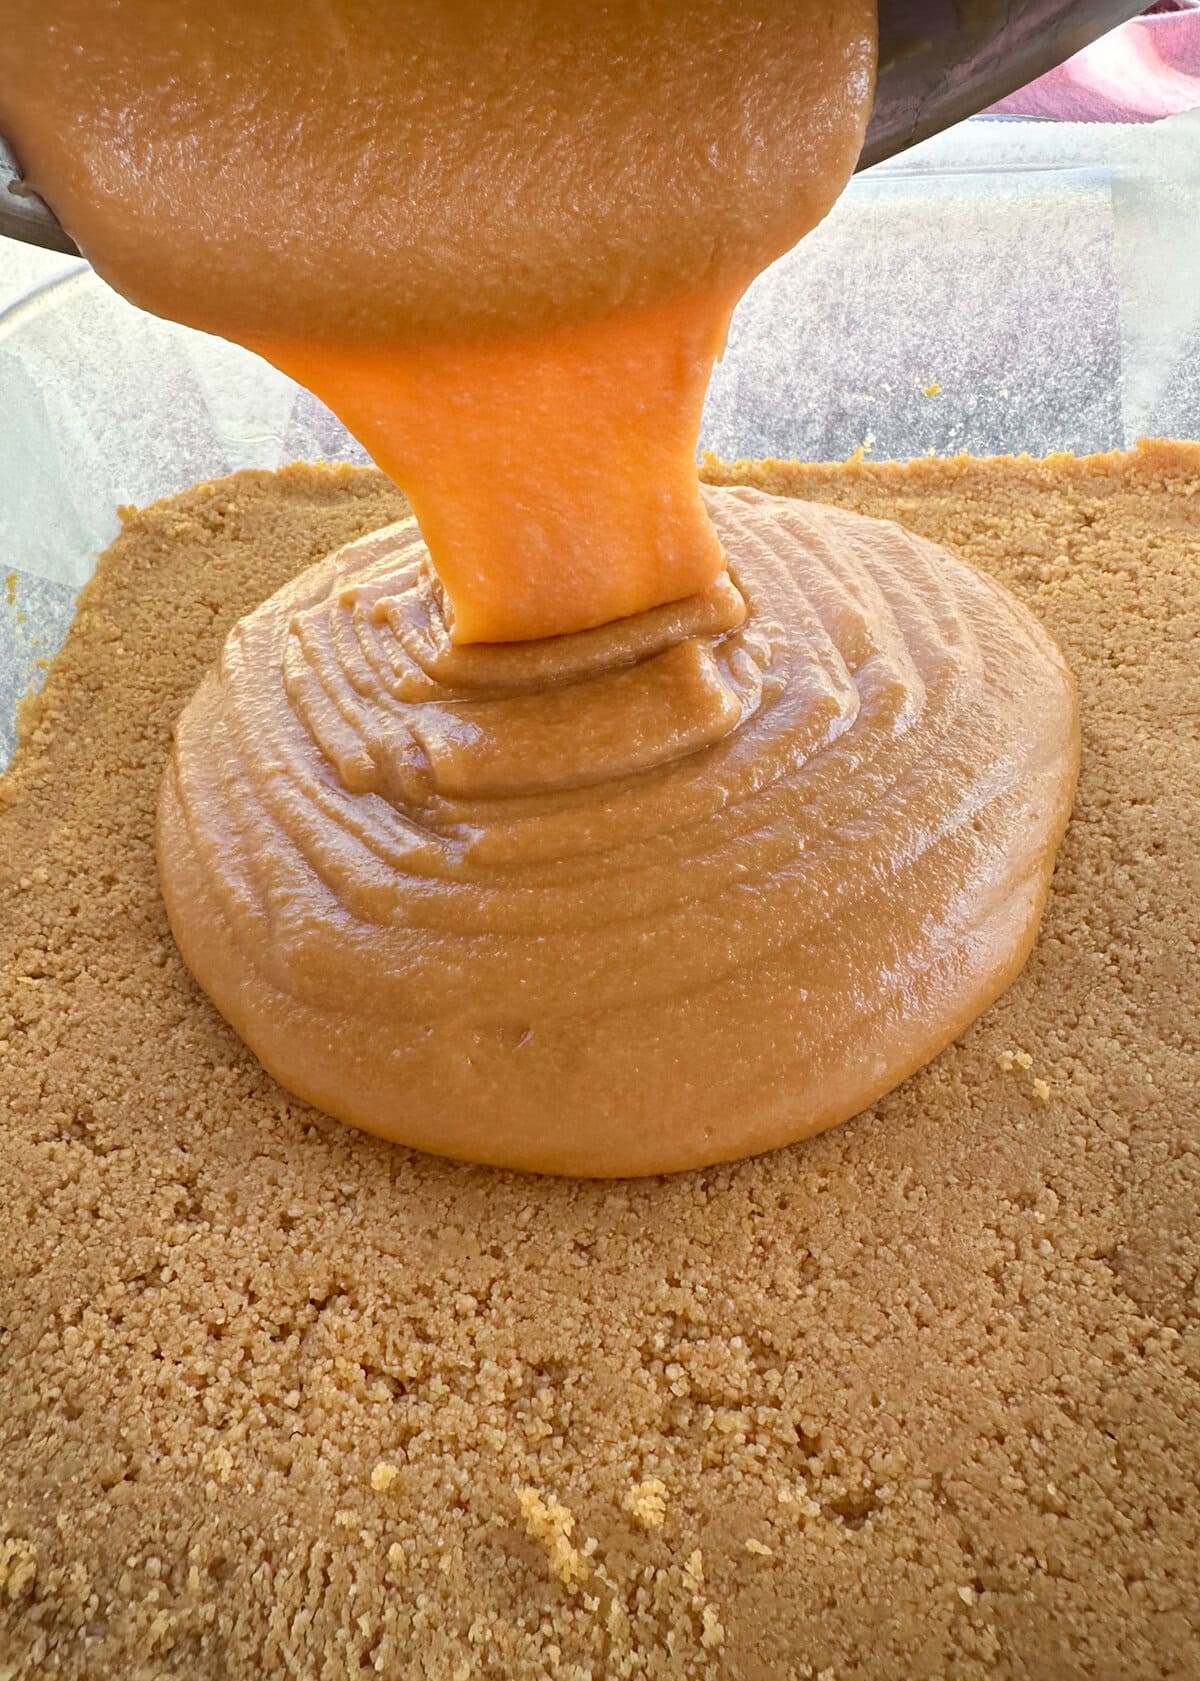
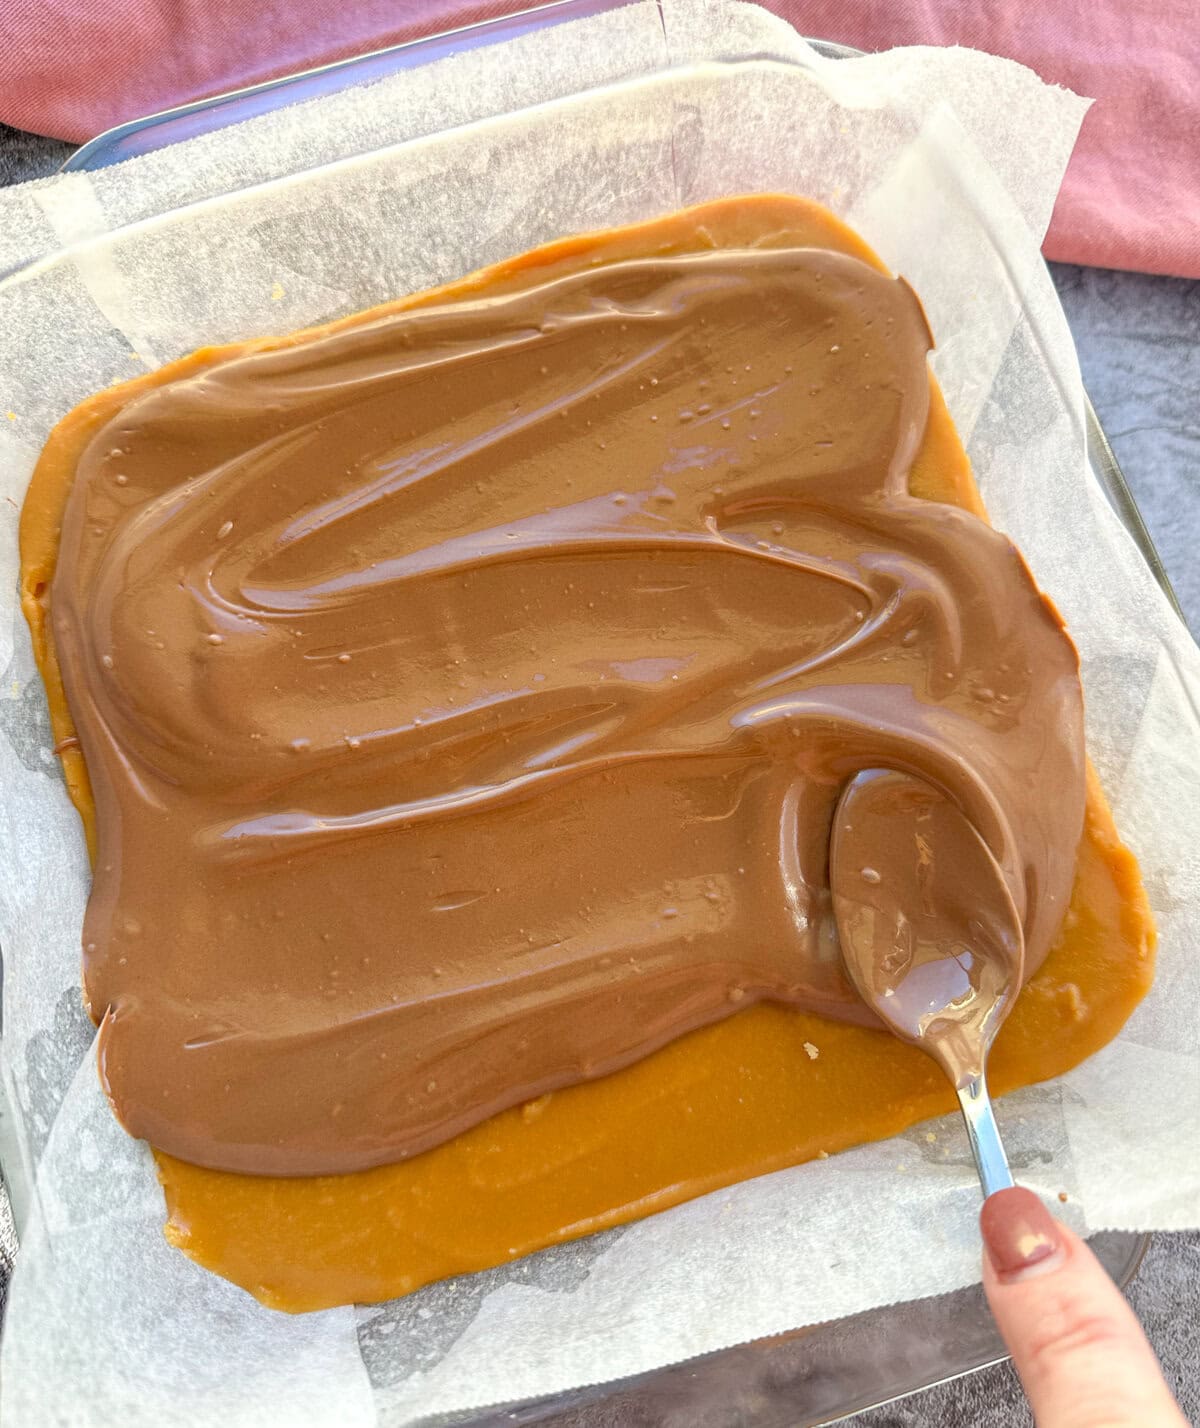
- Remove from the heat and pour this over the cooled base, then spread evenly with the back of a spoon or a spatula, then give the dish a jiggle to evenly disperse the caramel.
- Place the pan in the refrigerator for 30 minutes to cool slightly before preparing the chocolate topping.
- In a small microwave proof bowl or ramekin, place pieces of chocolate and melt in 20-30 second increments until no lumps remain, then add the oil and mix it through well.
- Pour the melted chocolate over the slightly cooled caramel and spread evenly with the back of a spoon. Then give it a little jiggle to settle the chocolate into a smooth even layer
- Refrigerate for 6 hours to set the caramel, or overnight.
- Before cutting the slice, remove it from the oven 20 minutes before to bring it slightly to room temperature.
- Use a warm damp cloth to wipe a sharp knife between cuts, to cut the slice into even pieces.
- Store in an airtight container, will keep for 4-5 days.
- Enjoy!
Notes
Ensure you cook the caramel for at least 15 minutes, otherwise it may not set.
Stir and scrape the sides constantly while cooking the caramel, it will catch and burn very quickly. Use a heat proof rubber spatula with a square-ish end to ensure you can get the corners of the saucepan. A few little browned bits is ok, but take care to ensure it does not burn as it will affect the taste.
To line a square or rectangular pan, spray a little cooking spray inside the pan, then lay a large piece of baking paper over the pan, cut 2x 5 cm slits into the top edge of the paper where the corners of the pan are, and two on the bottom edge. Then press the paper into the tin, this method forms nice corners in the paper.
When melting chocolate in the microwave, ideally heat it at 50-70% power, and in 20-30 second increments, stirring in between to ensure it does not seize or burn. When only a few small lump remain, remove it and stir these in well to melt.
Milk or Dark Chocolate? You can use either! It is a very rich slice, milk chocolate will make it sweeter, dark chocolate is a stronger flavour which can overpower the slice. Both are delicious. You can also use a thin layer of chocolate icing instead
This is a no coconut caramel slice? The overwhelming feedback I get when I share my caramel slice recipe is that people want a coconut free version, so as well as being no bake, the base is tested without coconut. If you are ok with coconut, 2 tablespoons of finely desiccated coconut is lovely in the base.
Nutrition Information:
Yield: 16 Serving Size: 1Amount Per Serving: Calories: 196Total Fat: 13gSaturated Fat: 8gTrans Fat: 0gUnsaturated Fat: 4gCholesterol: 30mgSodium: 128mgCarbohydrates: 9gFiber: 0gSugar: 5gProtein: 1g
JustAMumNZ.com, occasionally offers nutritional information for recipes contained on this site. This information is provided as a courtesy and is an estimate only. This information comes from online calculators. Although justamumnz.com attempts to provide accurate nutritional information, these figures are only estimates.
I hope you love this no bake caramel slice, a lovely alternative to my super popular classic version. Be sure to give me a star rating above when you make it, and I love hearing in the comments below.

Thank you so much for stopping by to check out my latest recipes on my blog. If you are not already, be sure to follow me on Facebook or Instagram for more deliciousness, and you can register your email in the subscription box below to receive all my recipes as I publish them.
Happy Baking!
Anna
Pin It! Pinterest
Margaret Crawford-Warden says
Hello
I have made your apricot slice for my 80th Birthday recently and it went down a treat with guests and my husband and I just loved it -will made again sometime also made your fudge slice was a bit rich and your Lollie cake also for the special occasion as well -my husband’s favourite slice
justamumnz says
Hi Margaret, that is so lovely to hear, and Happy Birthday! Yes, some slices can be very rich and sweet, but everything is ok in moderation! Thank you for your support of my page. Anna