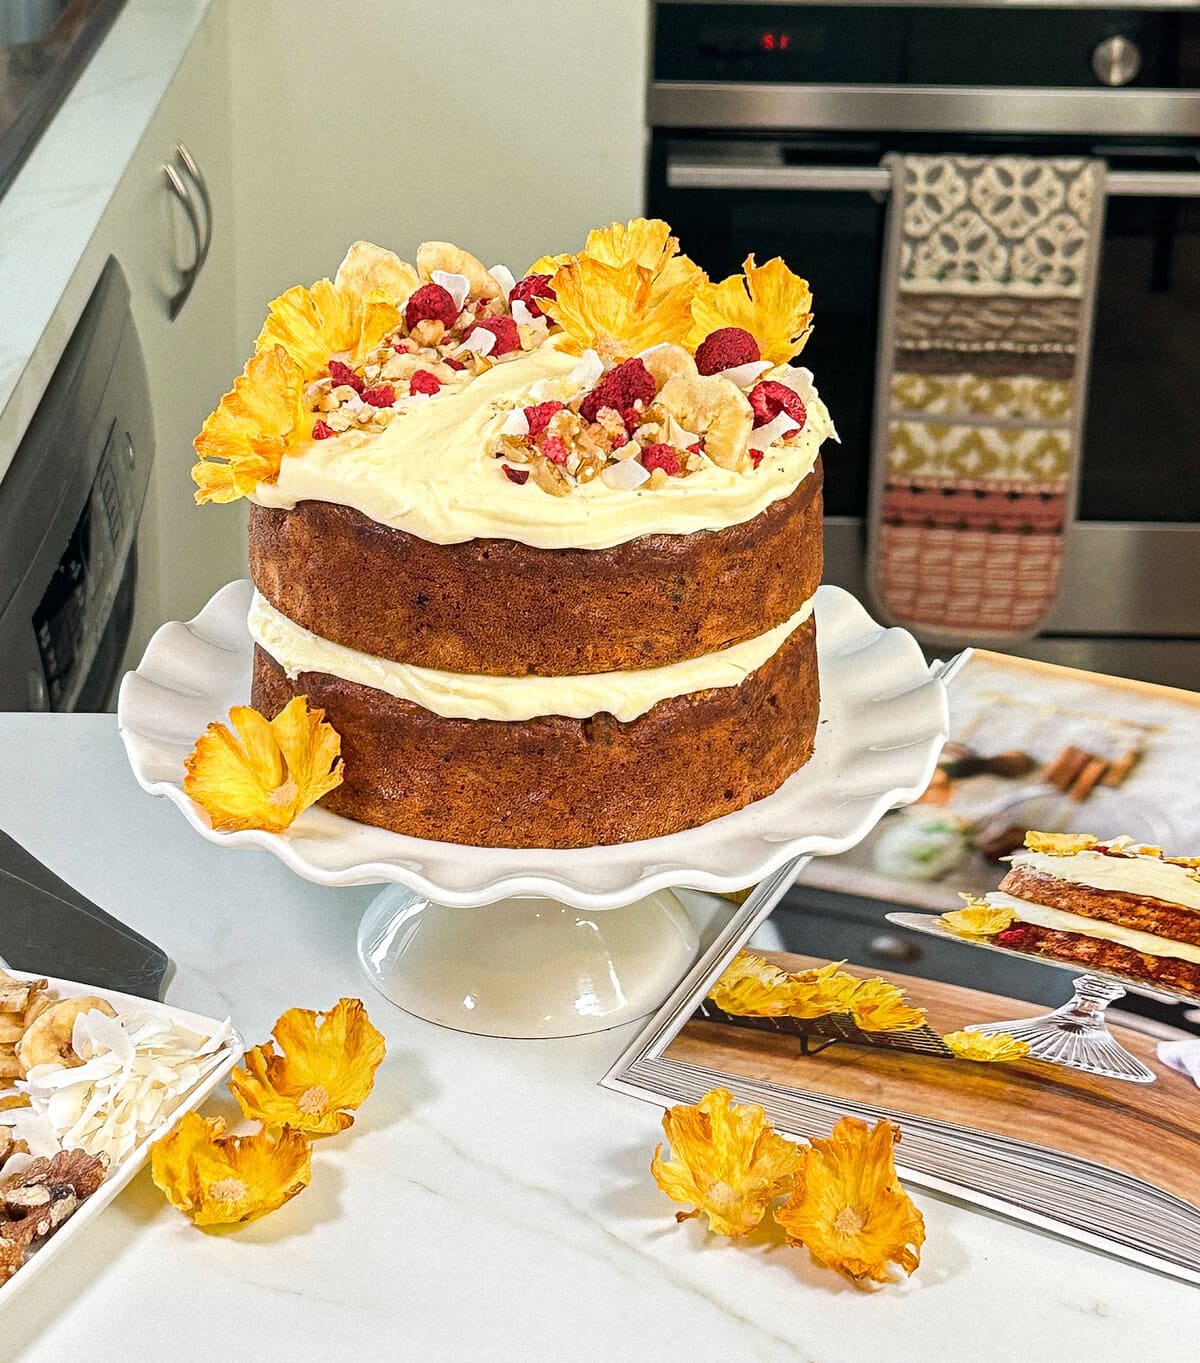
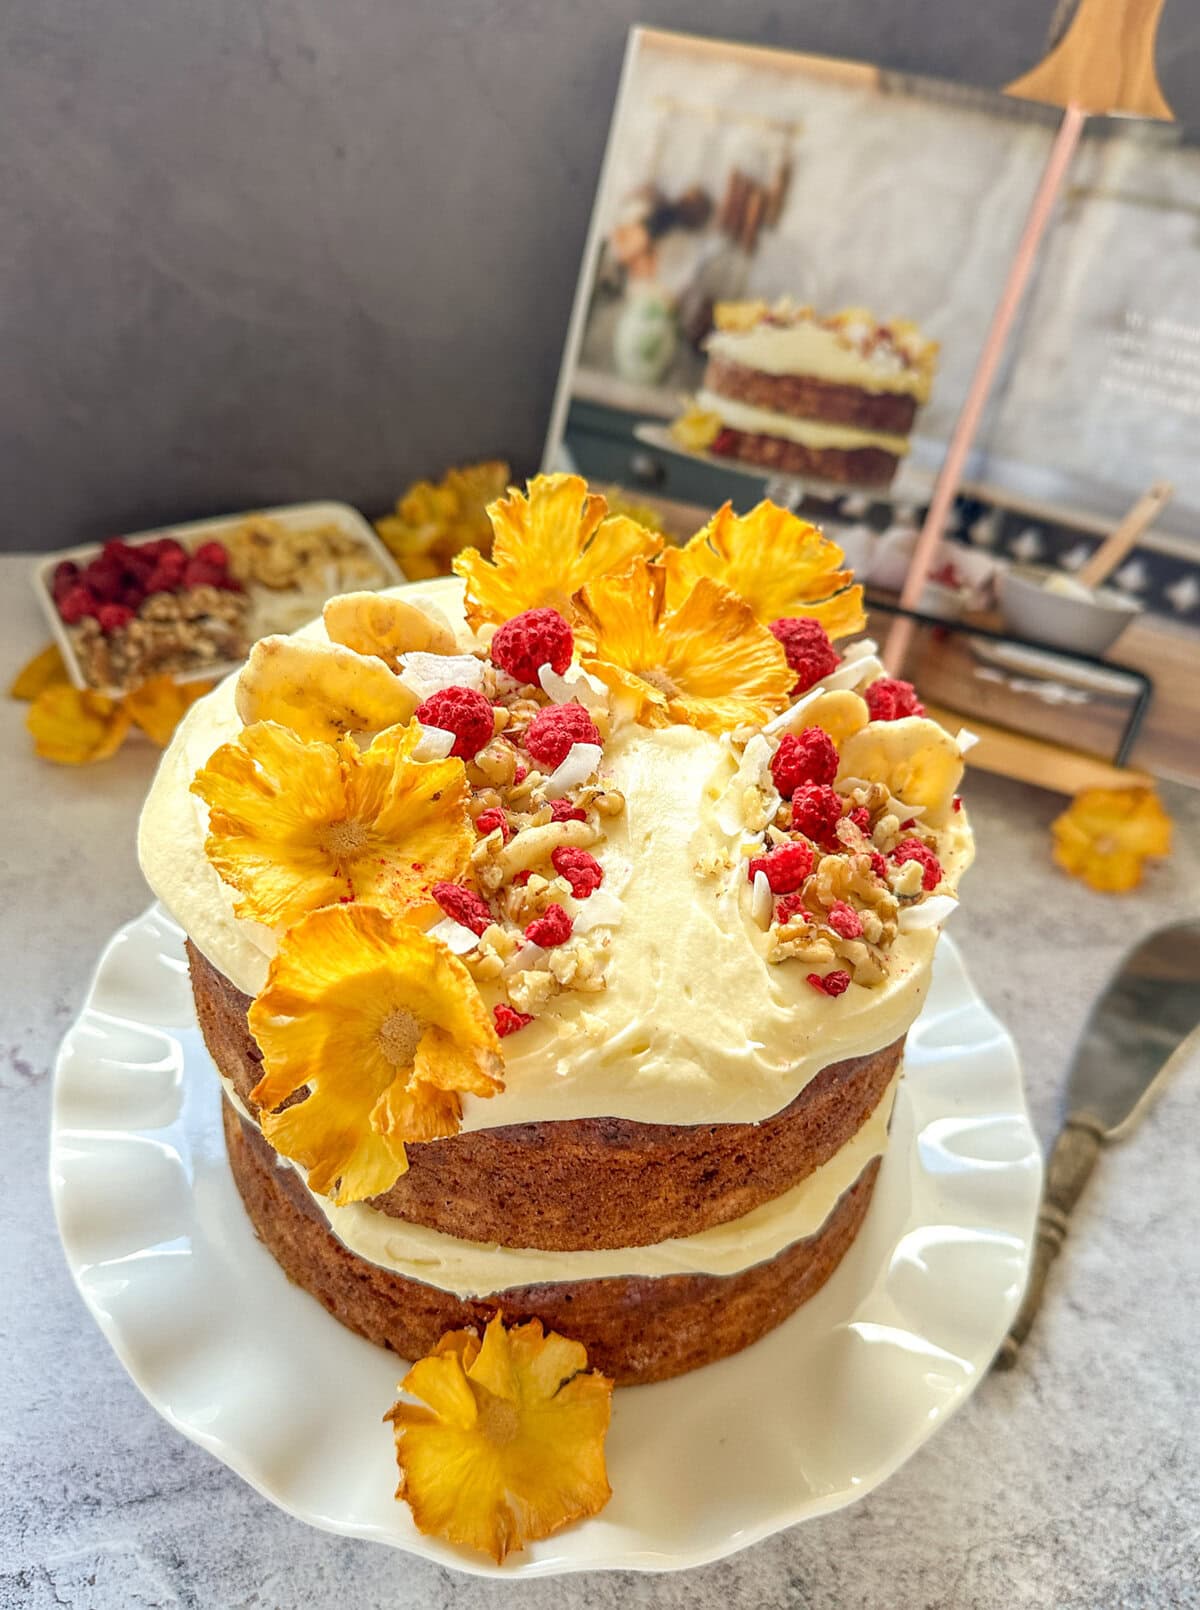
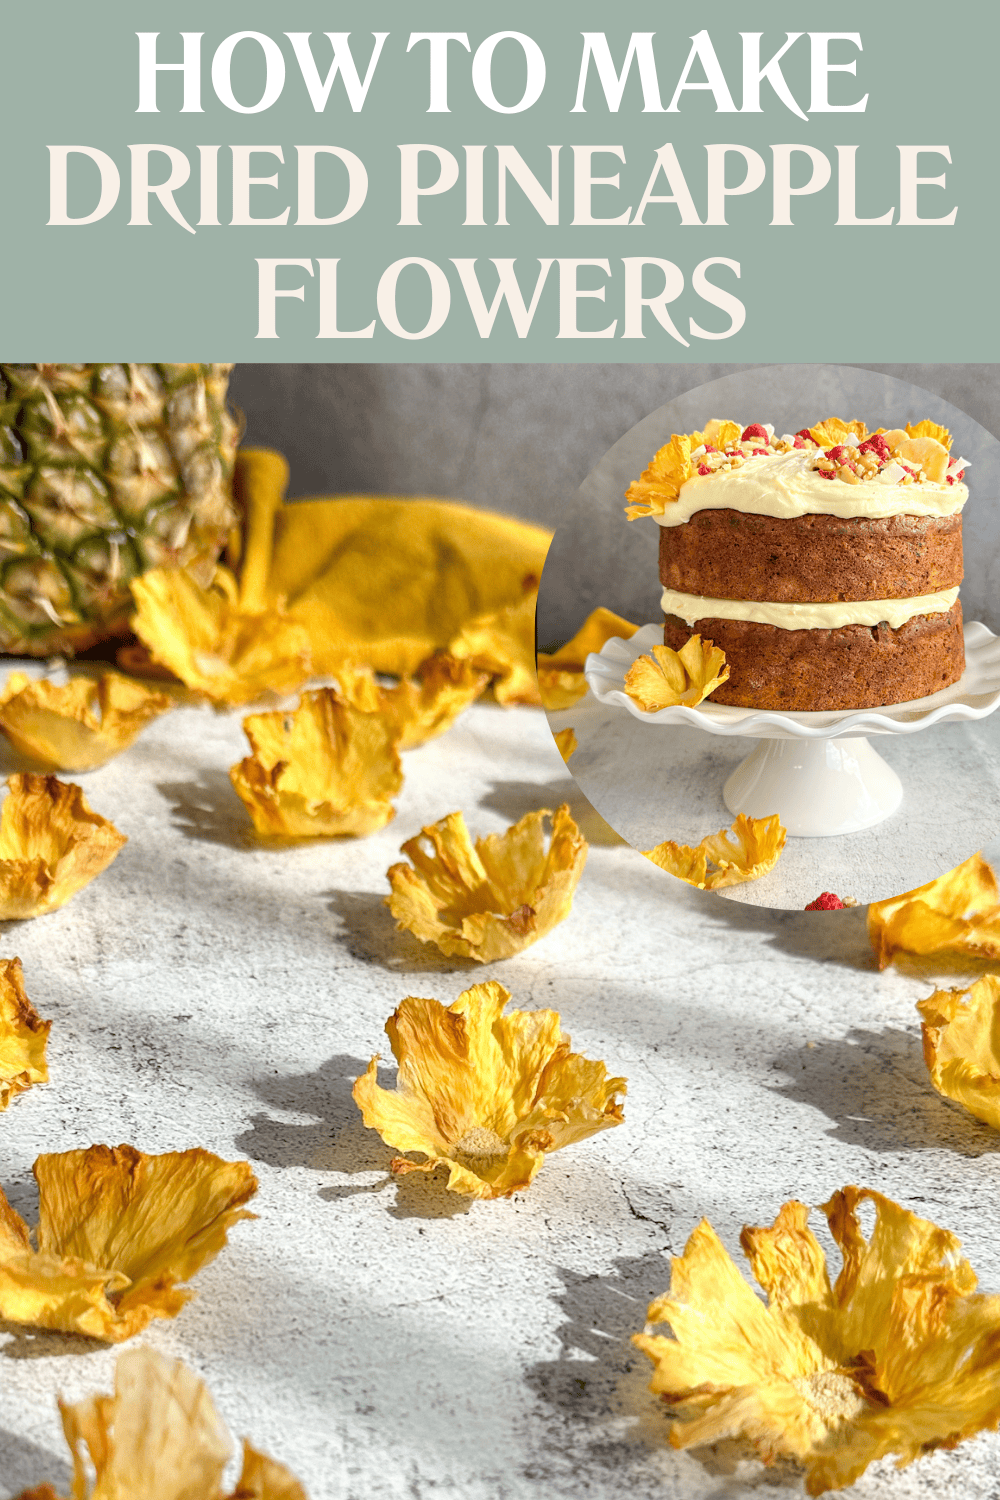
This very simple process for how to make dried pineapple flowers, makes a gorgeous decoration for cakes or garnish for platters & cocktails!
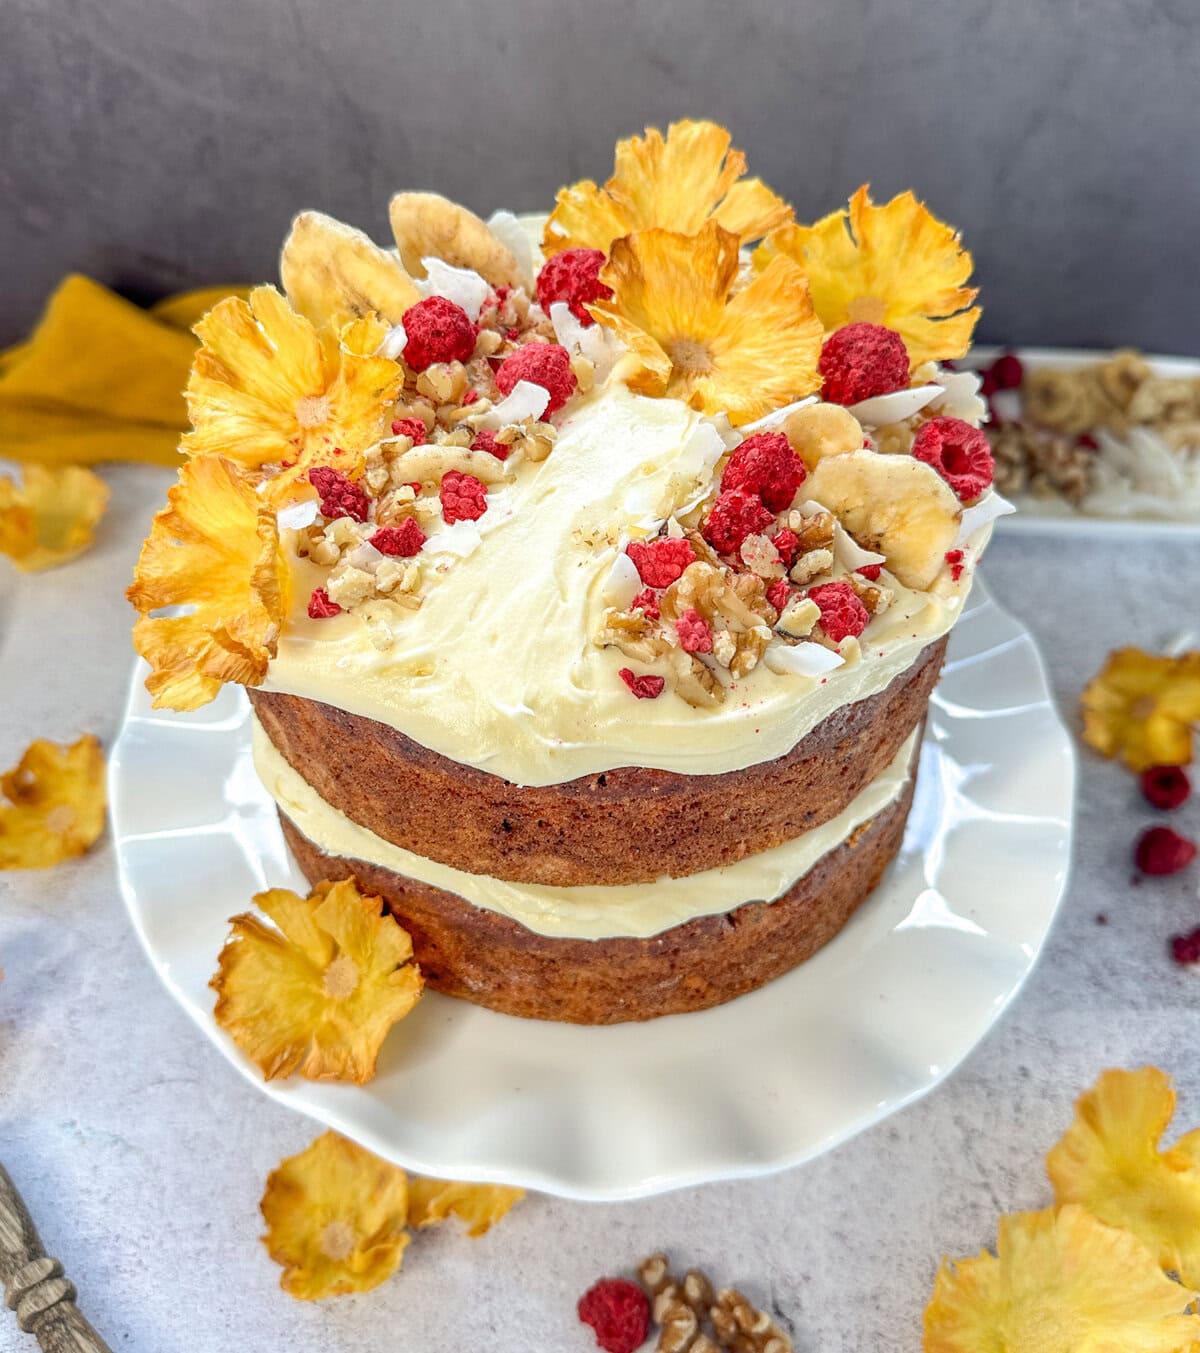
All you will need is a fresh pineapple and a little patience. I learned how to make these for the Hummingbird Cake that features on the front cover of my new cookbook!

I love edible garnishes and making beautiful things simply, so this perfectly fit the bill. I was inspired by the tutorials of the Cookie Rookie and others to give these a go and I wanted to share the process with you as I think you will love it.
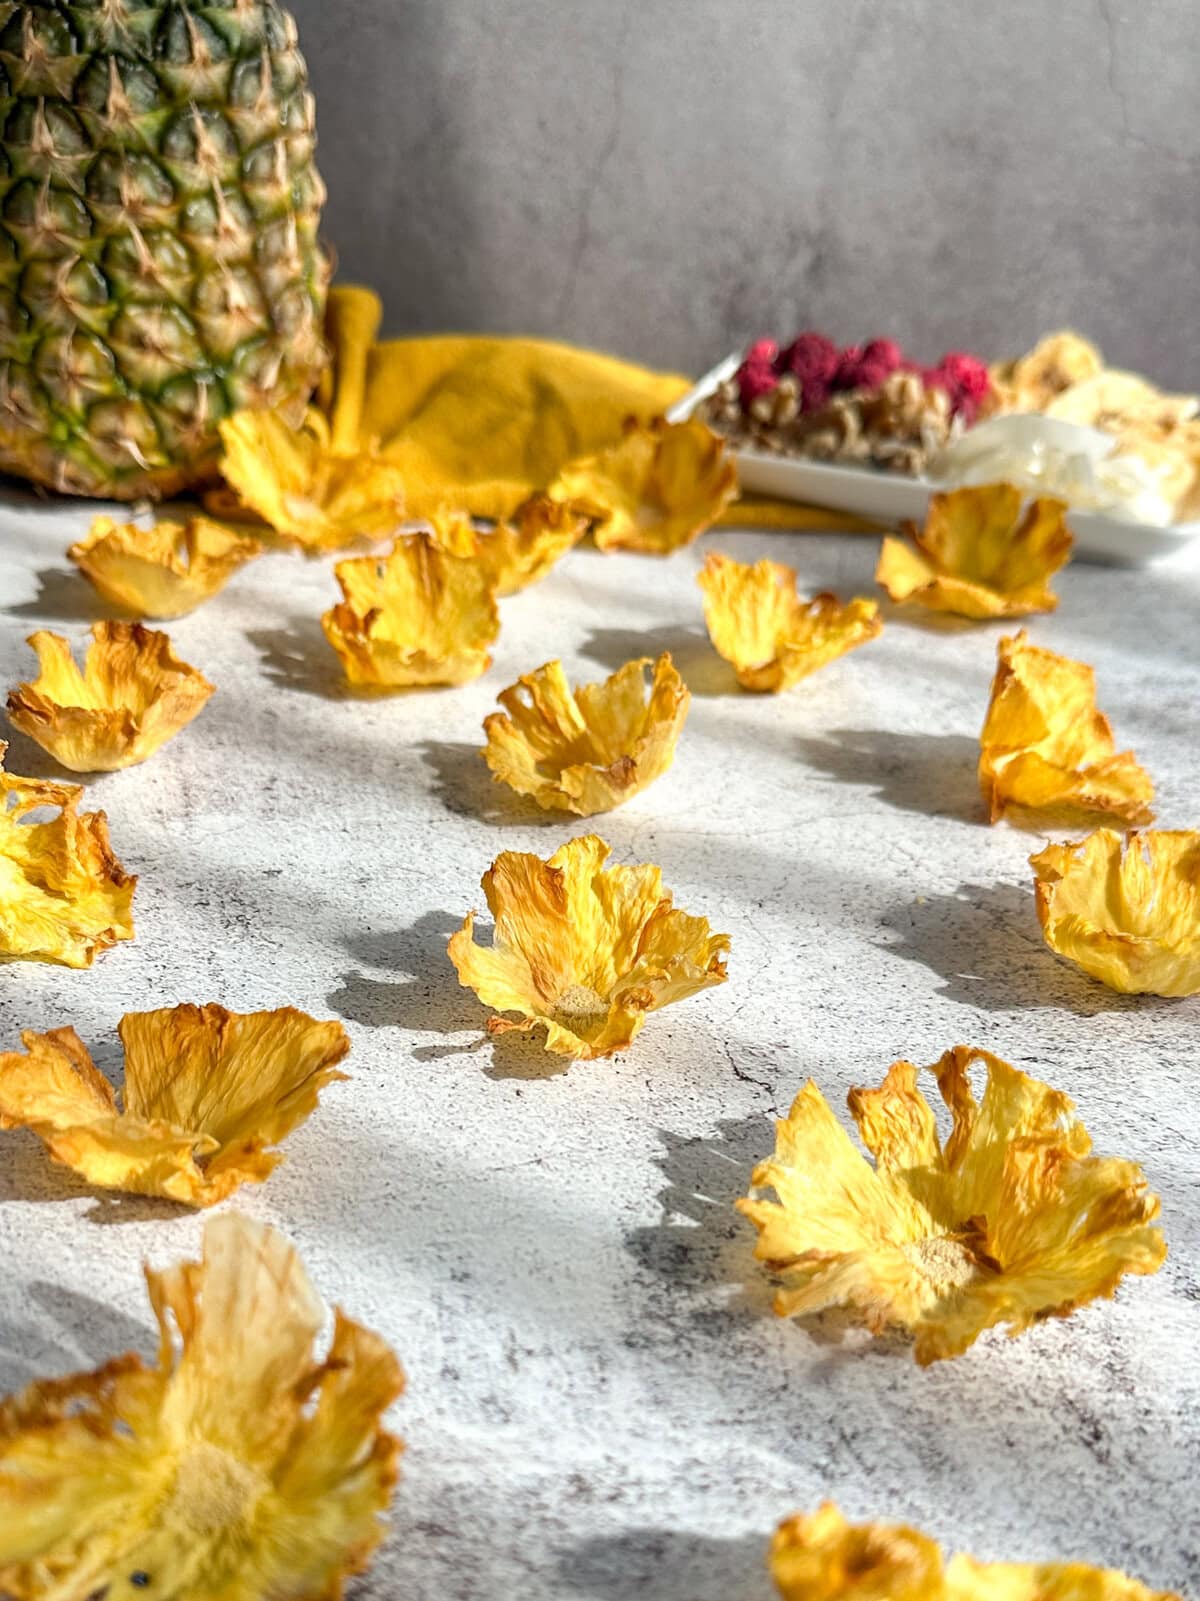
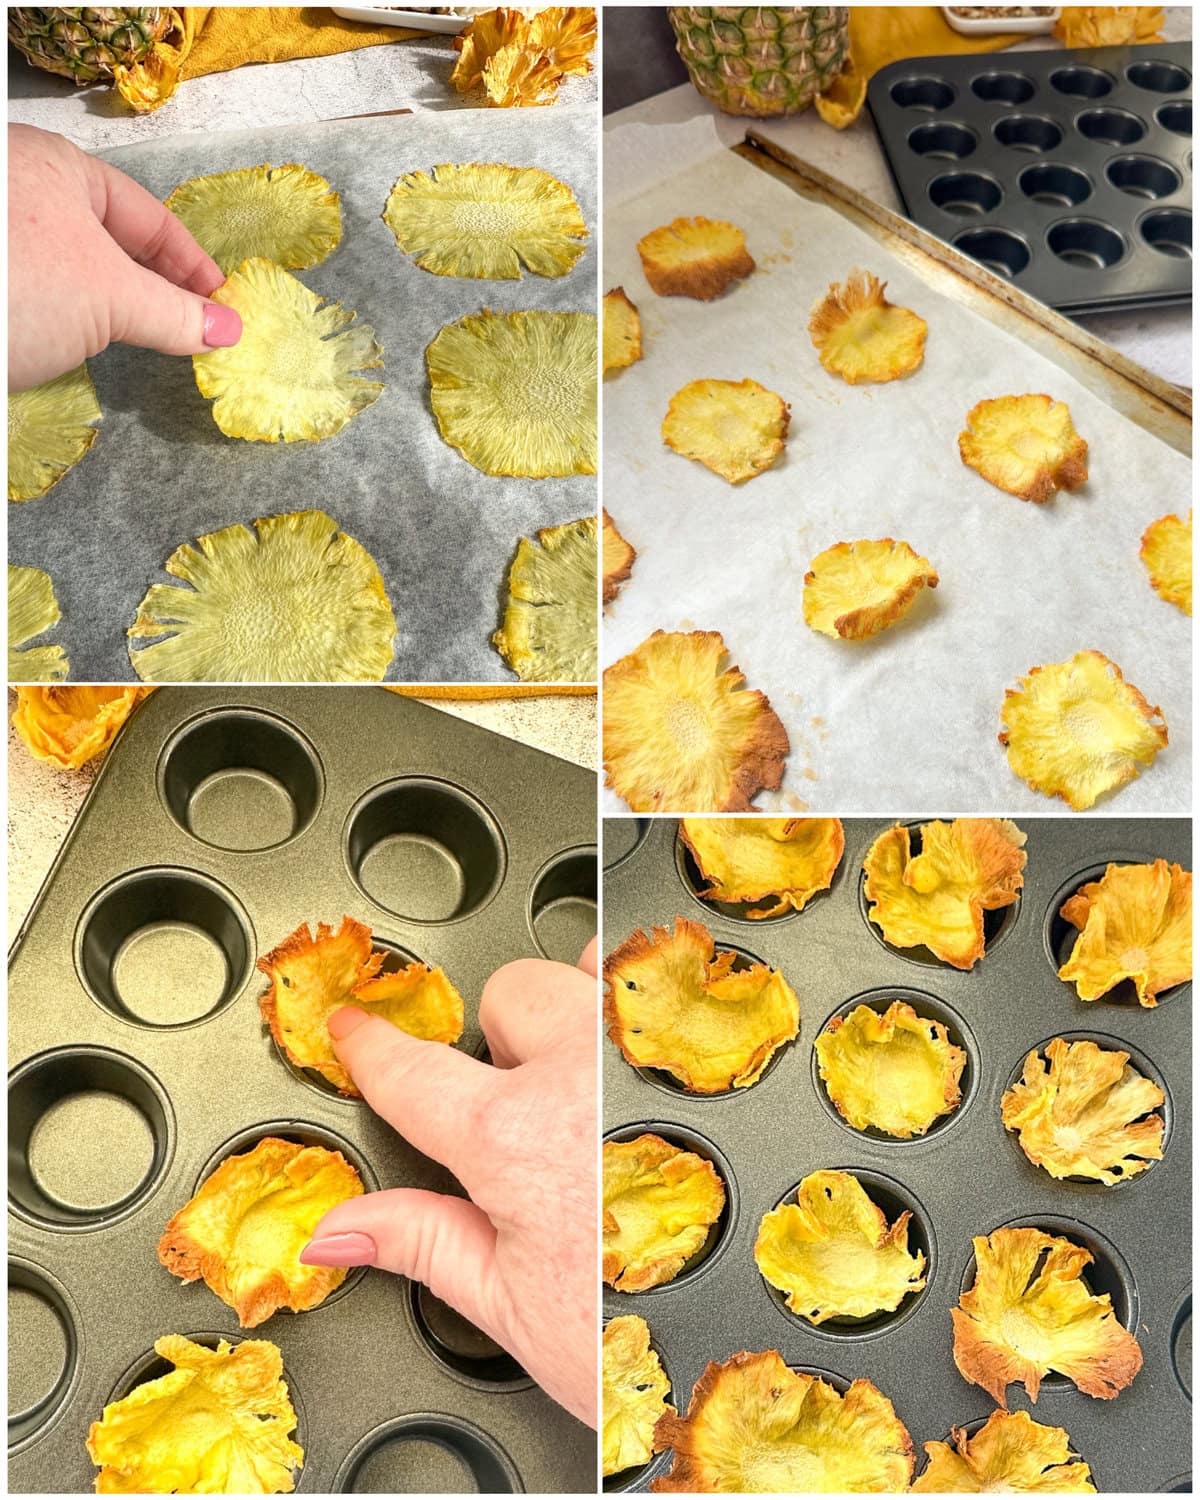
Pineapple flowers are simply fresh pineapple, very thinly sliced, then dried and slowly baked until they are dry & crisp. Then you use a muffin tray to form them into the ‘flower’ shape you see here.
There are a few tips to ensuring that these work every single time. The most important of these being that the pineapple, once sliced, needs to have as much moisture as possible soaked out, before you bake low and slow for an hour or two.

In order to do that you will need to use a LOT of paper towels. Using paper towels is the simplest and quickest method. You can follow my video below or check out my full method in the recipe card further down the page.
First step is to slice off the top and bottom of the pineapple, then slice the outer skin from the pineapple, I like to ensure that any imperfections are removed, as well as any seeds.
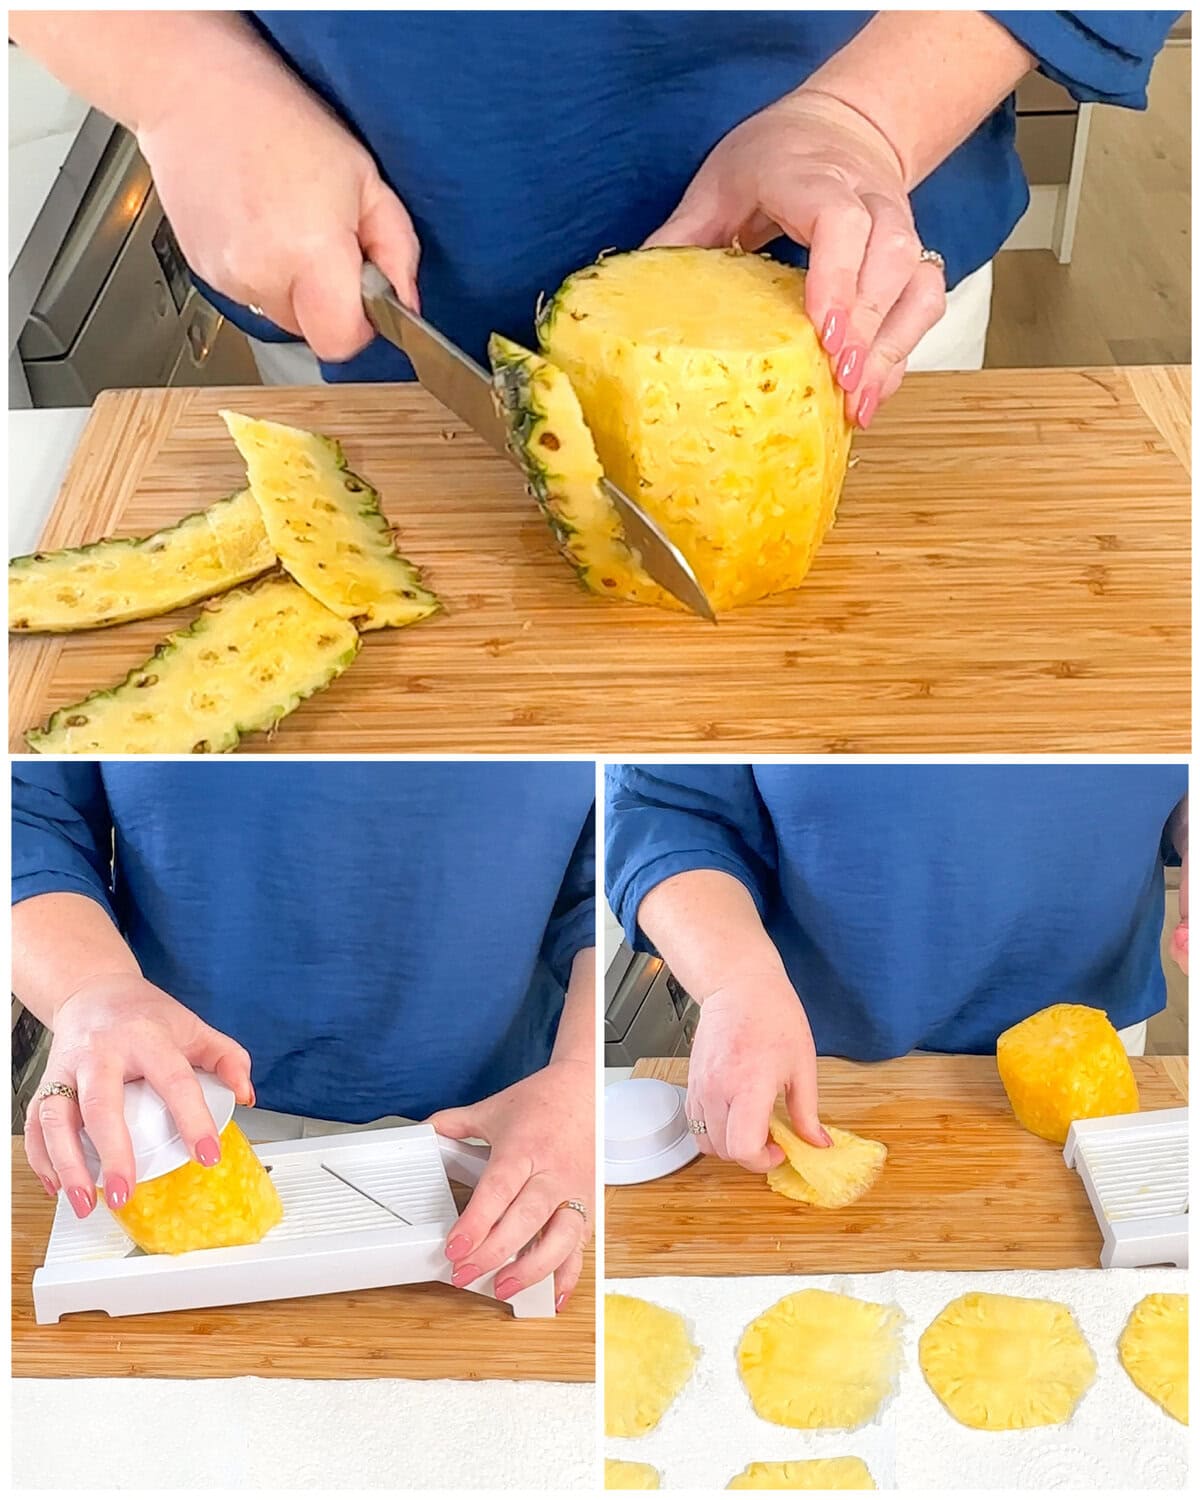
Using a mandoline slicer is really handy here. You want the pineapple to be sliced as thinly as possible – so when using the mandoline you want to have it on its thinest setting. Alternatively you can use a very sharp large knife to slice super thin pieces.
Please take care when using a mandoline, I managed to cut my little finger just by moving it while shooting this!
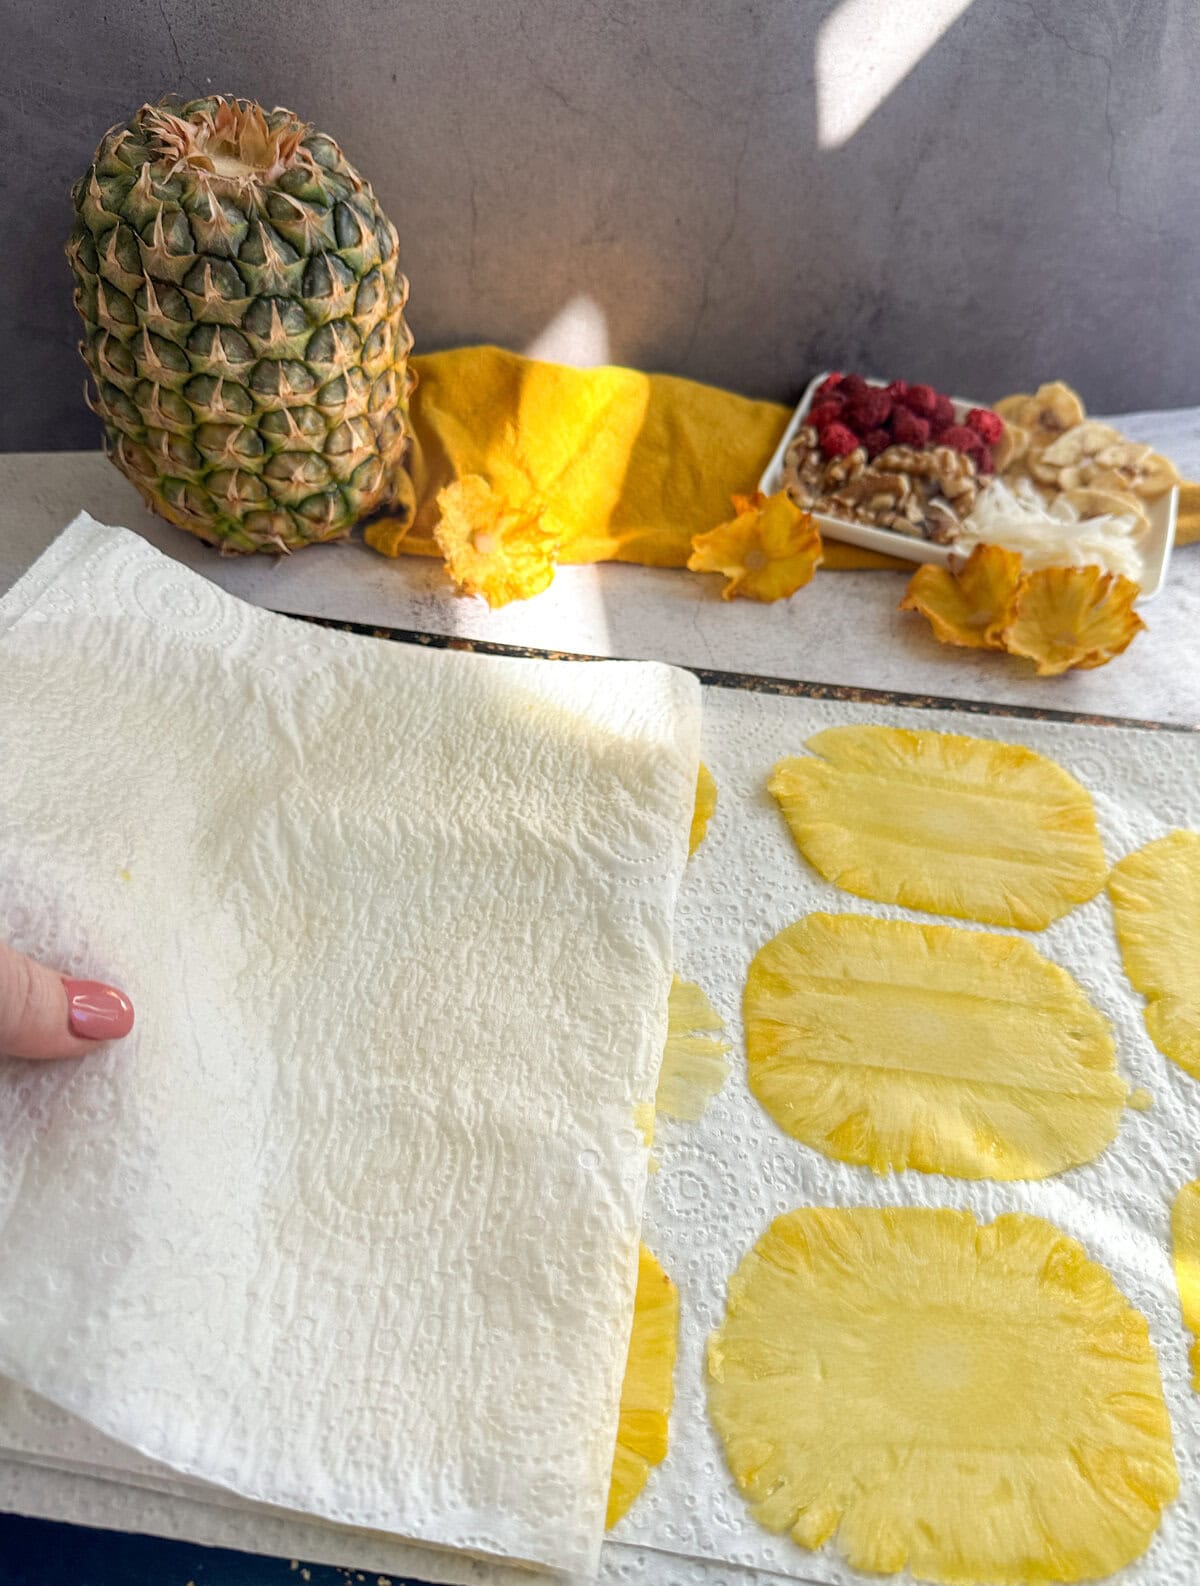
On two large baking trays (assuming you use the entire pineapple) I set up paper towels, doubled for thickness, using 4 each time, so the length is two paper towels, doubled. I then lay the thin slices of pineapple on the paper towel.
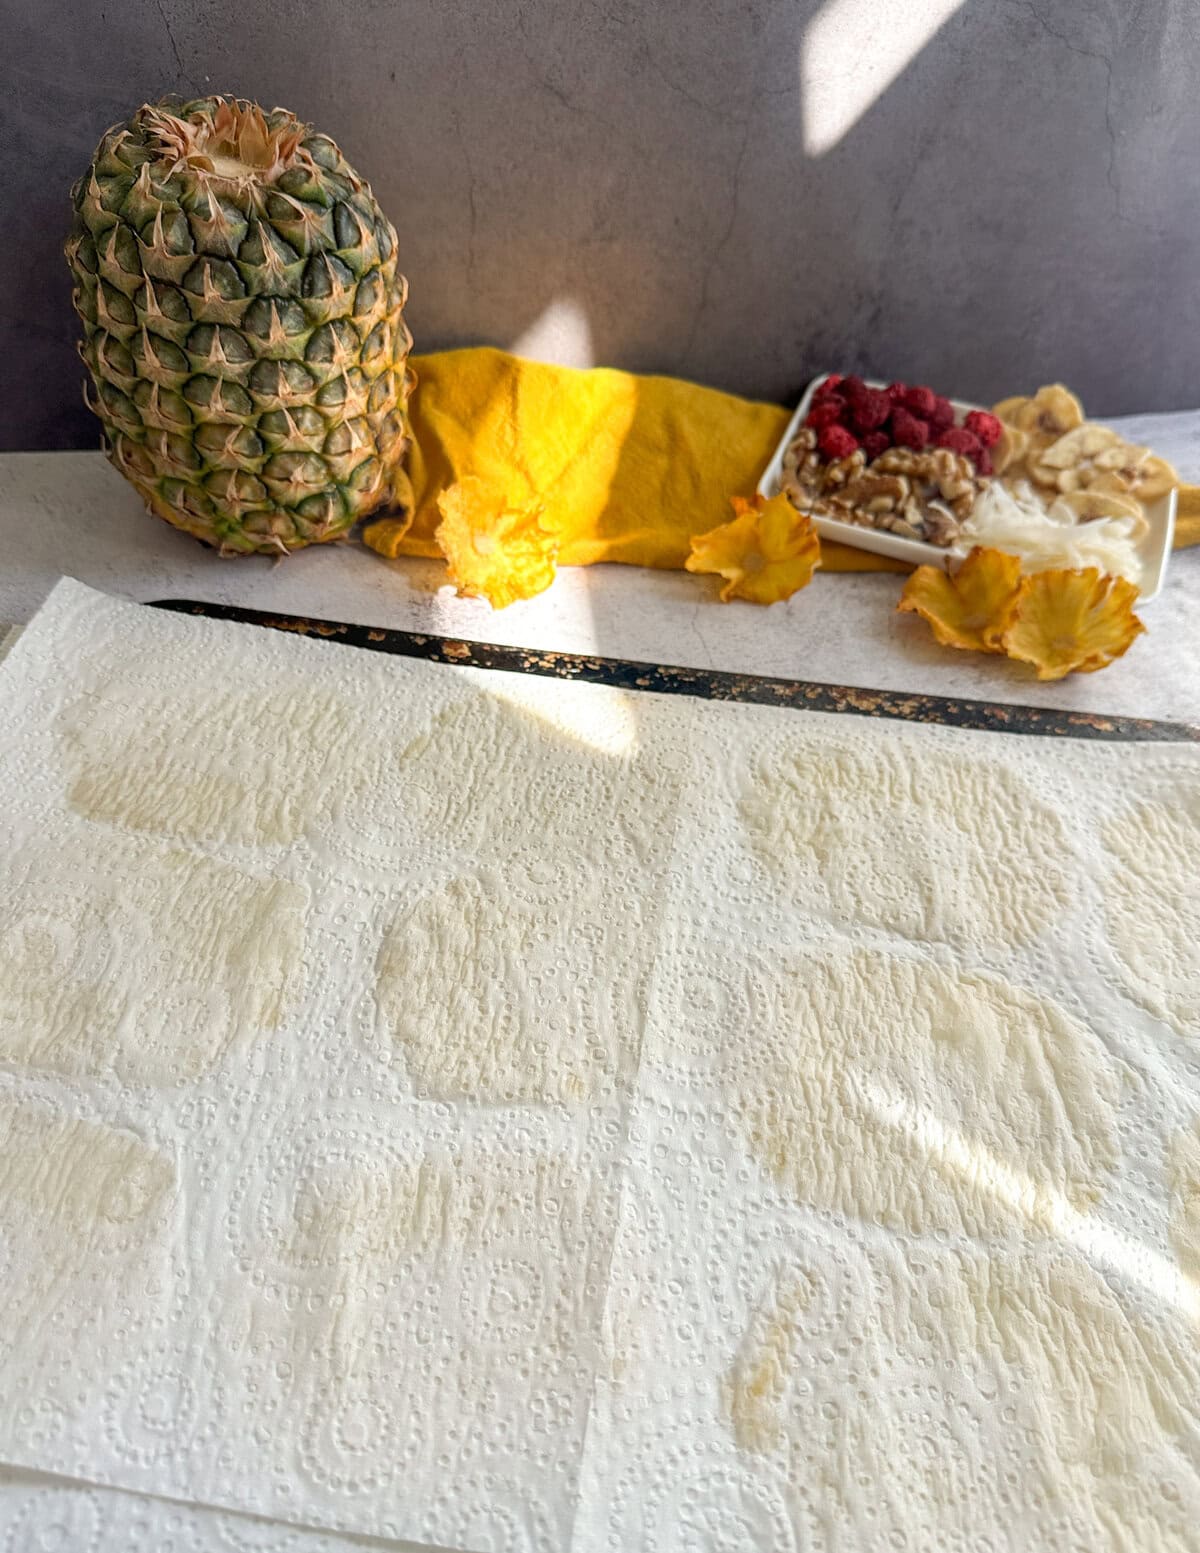
Then I cover these slices in another doubled over section of 2 paper towels and gently press down across the towels to draw as much moisture as I can.
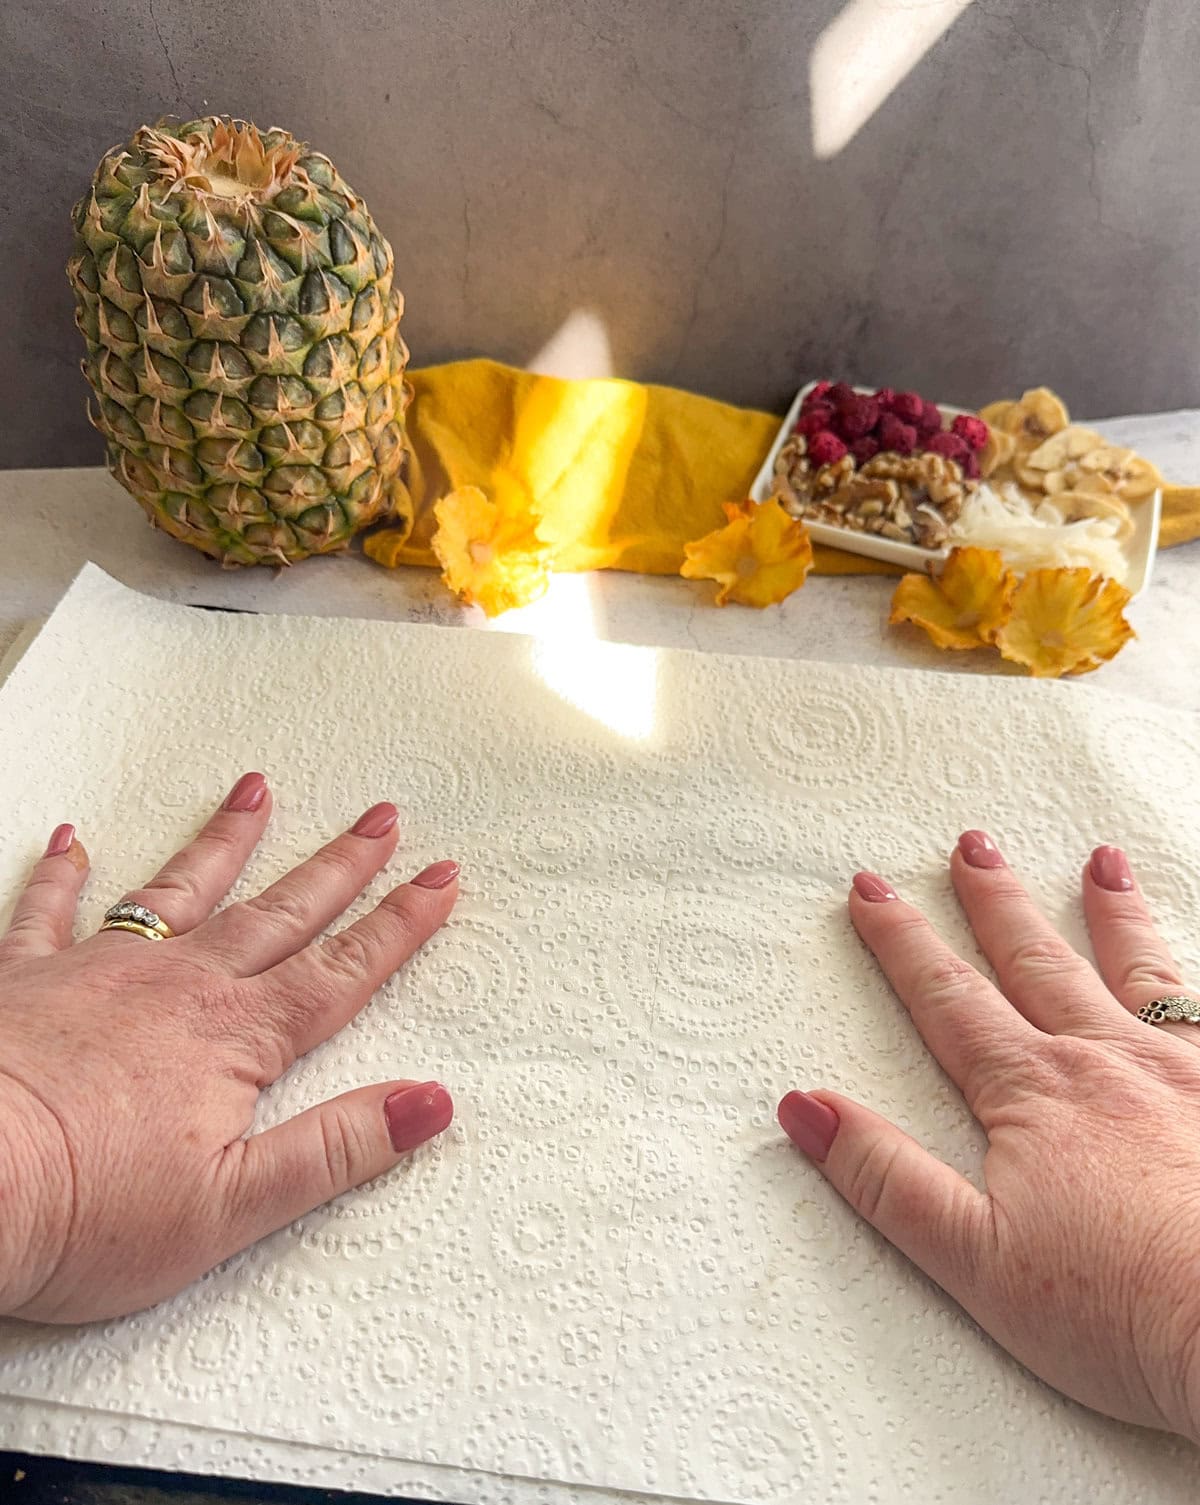
I then lift two corners of all the paper towels, and flip the entire thing over so the base paper is now on top. Then I carefully peel off these top sections of paper towel, they will be quite damp at this stage of the process. So I discard them, and repeat with another 2 section of paper towel, doubled.
Press across the top of the paper towels to draw out moisture and then flip the whole thing over again. I repeat this process until the slices of pineapple feel quite dry to the touch and the paper towels are now largely dry when I peel it off.
Sometimes I can go through several stages depending on how wet the pineapple is!
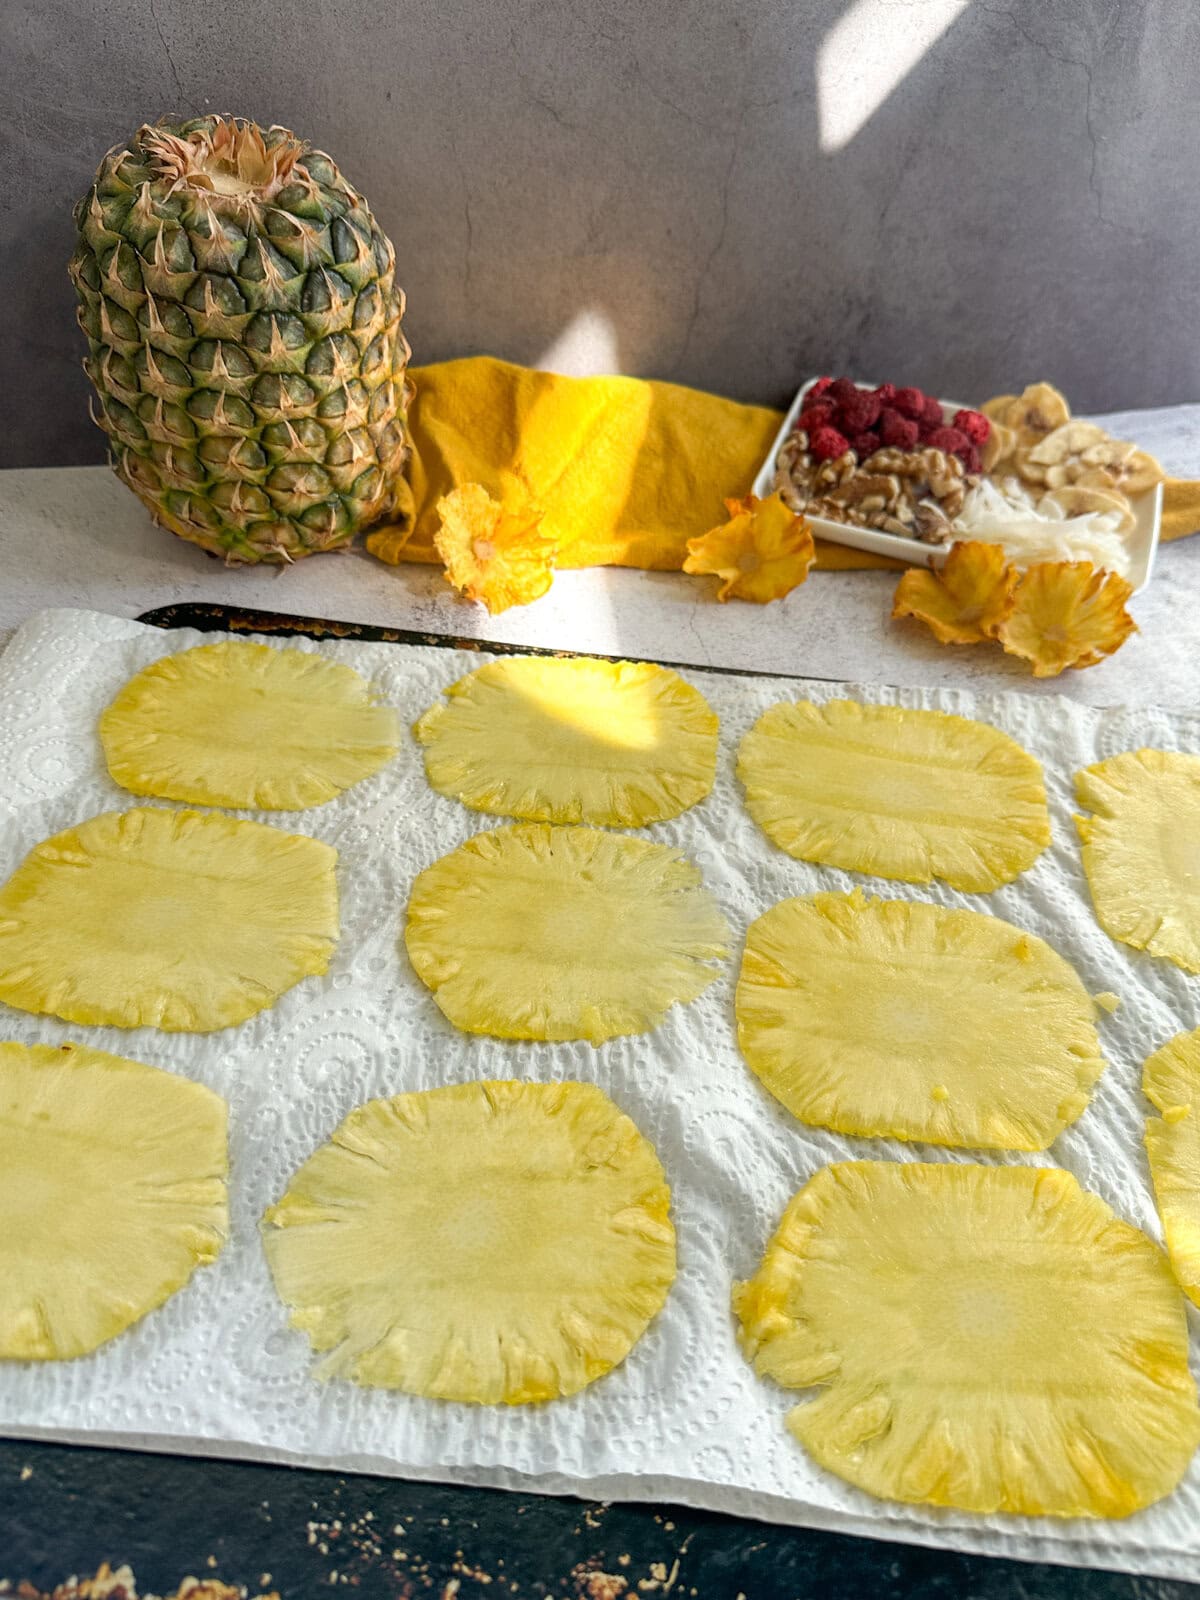
Once I am happy it is dry I lay a large piece of baking paper over the pineapple slices, and once again lift it all up and flip over so the baking paper is the bottom layer on the tray. Then I carefully peel off the paper towels and place in a preheated oven.
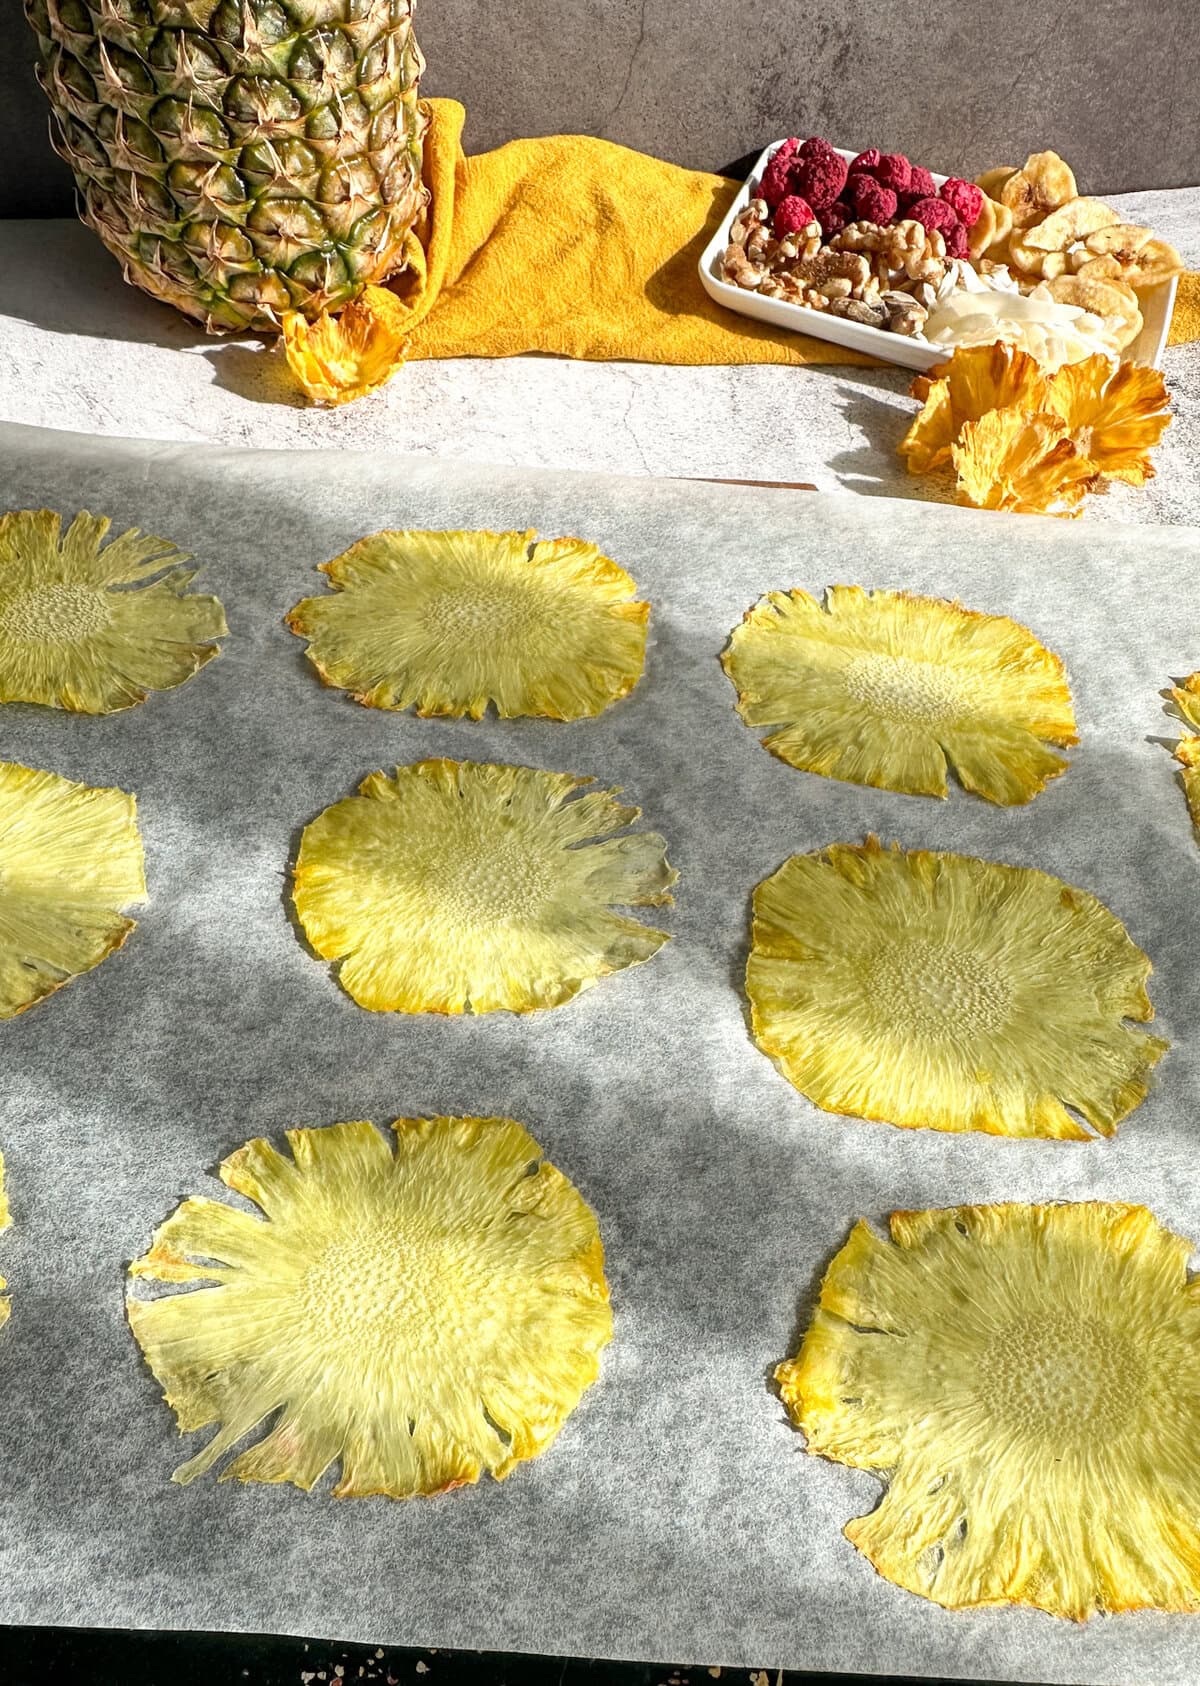
This is how the flowers look after 40 minutes in the oven, still damp but starting to dry out.
The oven only needs to be at 100C on the bake setting. I bake these for 40 minutes, then carefully turn over each slice, then bake for a further 30 minutes, then I remove them and turn them over every 15 minutes from this stage on, rotating & turning the oven trays if need be for hot spots.
This ensures that they are evenly drying and those that are smaller or on the edge do not overcook.
They are done when the hard centre of the pineapple slice feels dry and the edges crispy, but before they brown too much at the edges or curl. They should not break or crumble, or they have tried too much.
Then working quickly, I press each slice into a mini muffin tray, holding it in there for a beat to ensure it will hold its shape and repeat with all the remaining slices.
You will soon know if your slices feel damp or dry in this process. If some still feel damp then pop them back into the oven and work with those that are ready. I then leave it to firm up for a few hours.
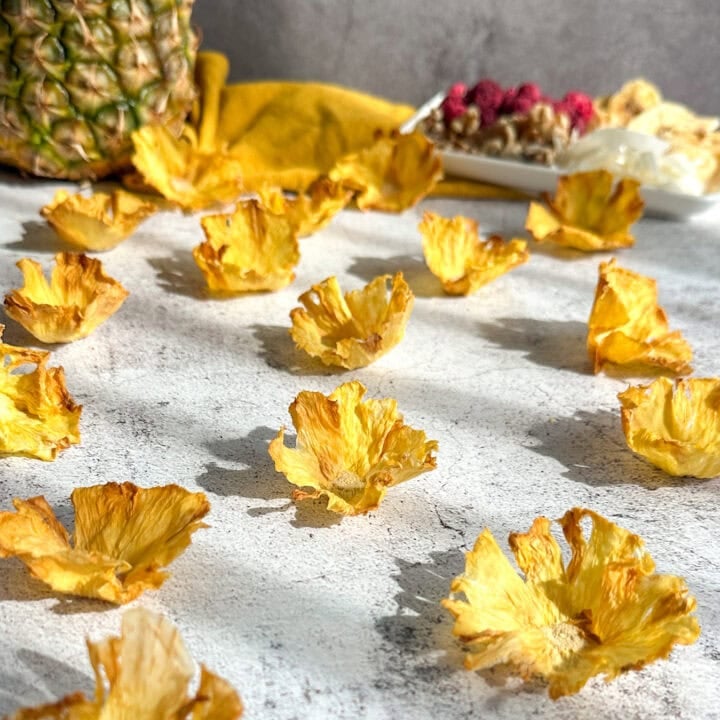
Every single one looks different and unique, that is part of the beauty of them. Once your pineapple flowers are dried properly, they will keep well.
I hope you enjoy this tutorial, such a fun and pretty garnish to learn how to make. In case you are wondering they definitely are not as tasty as fresh pineapple! But a gorgeous decoration that is safe to use on your cakes, cheeseboards or drinks.
Click here for the recipe for my delicious Hummingbird Cake
Here is How to Make Dried Pineapple Flowers
How to Make Dried Pineapple Flowers
A step by step tutorial for how to make decorative dried pineapple flowers.
Ingredients
- 1 Fresh Pineapple
Equipment:
- Large Sharp Knife
- Mandoline Slicer
- Two Oven Trays
- LOTS of Paper Towels
- Baking Paper
Instructions
- Preheat the oven to 100°C Bake and line two oven trays with paper towels, use 4 paper towels total per tray, folded over in half
- Slice the top and bottom off the pineapple then cut off the outside of the pineapple, removing any blemishes and seeds, (ensuring it is the right circumference to fit your mandoline if you are using one)
- Using a mandoline slicer on the thinnest setting, slice very thin fine slices of pineapple. Or use a large sharp knife to cut very thin slices.
- Lay each pineapple slice on the paper towels across the two trays, close together.
- Working with one tray at a time, place another section of 4 pieces of paper towels, doubled, over the pineapple pieces and press firmly across the paper to draw out the moisture.
- Grab all layers of paper towels at two corners and flip over the entire segment, so that the bottom layer of paper towels is now the top
- Carefully peel this off, it will be quite damp the first time, then replace with another set of doubled paper towels, press across to draw out moisture, then flip over again.
- Carefully peel off the damp paper towels and repeat this process until the paper towels are no longer damp, (you can reuse the dry side of the doubled paper towels once they no longer soak through both layers.)
- Once the paper towels and the pineapple slices feel very dry, place a large piece of baking paper over the pineapple slices and press into the slices.
- Lift all the layers one final time and flip, so now the baking paper is the base layer.
- Carefully peel the final lot of paper towels from the pineapple slices
- Bake the pineapple slices for 40 minutes, the remove from the oven and carefully turn each slice over
- Place back in the oven for 30 minutes. From that point on check & turn the slices every 15 minutes, rotating the trays or turning them if required for hot spots.
- The dried pineapple flowers are ready once the centre core of the slice of pineapple feels dry and the outside is firm, crisp but not too brown. Some will dry out faster than others.
- They should not break or crush during the next step, if they do they have dried out too much, nor should they feel soft and damp.
- Once the slice of pineapple is dry and crisp, remove from the oven and working quickly, press each slice into a mini muffin tin to create the flower shape.
- Press your finger into the middle of each slice to create the flower shape and hold for around 10 seconds to ensure it keeps its shape, if it springs back, press in again.
- If you feel that some slices are still a little damp or soft for this process, pop those ones back in the oven.
- All flowers will have a unique shape. Allow the pineapple flowers to dry in the muffin tin for 2-3 hours or I often leave mine out overnight or until I need to use them.
- If properly dried these last for a long time, they can be stored in the open air to stay dry for a number of days, or in an airtight container in the fridge or freezer for a few months.
- If they are soft or a little damp they will not keep as well, but you can always pop them in the oven again to dry out if needed.
- Use the flowers to decorate the top of a cake, or as garnish on a cheeseplatter or drinks
- Enjoy!
Notes
You may not require 24 pineapple flowers, if that is the case just use half a pineapple and a single tray
Can I make pineapple flowers in my air fryer?
I would not recommend this, due the slices being so thin and light, they will fly around the air fryer, and also you cannot make as many at a time this way.
Can I make pineapple flowers in my dehydrator?
Yes, follow your models instructions for this process, and check the timing to ensure they can still be moulded. You may wish to further reduce the temperature, and then finish drying in the muffin tray in the dehydrator.
Are dried pineapple flowers edible?
Yes they are edible but they are not enjoyable!
Nutrition Information:
Yield: 24 Serving Size: 1Amount Per Serving: Calories: 3Total Fat: 0gSaturated Fat: 0gTrans Fat: 0gUnsaturated Fat: 0gCholesterol: 0mgSodium: 0mgCarbohydrates: 1gFiber: 0gSugar: 1gProtein: 0g
JustAMumNZ.com, occasionally offers nutritional information for recipes contained on this site. This information is provided as a courtesy and is an estimate only. This information comes from online calculators. Although justamumnz.com attempts to provide accurate nutritional information, these figures are only estimates.
I hope you have enjoyed that step by step tutorial. A lovely simple way to make something really special to jazz up your next cake, cheese platter or cocktails!
Thank you so much for stopping by to check out this recipe, you can follow me on Facebook & Instagram and also follow this blog via email to receive all my recipes as I publish them so check out the subscription box below.
Happy Baking!
Anna
Pin It!
I love hearing from you! What do you think of this recipe?