I would like to share some of the fun hairstyles I do on my girls hair each week on a Sunday night with my lovely likers. We have so much fun coming up with hairstyles, watching you tube clips and creating some by trial and error. With both girls having long hair it is easy to play around with different hairstyles. If your child’s hair is shorter then there are still a lot of styles you can try so it is worth a play.
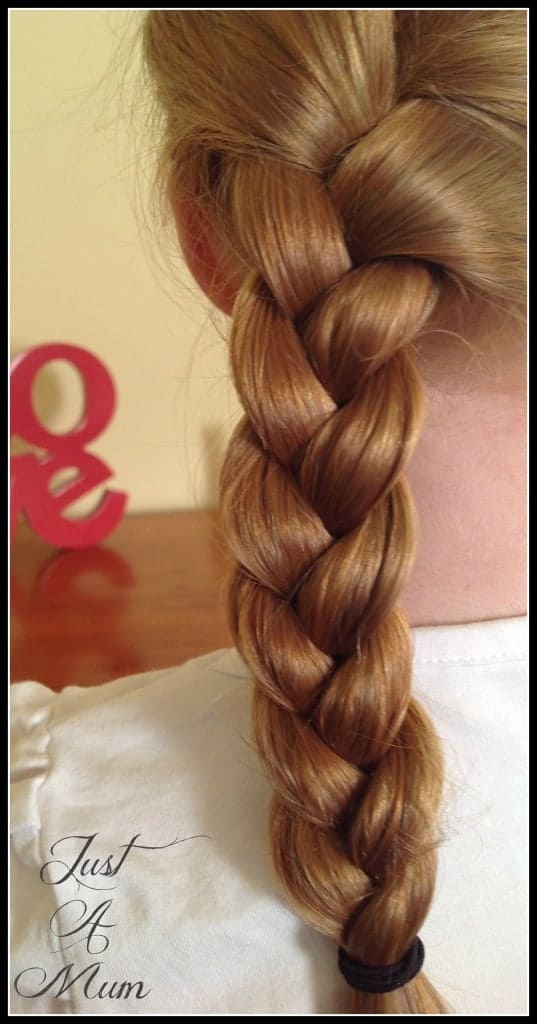
My eldest daughter is growing out her fringe so I have had to get creative to find ways to incorporate this into a hairstyle – so French & Dutch braids are common place for school for her, but I realised before I begin I should start with a basic plait as this forms the concept behind most braids and is also a really pretty style on its own – simple, quick and can be used in so many different ways.
Until I can figure out how to best video the hairstyles (I only have so many hands lol!) I will continue to show you step by step with photos and hope that you can follow my garbled instructions! Any questions I am never far away so do ask, it is lovely to hear from you. Just use the comment section below – or email me at justamumnz@gmail.com.
Forgive me if this seems a little simple – but there will always be people in the world that are just starting out with hairstyles so best we start at the beginning, especially handy for Barbie & My Little Pony hair if nothing else! 😉
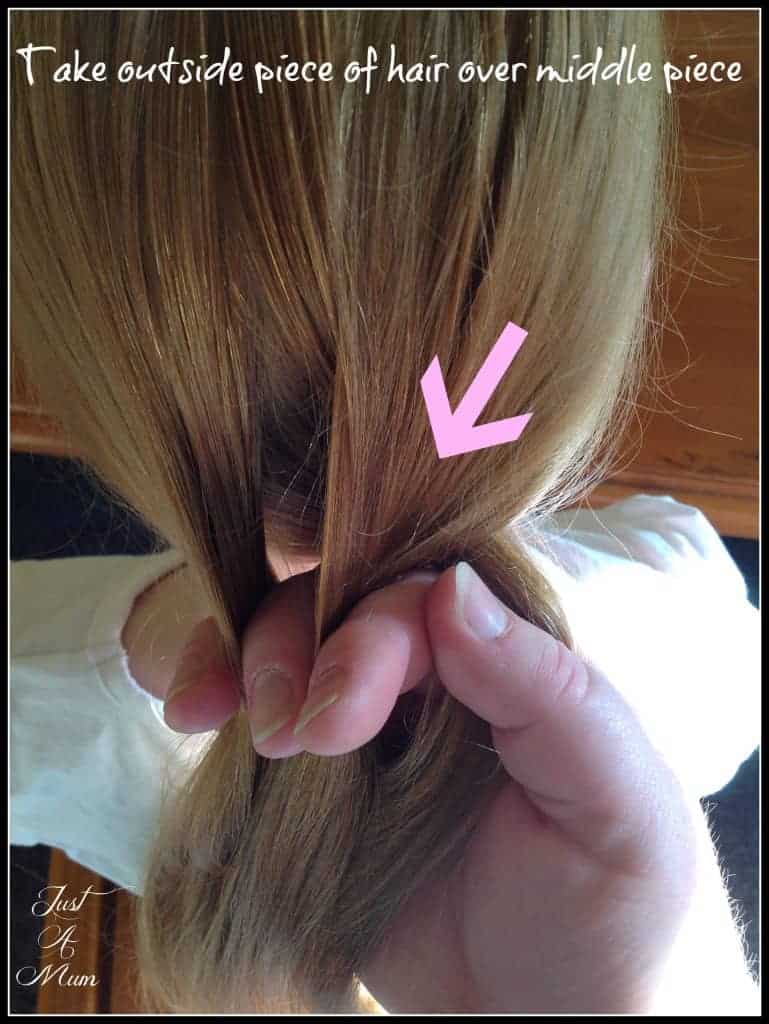
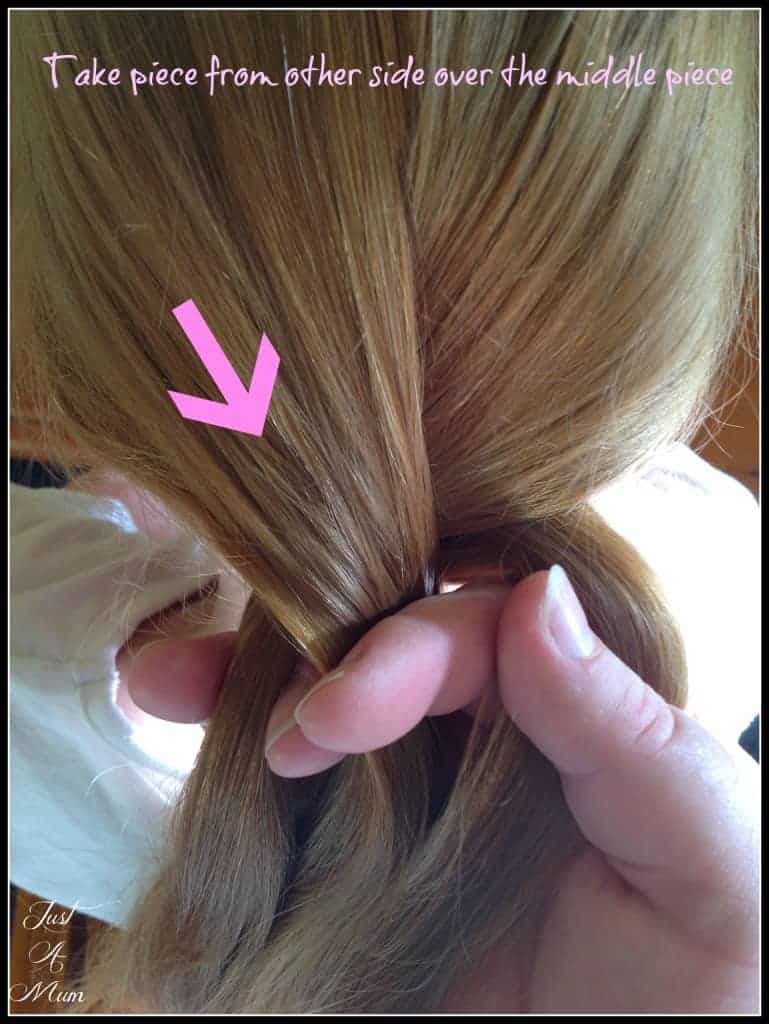
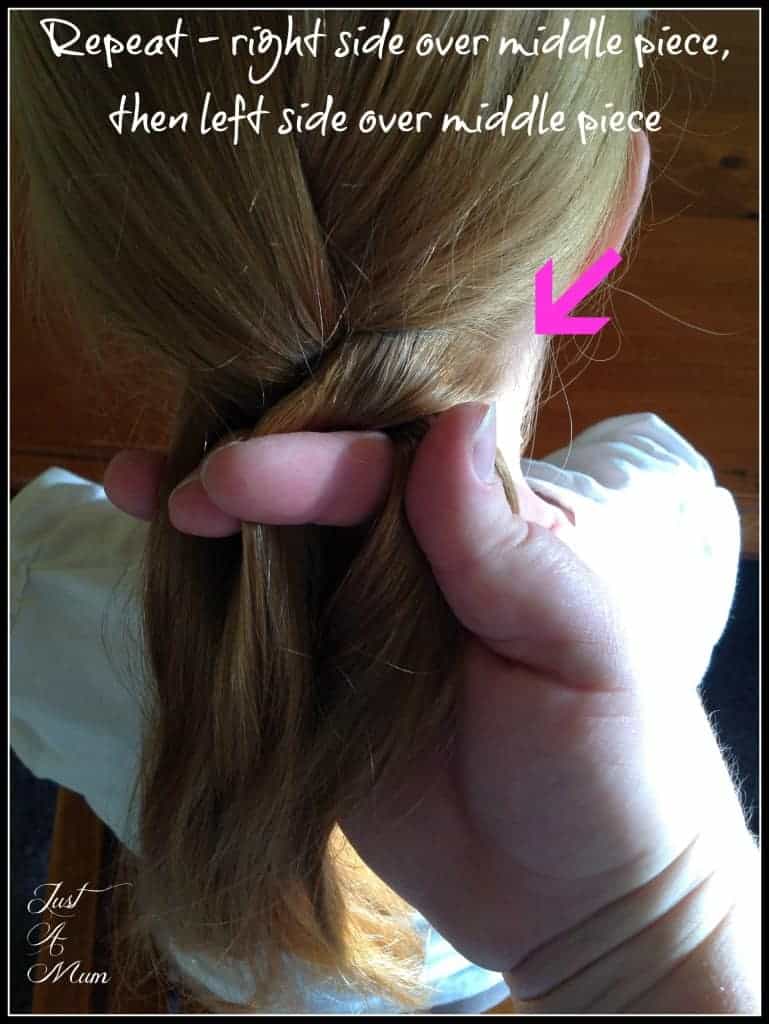
The basic concept behind a plait is to divide the hair into 3 even sections and begin to overlap the pieces of hair – always taking an outside piece over the middle piece – one side at a time until you run out of hair! Sound simple? Hope so – here are some photos to illustrate my process. 🙂
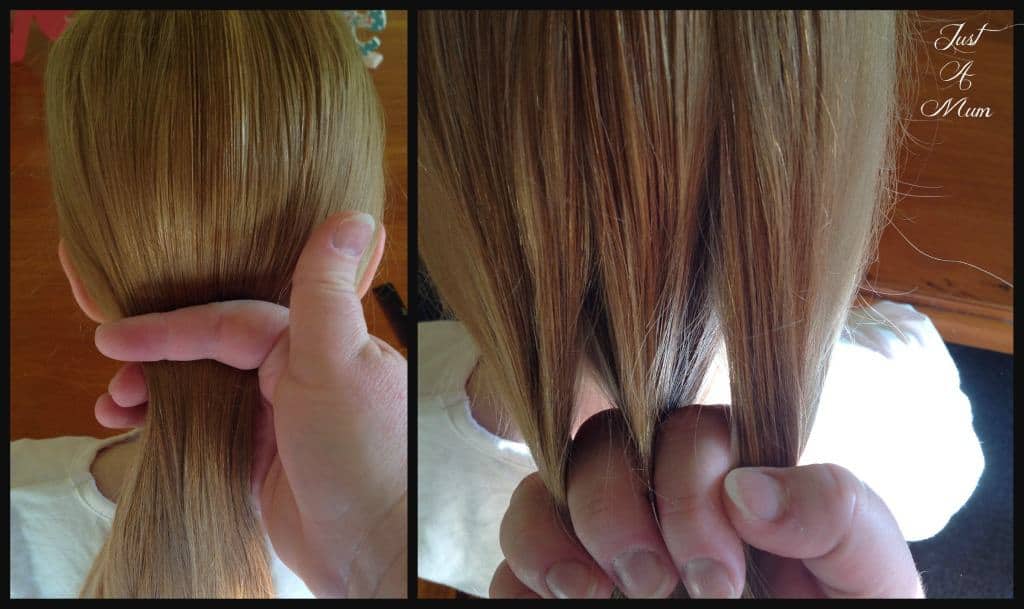
Step One: Brush or comb hair smooth. You can put hair into a ponytail with a hair tie before you begin – or as I have done hair just keep the hair loose. Divide hair into 3 roughly even sections.
Step Two: Take the right hand piece of hair over the middle piece of hair – trying to keep tension quite tight.
Step Three: Take the left hand piece of hair and take it over what is now the middle piece of hair
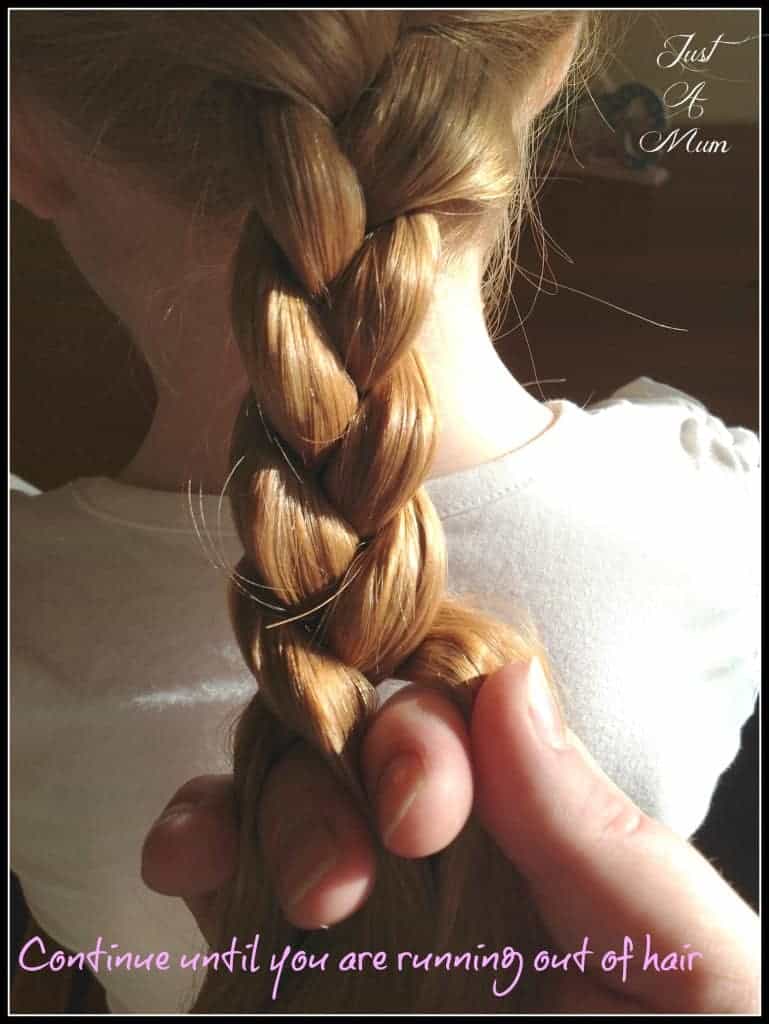
Step Four: Continue to take the outside piece over the middle piece, one side at a time.
Step Five: Continue all the way down the hair until you begin to run out of hair – or are about 1-2 inches from the bottom of the hair.
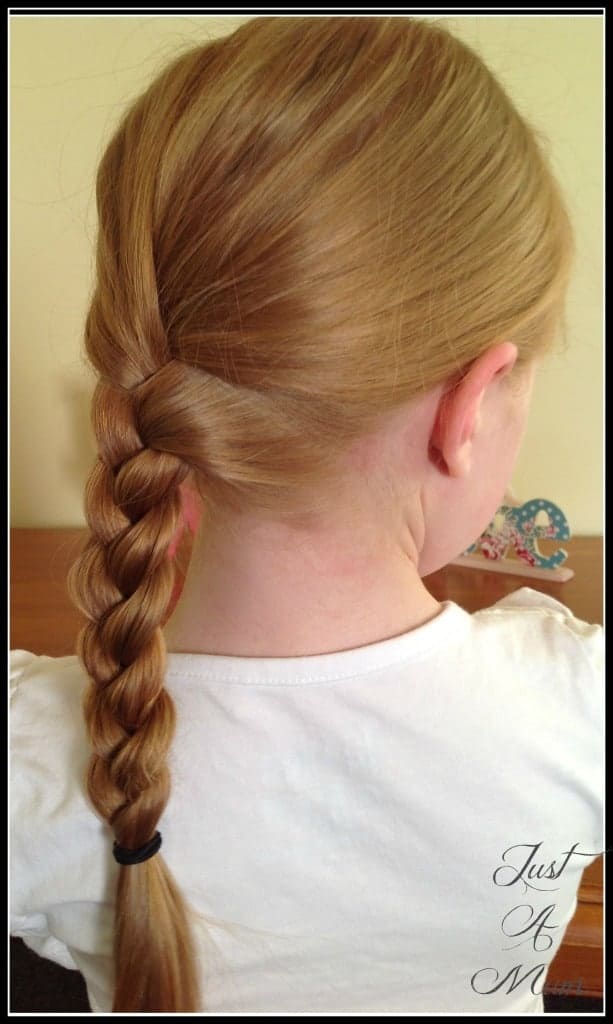
Step Six: Tie a hair tie around the bottom of the hair – secure it tight and you are done!
So simple but so pretty. No fuss, takes very little time but makes the hair look really tidy. You can use this style in so many ways! Little plaits taken from both temples bought together at the back of the hair for a half up half down style, from a high pony, a side plait, two plaits in pigtails – there are so many options. Also a great style to do on your own hair.
If you give this a go for the first time please do send me a photo! I love to see how you are getting on with my recipes, fun kids activities and now hairstyles.
Thank you so much for stopping by to check out this recipe, you can follow me on Facebook & Instagram and also follow this blog via email to receive all my recipes as I publish them so check out the subscription box below.
Happy Baking!
Anna
Gemma says
Thanks for sharing your basic hair plait tutorial. Its simple and easy to follow
justamumnz says
Thank you ?