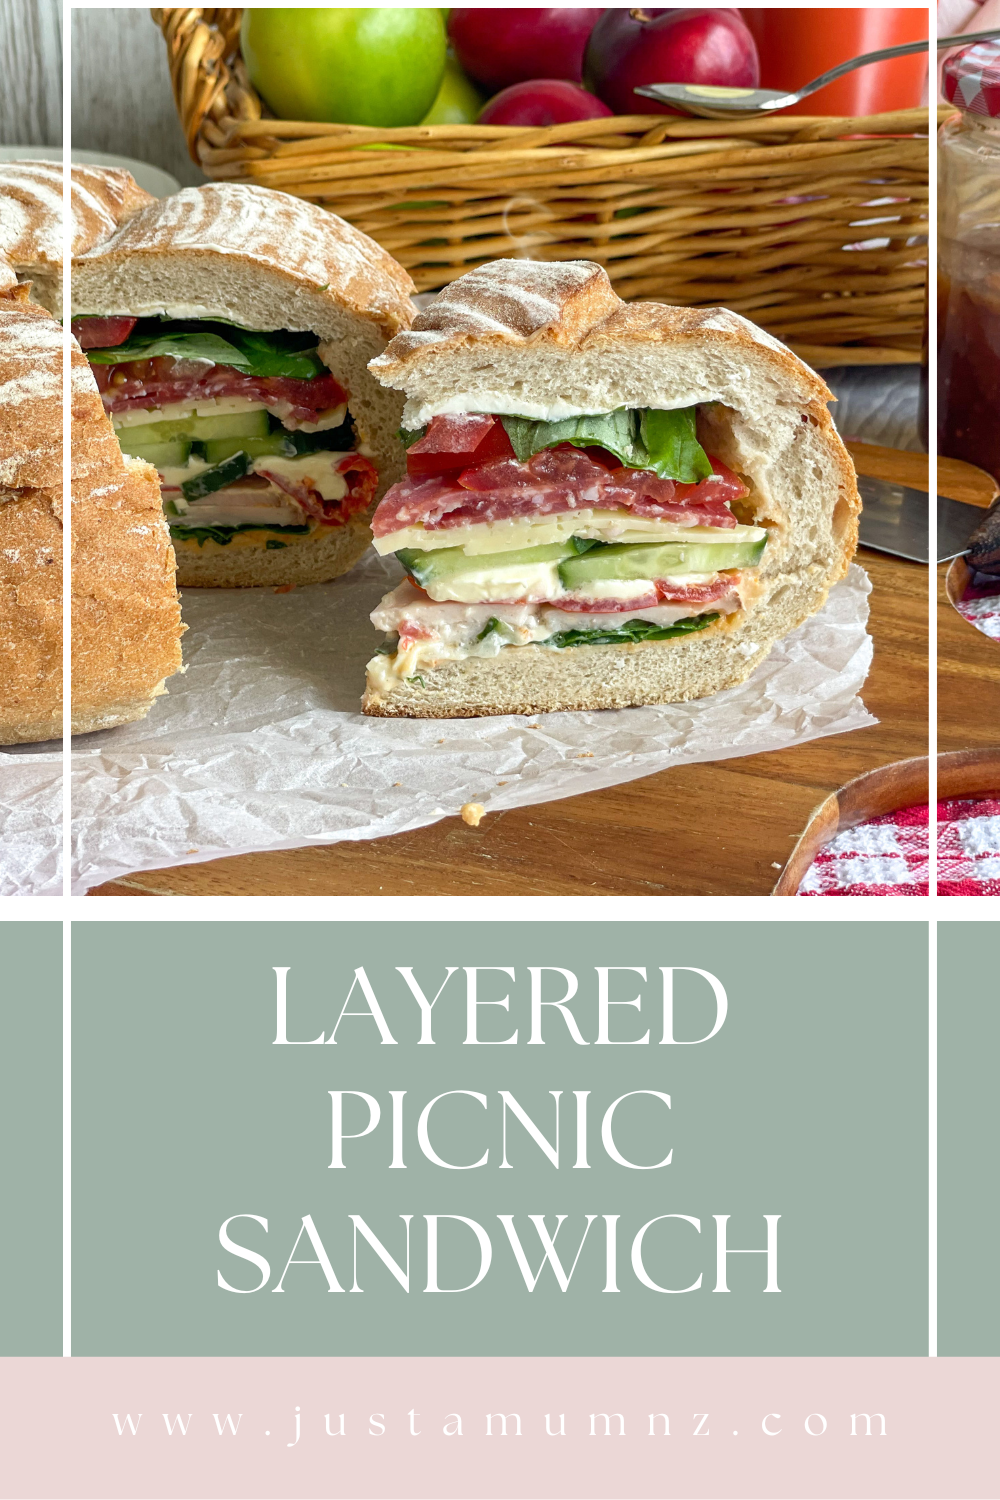
A delicious fun fresh way to serve your sandwiches in time for summer! This layered picnic sandwich is sure to impress.
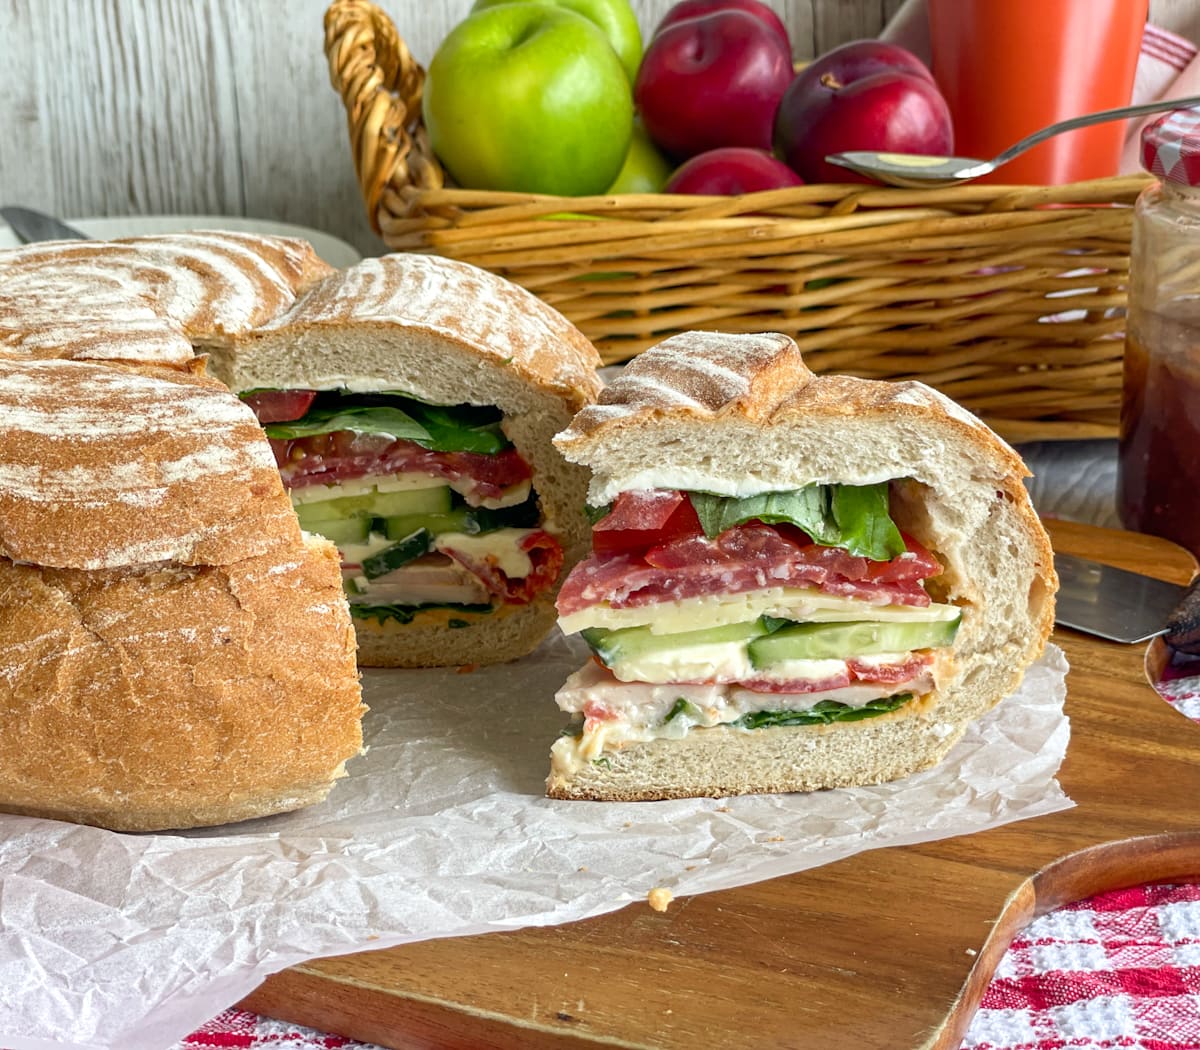
Summer means long lovely days and hopefully a few picnics and road trips thrown in the mix also. I wanted to share a fun idea to jazz up your picnic sandwiches.
This recipe is not a new one, there are variations to be found everywhere but I wanted to show you how I make mine, then you can take the wheel and make it your own.
This recipe is all about fresh ingredients to create your favourite flavour combos.
The more colour, texture and flavours you can combine the better. A layered or stuffed picnic loaf is simply a mega sandwich with several fillings which is more like a sandwich cake!
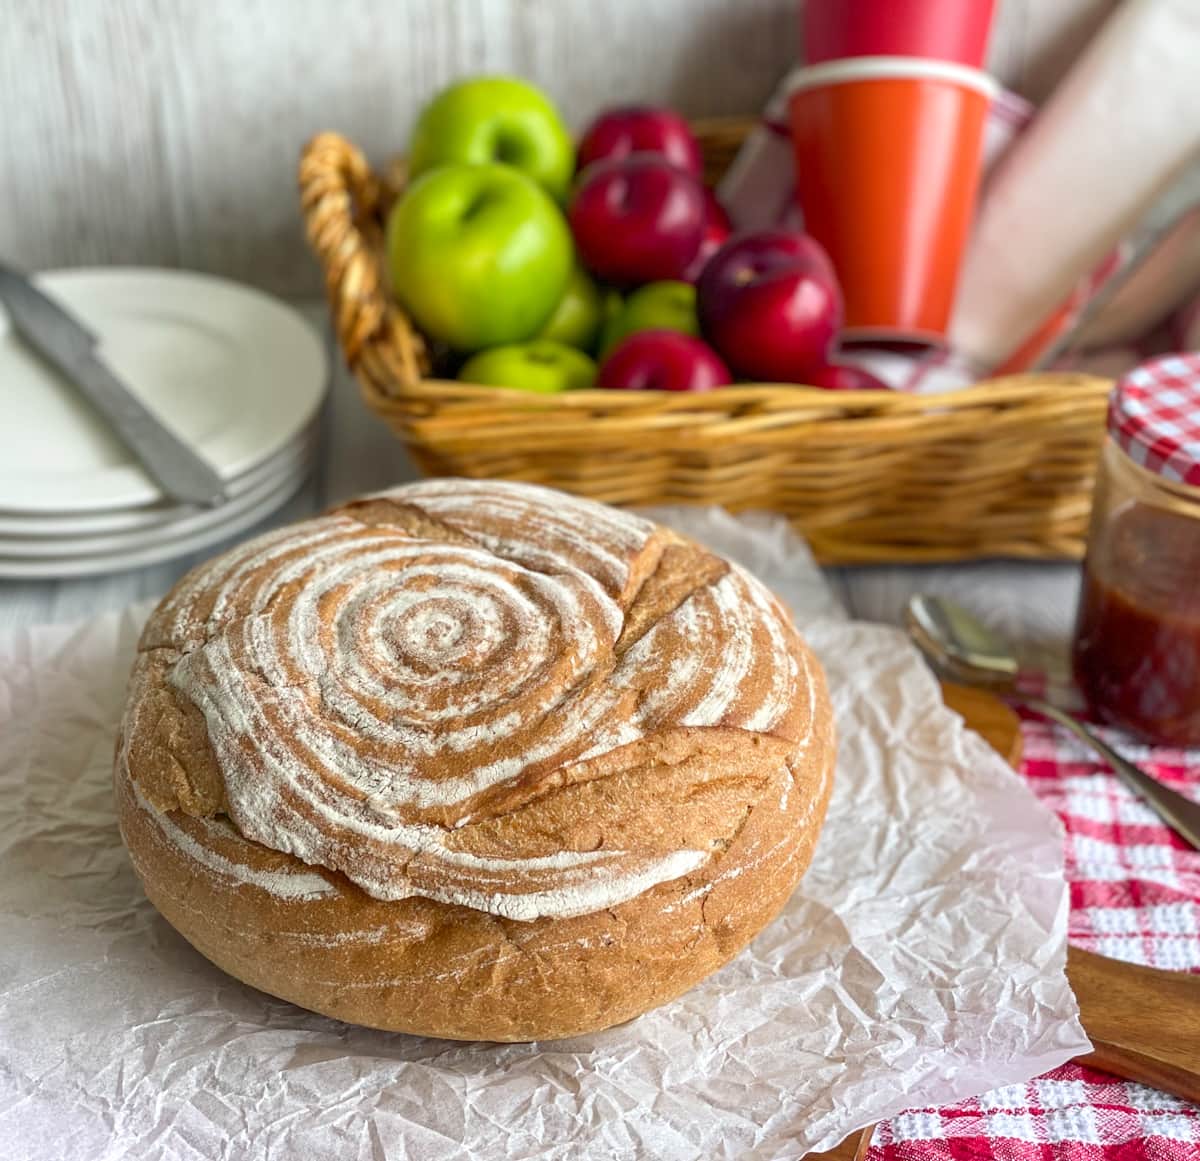
The base of this recipe is a loaf of your favourite bread, you can use a round sourdough cob loaf as I have done, or any large uncut loaf of bread will do.
The filling as I have mentioned is entirely up to you! I will share below in the recipe card exactly what I have used, but really you can complete your layers with any fresh salads, meats and spreads you like. Be sure to add some different textures and flavours.
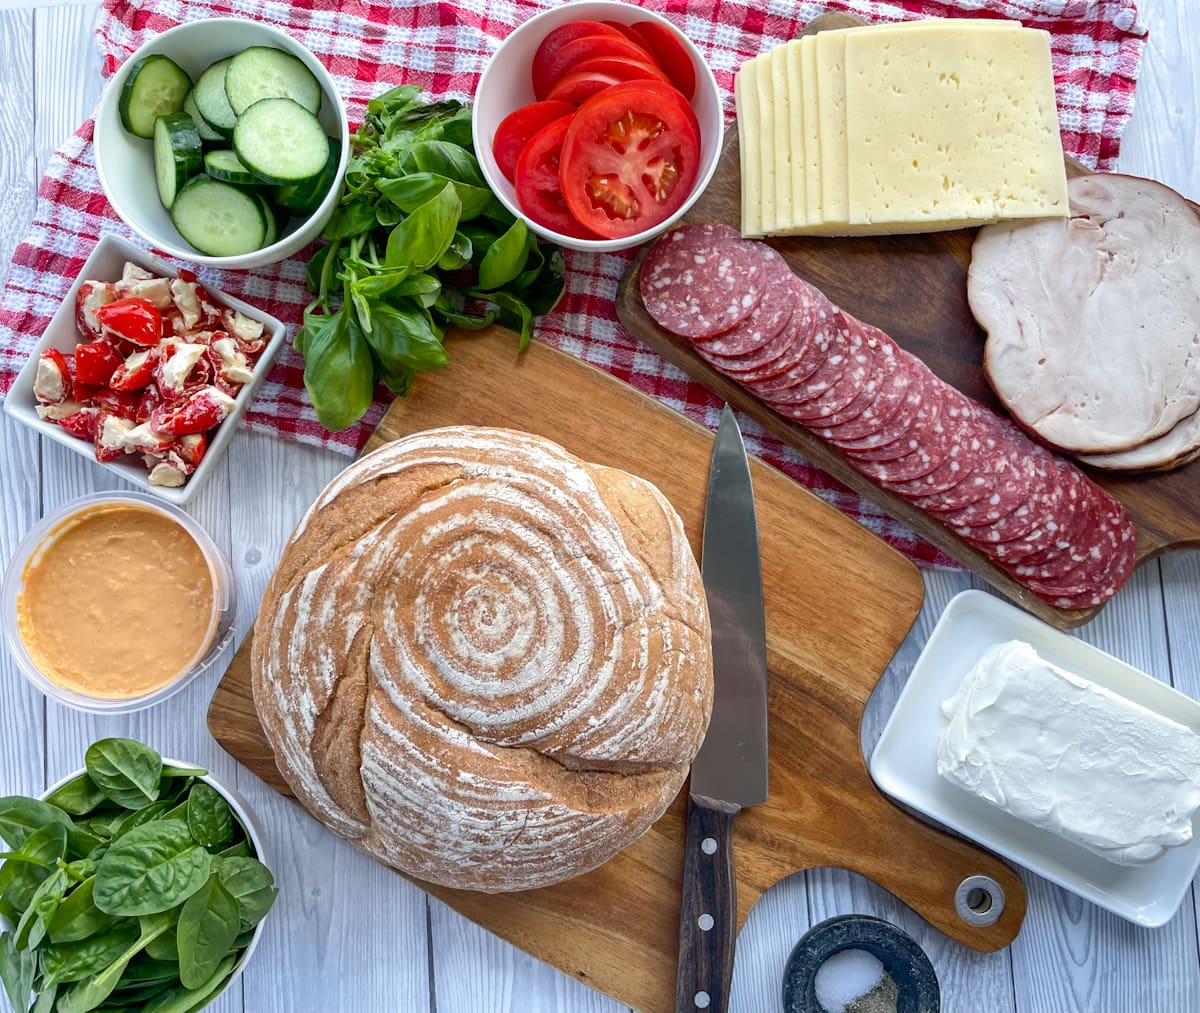
The fillings I have chosen today are
-
Cream Cheese
-
Red Pepper Hummus
-
Spinach
-
Turkey, Shaved
-
Mini Stuffed Bell Peppers
-
Cucumber
-
Havarti Cheese
-
Salami
-
Tomatoes
-
Basil
-
Salt & Pepper
The method is super simple also. You will want to allow a few hours for the loaf to sit and meld together the flavours and squish the ingredients together.
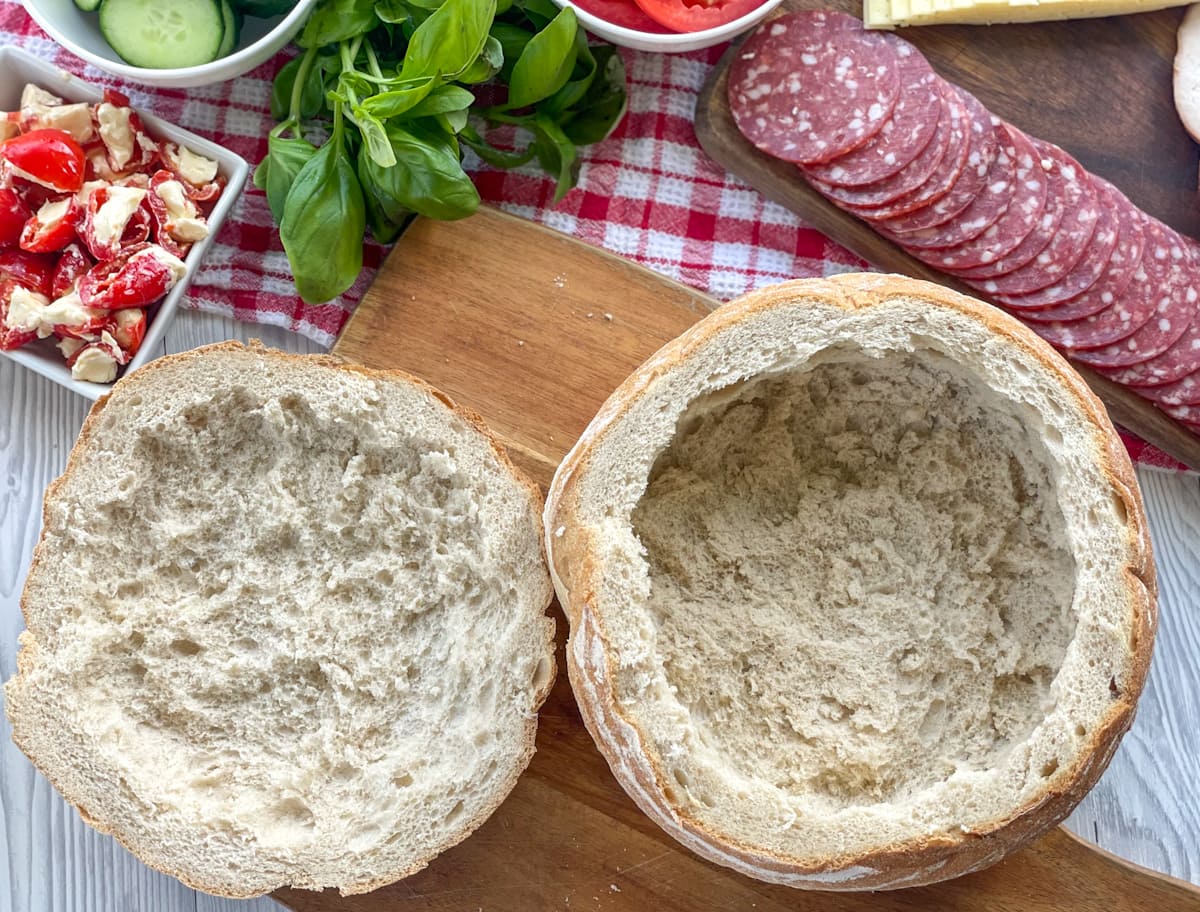
First step is to cut the top of the loaf off, about a quarter of the way down. Then remove the bread from inside both the base and the lid, leaving about a 1 cm thickness around the side of the loaf to hold its shape.
You can use the stuffing to make breadcrumbs, I will share my method for this at the end of this post so check that out too.
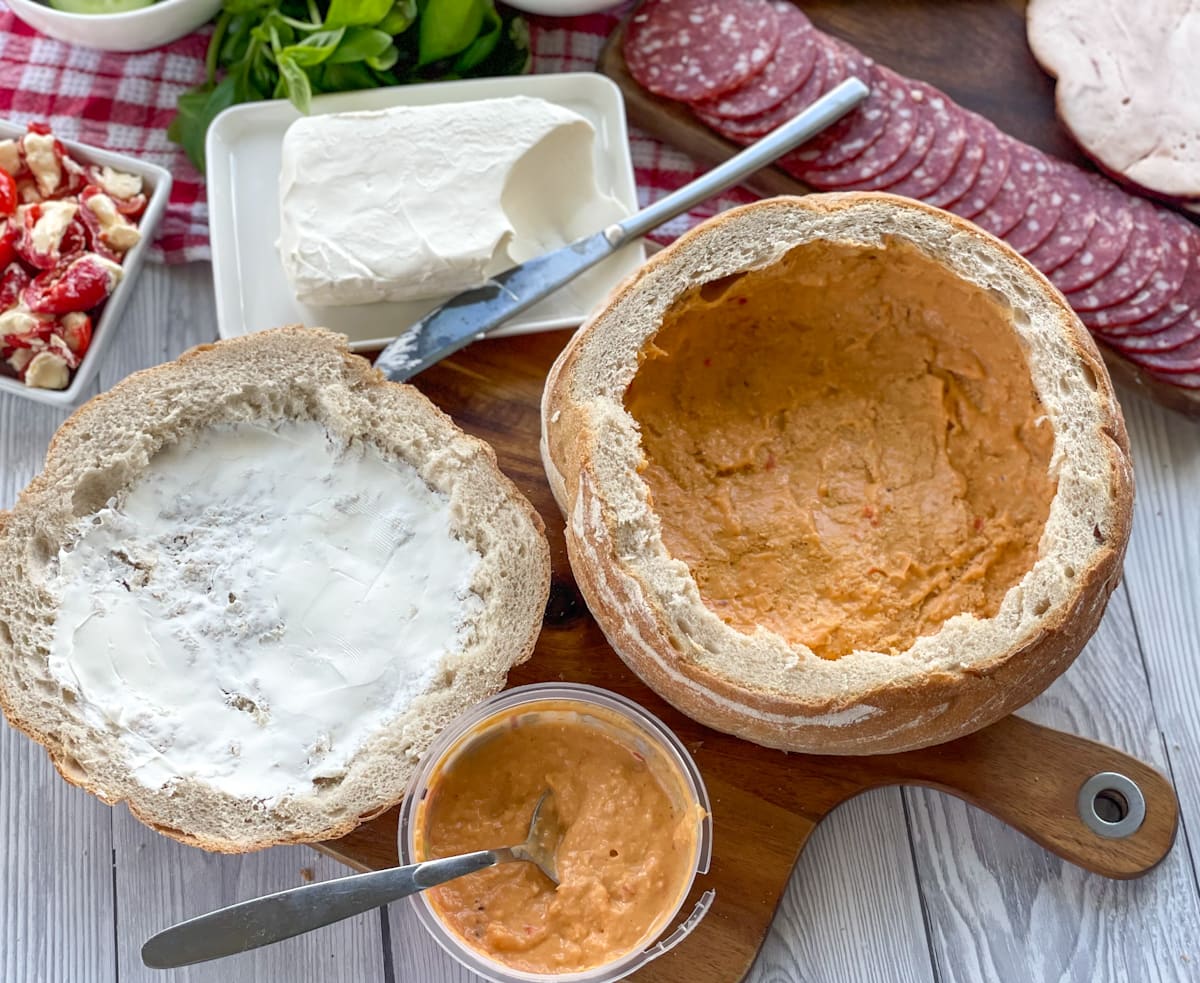
Then spread around the dip or spread of your choice. I have chosen a lovely red pepper hummus for the inside of the base and cream cheese for the inside of the lid of the loaf.
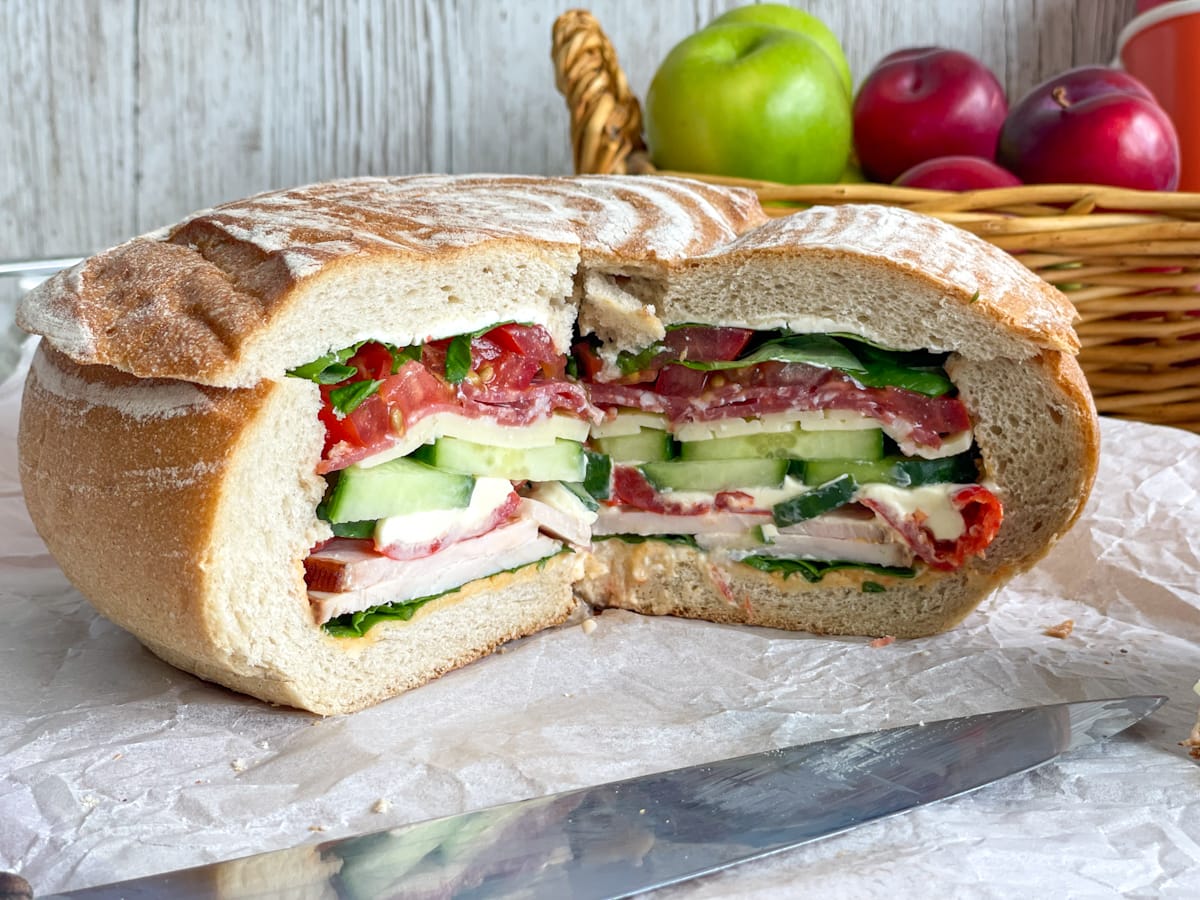
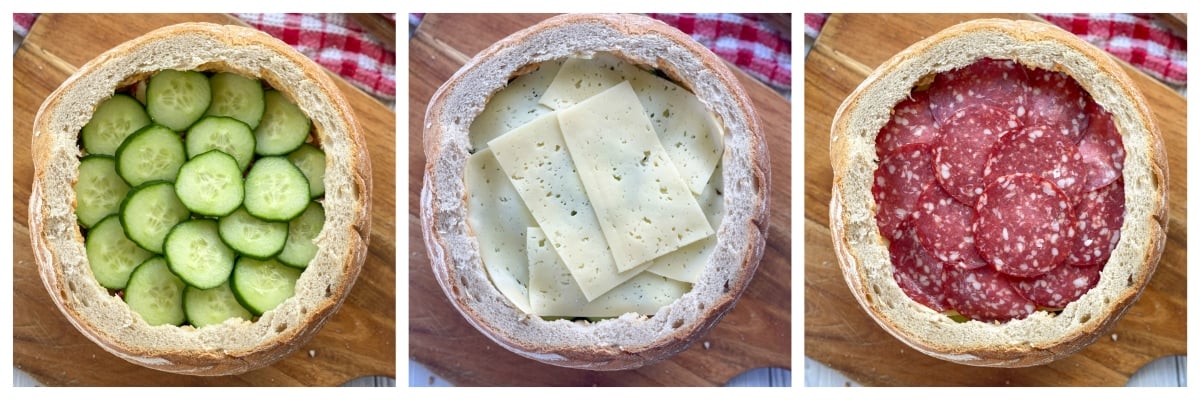
Then you simply add your layers! I like to use a few different cuts of deli meat, shaved turkey and salami is what I have used today and a lovely flavourful cheese.
Then think of vegetables that will complement your flavours, and add the layers in a way where any wet ingredients are unlikely to cause the sandwich to go soggy. My stuffed peppers and salami have a wee spice hit and garlic flavours so this adds to the overall balance.
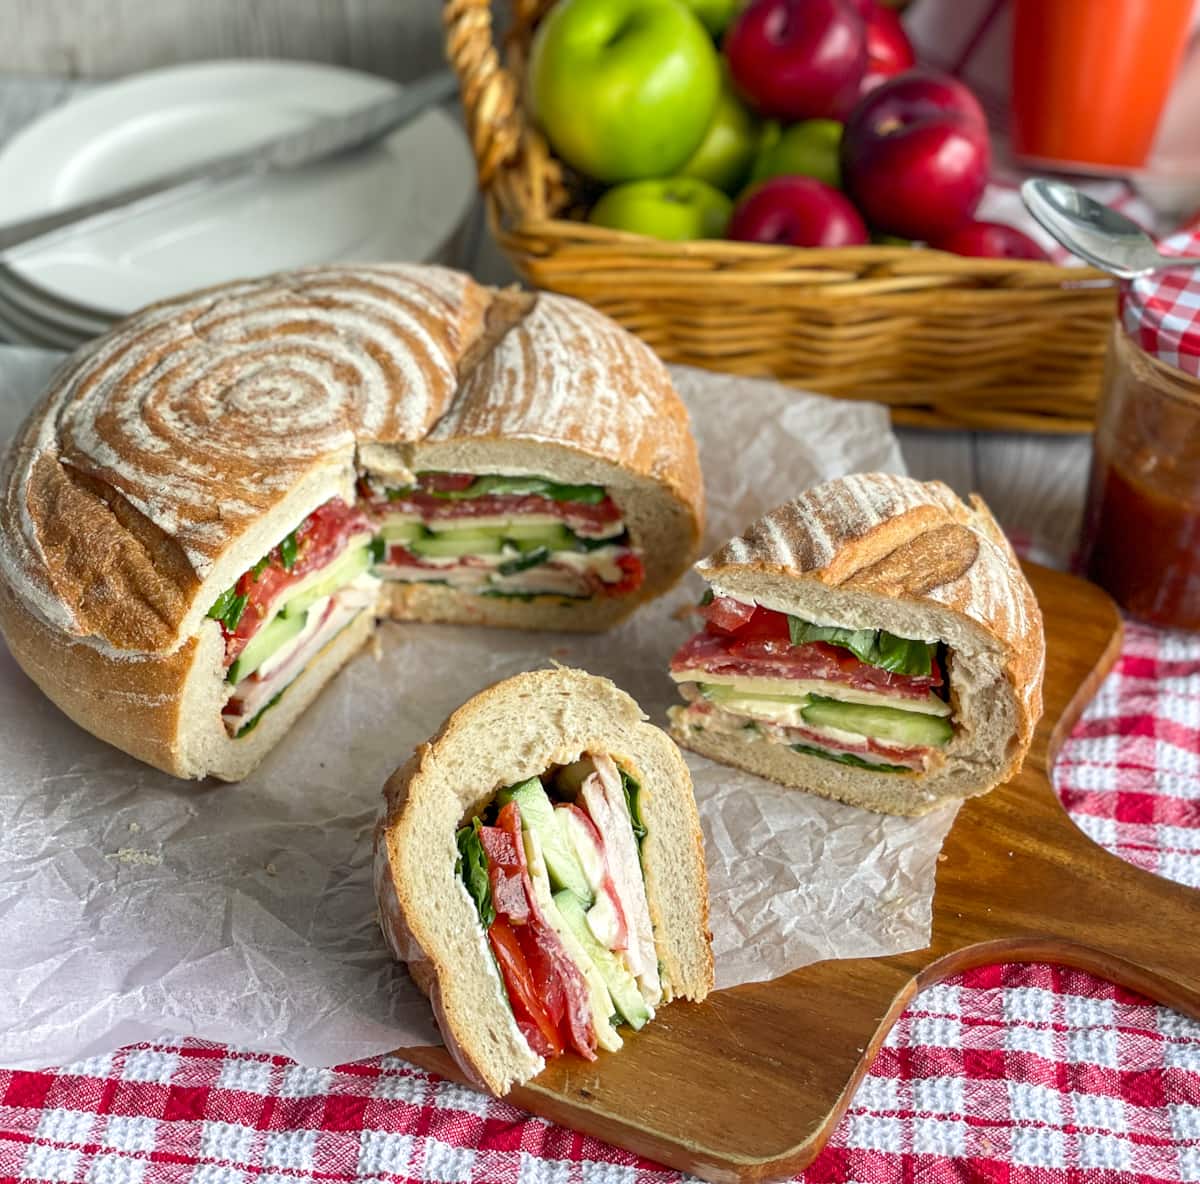
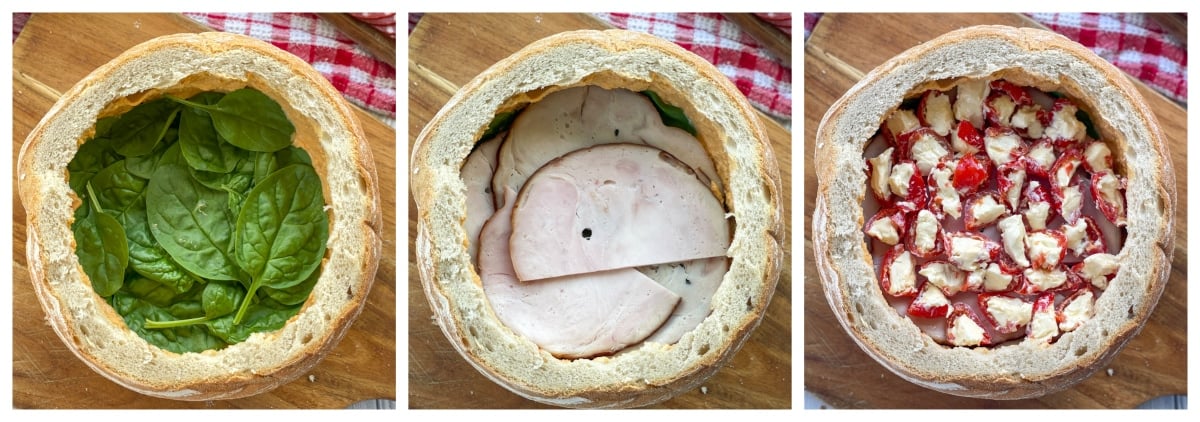
You will want to fill the inside really well and press each layer in firmly and right to the edges, so that it is quite tightly packed when you place on the lid. Then wrap firmly in plastic wrap and place on a plate with another large plate on top to press down the ingredients.
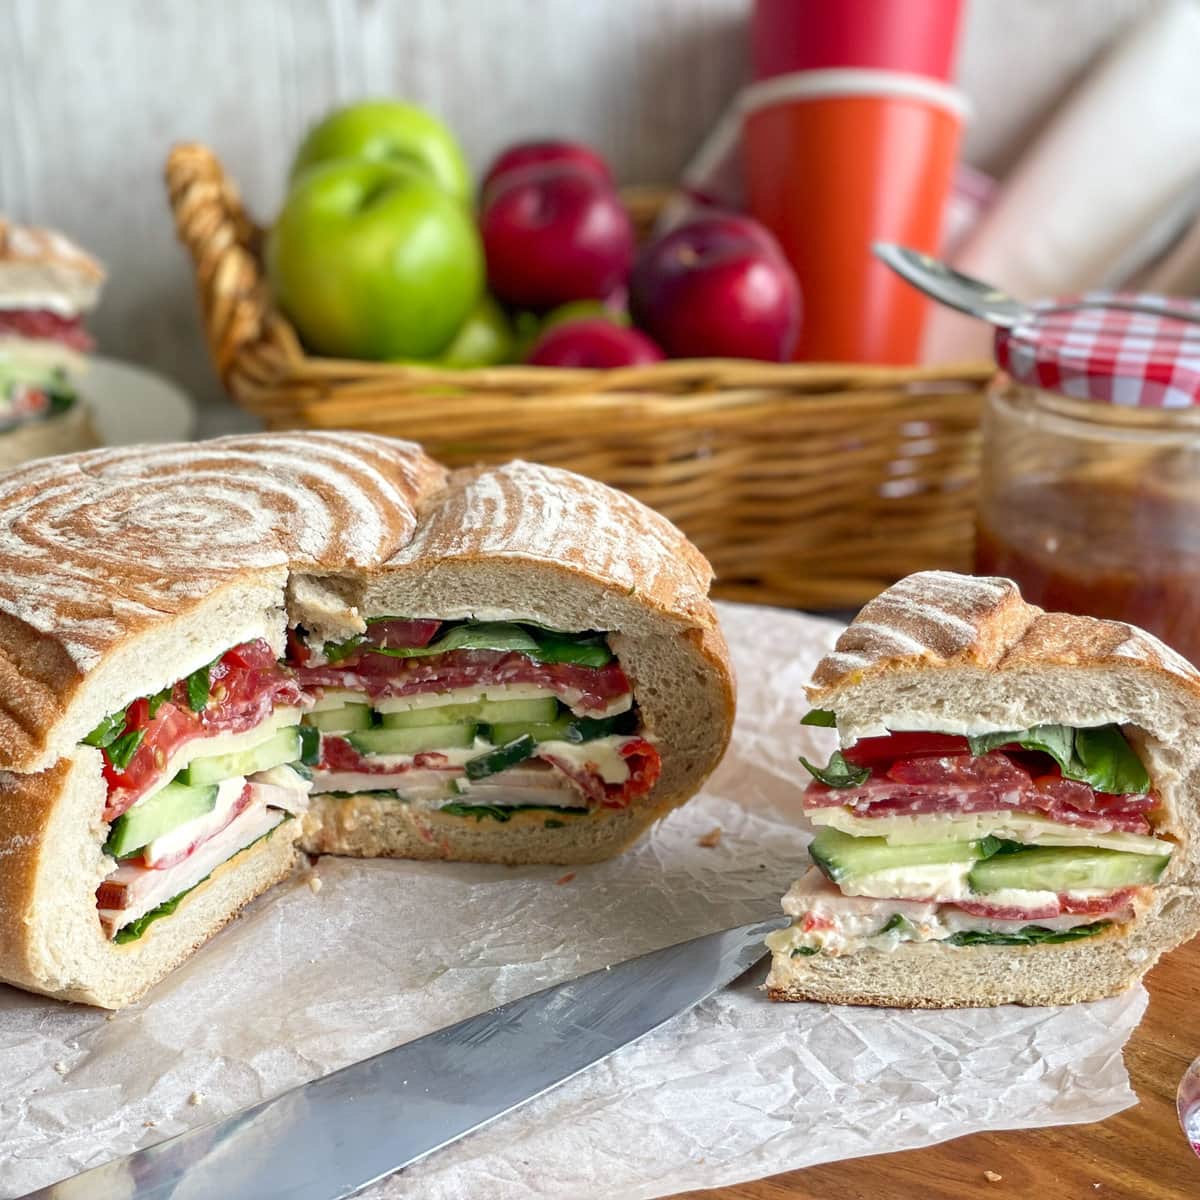
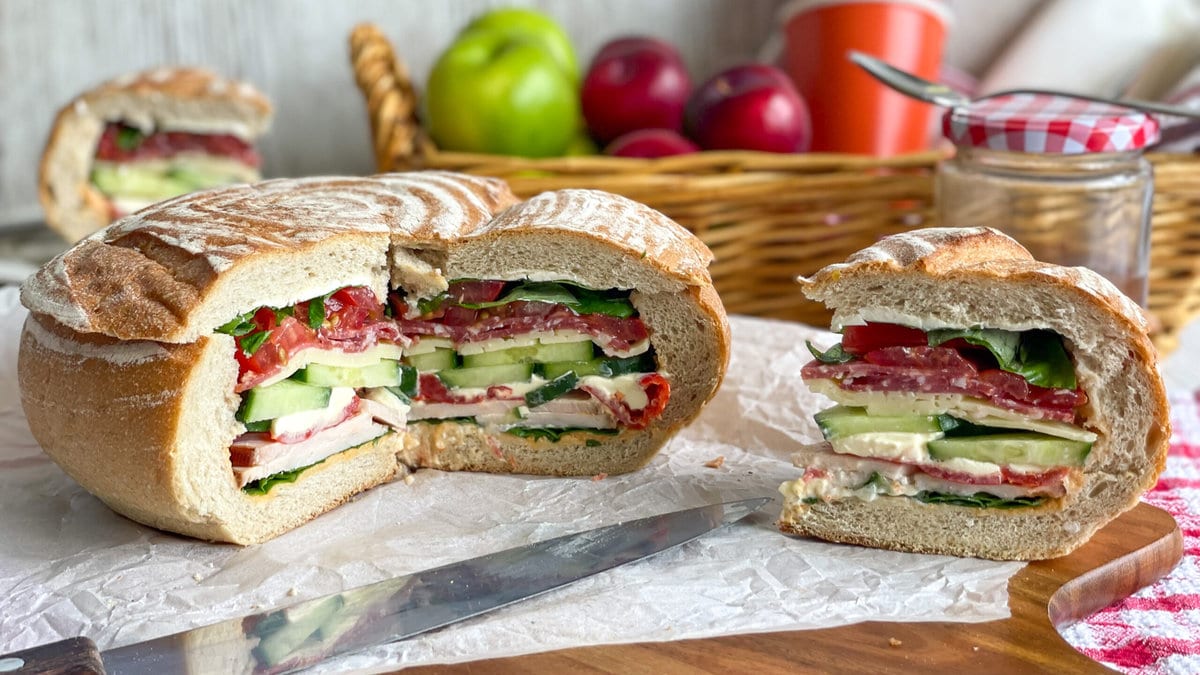
Chill for a few hours or overnight before serving. If you are taking this on the road take it whole and slice like a cake with a large sharp knife when you are ready to serve.
I hope you love this idea and I really look forward to seeing the variations you come up with.
Onto my recipe for Layered Picnic Loaf
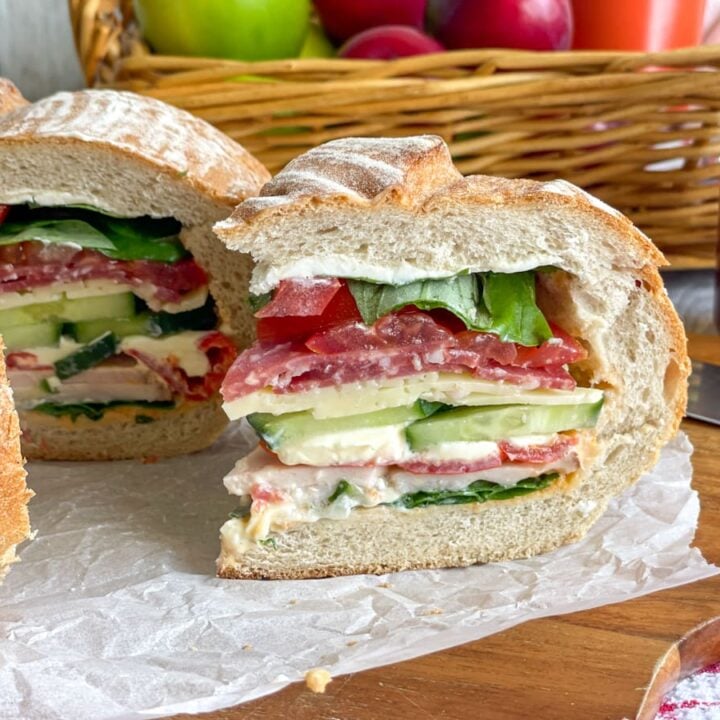
Layered Picnic Sandwich
Delicious layered sandwich using fresh ingredients.
Ingredients
1 Large Round Loaf, uncut
Your choice of spreads or dips, today I used:
- Cream Cheese
- Red Pepper Hummus
Filling Ideas
- Spinach Leaves
- Shaved Turkey or Chicken
- Stuffed Mini Bell Peppers or Roasted Red Peppers
- Cucumber
- Havarti Cheese Slices, or cheese of your choice
- Salami
- Tomato
- Basil Leaves
- Salt & Pepper
Instructions
- Slice the top quarter of the loaf off with a sharp bread knife.
- Remove the bread inside of the lid and the loaf, leaving a 1 cm edge to the loaf to ensure it holds its shape (see below for how to use this to make breadcrumbs)
- Spread the hummus on the base and sides of the main loaf, and cream cheese inside the lid of the loaf if using.
- Then begin to add your fillings in an even layer, press the ingredients right up to the sides of the loaf and press firmly down as you add each layer
- First I added the spinach to cover the base, then I added the shaved turkey, the sliced stuffed bell peppers, sliced cucumber, slices of Havarti cheese, salami, sliced tomatoes, basil and finally season with salt and pepper.
- You want the final layer to be right at the very top if not over the top of the loaf
- Replace the lid of the loaf and wrap firmly in plastic wrap.
- Place on a plate and then add a large plate upside down on the loaf to press on the loaf while it chills.
- Refrigerate for at least 2 hours or overnight to allow the ingredients to press together and the flavours to infuse.
- When you are ready to serve remove the plastic wrap and slice into cake style pieces.
- Enjoy!
Notes
How to make breadcrumbs from picnic loaf
Once the insides of the loaf been removed spread them on to a plate and allow them to begin to go stale or firm over a few hours at room temperature. This makes them easier to form a crumb in the food processor.
Preheat the oven to 150C Bake, or if using 2 trays then your ovens choice of multi cook or fan forced
Add the bread to a food processor and blitz until it forms fine breadcrumbs.
Spread the breadcrumbs onto one or two trays into an even thin layer
Bake for 10 minutes or until it feels crunchy to the touch and a light golden brown.
Allow the breadcrumbs to cool completely on the tray. Once cold add to a small airtight container or a ziplock bag in an airtight container. If stored correctly it should keep for 1 month in a dark pantry or you can freeze until you are ready to use, up to 3 months.
Nutrition Information:
Yield: 6 Serving Size: 1Amount Per Serving: Calories: 245Total Fat: 14gSaturated Fat: 5gTrans Fat: 0gUnsaturated Fat: 8gCholesterol: 50mgSodium: 361mgCarbohydrates: 16gFiber: 4gSugar: 4gProtein: 17g
JustAMumNZ.com, occasionally offers nutritional information for recipes contained on this site. This information is provided as a courtesy and is an estimate only. This information comes from online calculators. Although justamumnz.com attempts to provide accurate nutritional information, these figures are only estimates.
I cannot wait to hear what you think of this one, be sure to let me know in the comments below what fillings you chose to give others ideas.
Thank you so much for stopping by to check out my latest recipes on my blog. If you are not already, be sure to follow me on Facebook or Instagram for more deliciousness, and you can register your email in the subscription box below to receive all my recipes as I publish them.
If you like the idea of using a loaf for a fun treat then be sure to check out my Cheesy Loaf Dip! It is amazing.
Happy Baking!
Anna
Pin It! Pinterest

I love hearing from you! What do you think of this recipe?