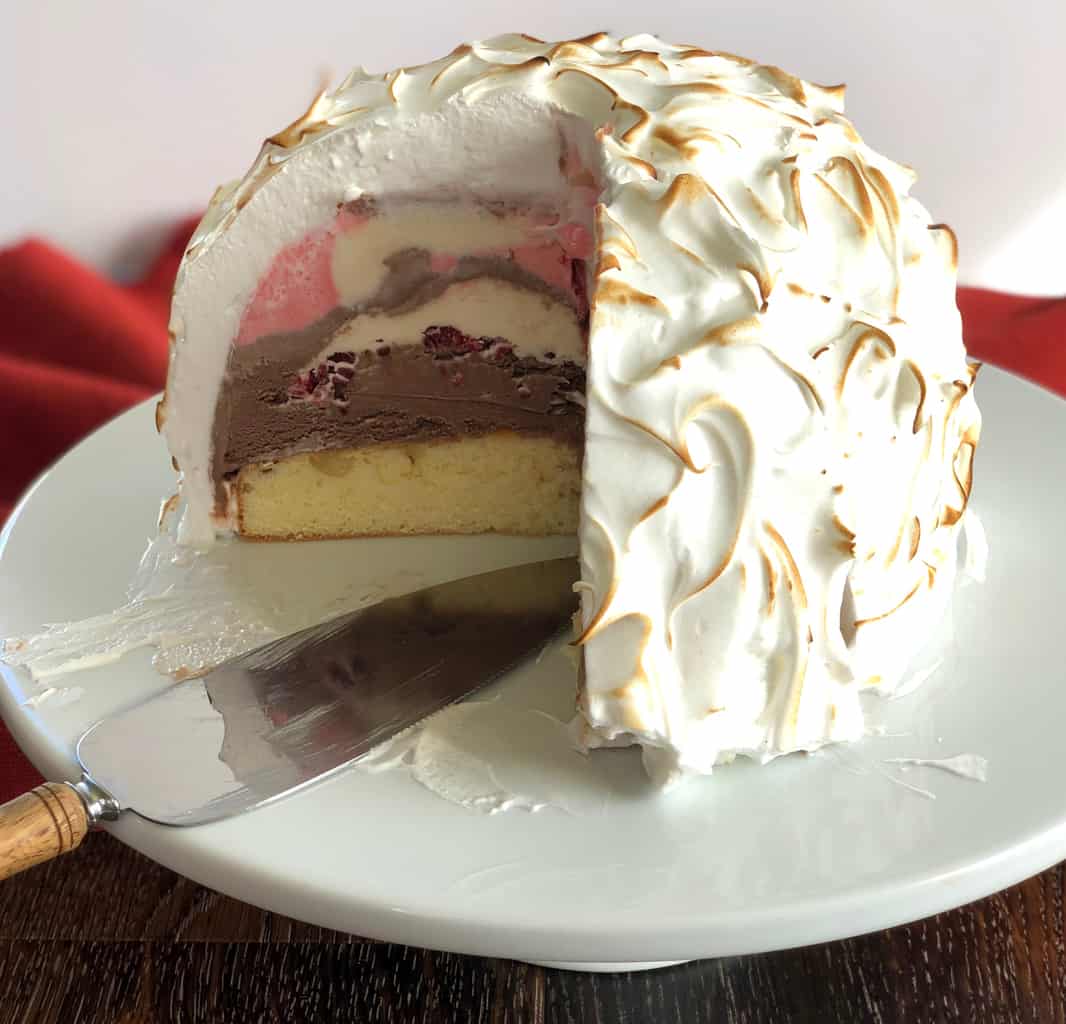
There are so many recipes that are often assumed to be really difficult, when in fact they are incredibly easy – this Baked Alaska is exactly that – spectacular but oh so easy and mine uses just a few main ingredients!
Posted May 2, 2019, Updated December 1, 2025
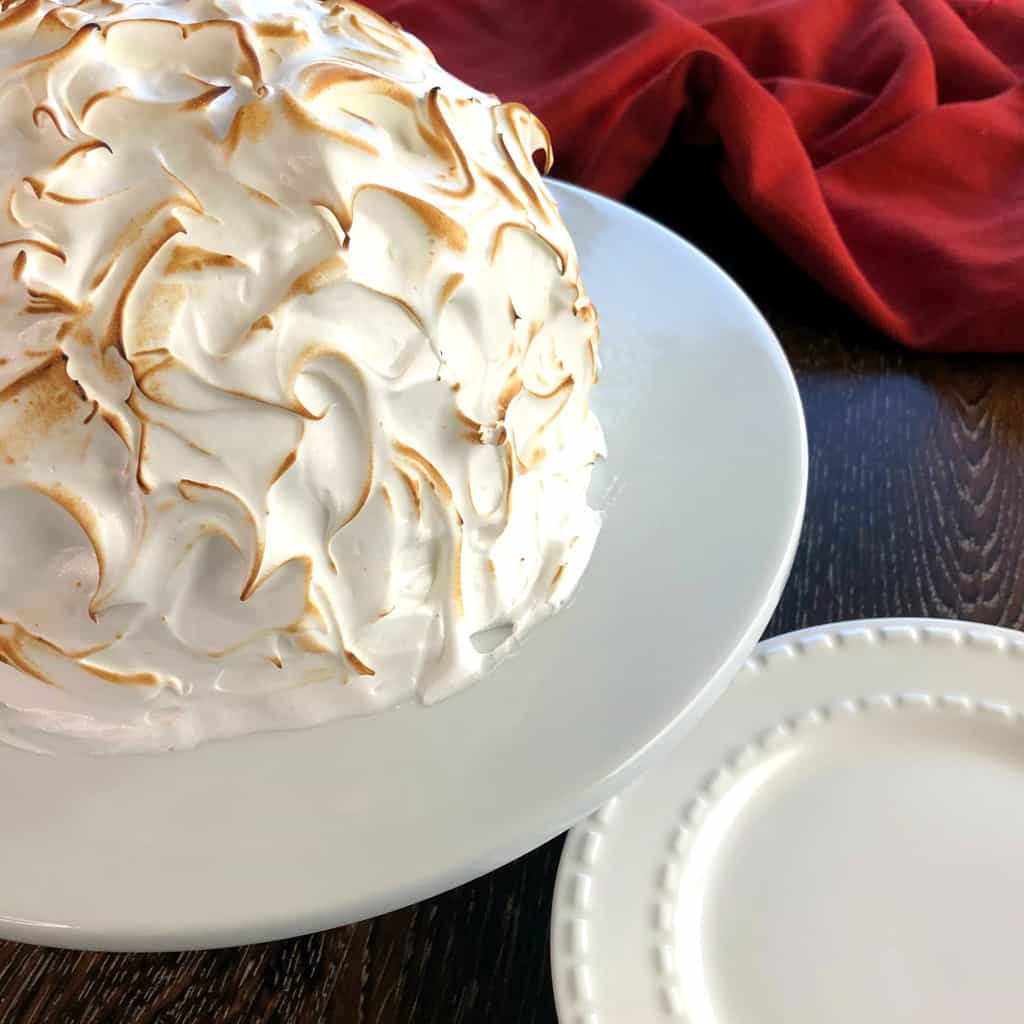
This is such a classic recipe, it has been around since forever, it got its name in 1867. After the United States purchased Alaska from Russia a famous New York Chef named a dessert in their honor – the Baked Alaska – so the story goes, however the more likely theory is he named an already popular dessert.
If you are a fan of Ice Cream desserts to impress you can also check out my Layered Ice Cream Pudding
Absolutely beautiful but so reasonably priced and super simple to make! Much like this easy Baked Alaska
I have for years only used the own brand range for my baking, and I know many of you have reached out to see if it really does the same job as some of the bigger named brands – I can assure you the quality of these products are great. Plus of course savings which is so important for my family.
Why am I telling you all this? Well I wanted to create a recipe entirely of own brand products from Countdown to show you how affordable, quality ingredients can create some show stopping dishes.
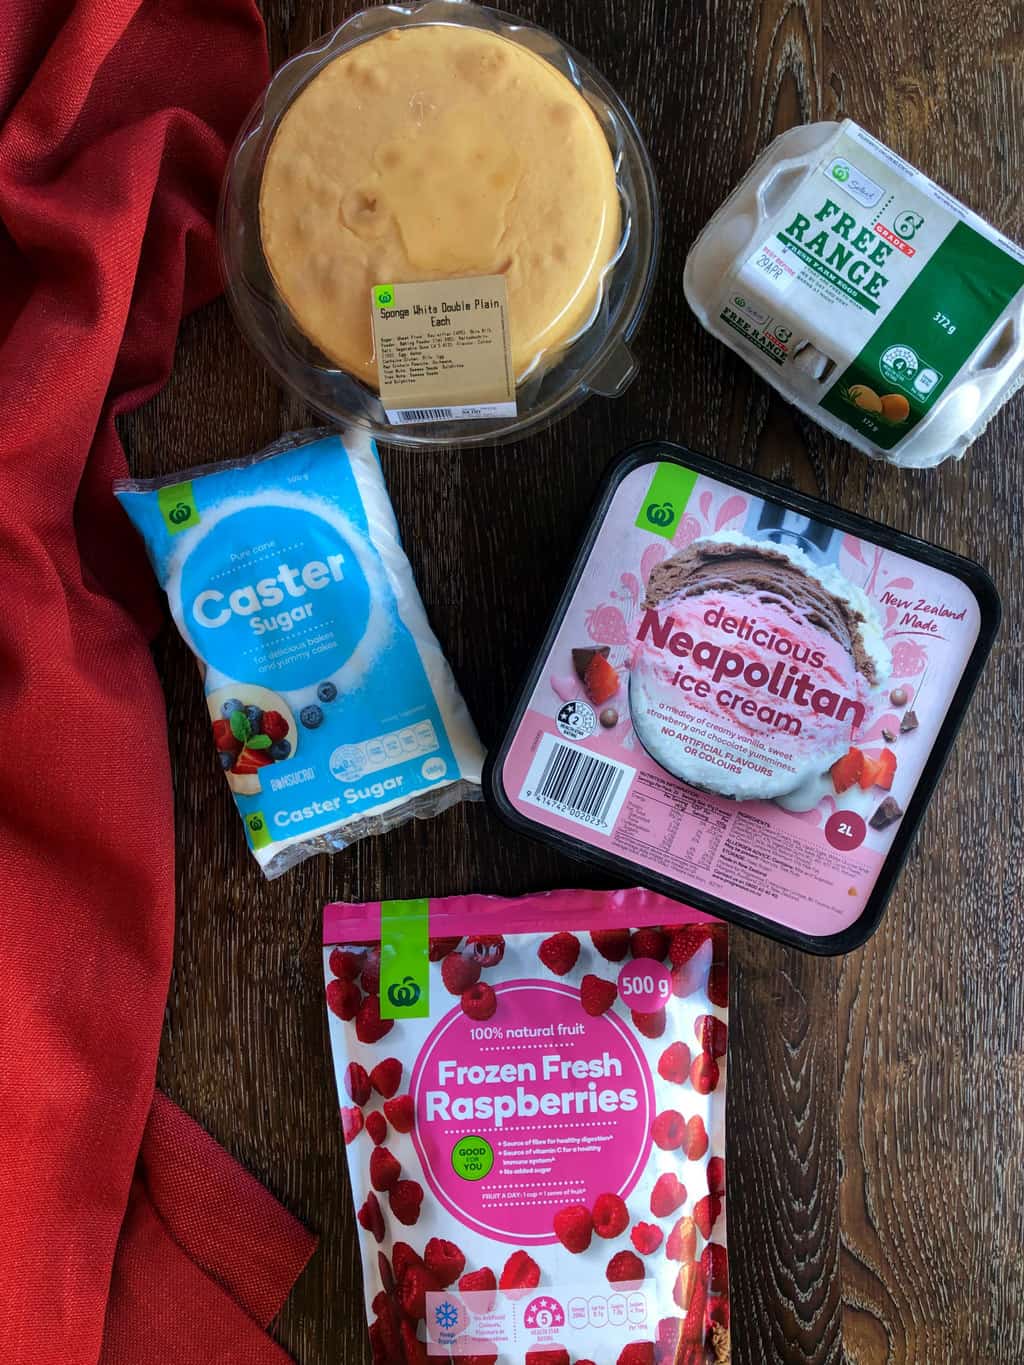
The main ingredients are all Countdown own brand products, the fresh bakery sponge, ice-cream, raspberries, caster sugar and egg whites. So simple you will definitely want to try this one next time you want a dessert to impress.
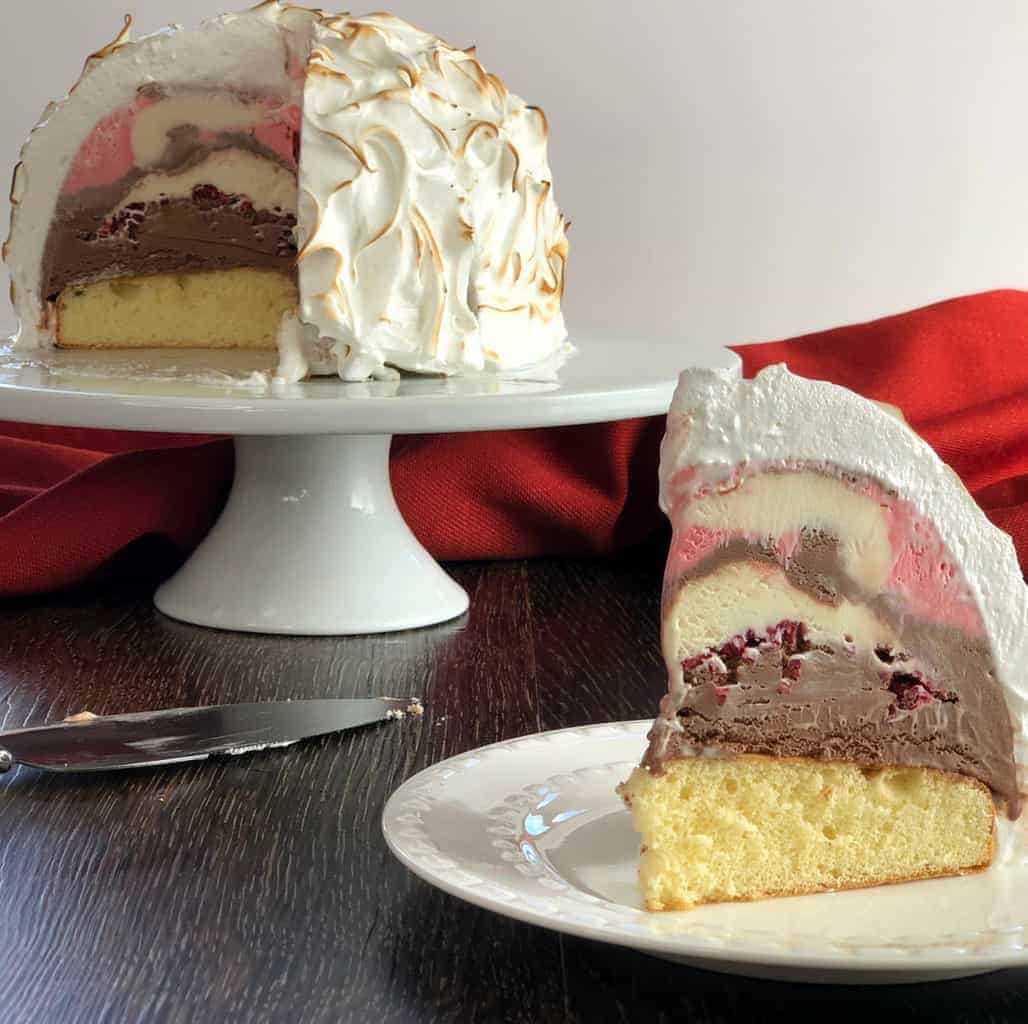
The recipe is so versatile, you can change so much of it, the range of Countdown Ice Creams includes the Neopolitan I have used, but also Chocolate Eclair, Boysenberry, Chocolate, Hokey Pokey to name a few – so you could really have a lot of fun with those flavours. I kept mine classic but already I know what I will try for the next one!
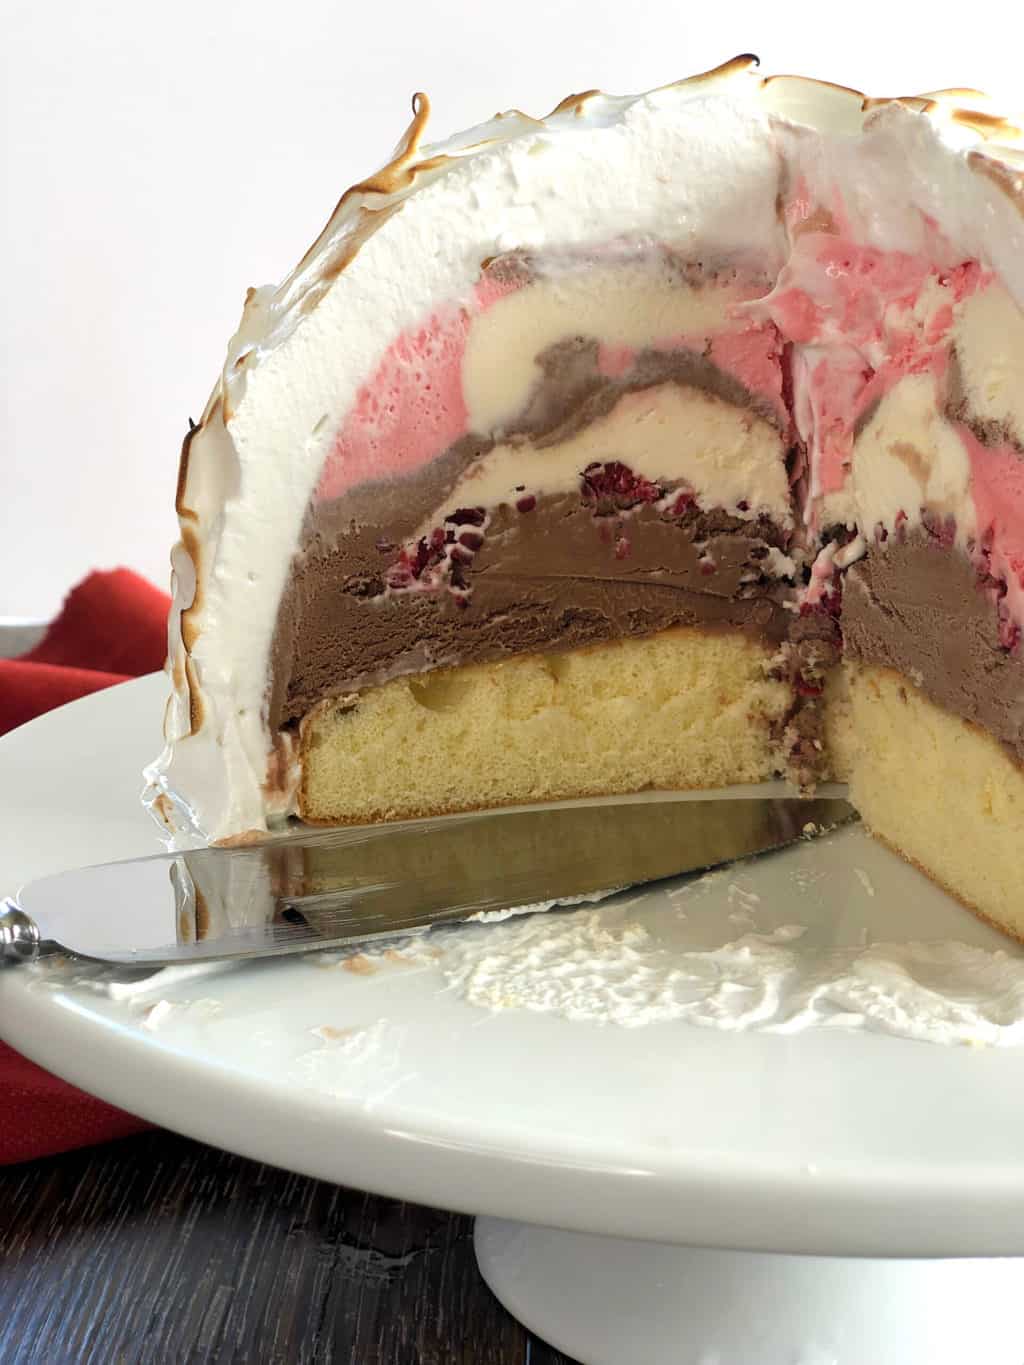
The sponge I purchased was the in-store Bakery sponge, a fresh pack of two sponges, next time I will use both sponges and layer then between the ice cream as I think this will give it even more flavour and texture. You can purchase the vanilla sponge I have used or a chocolate version which would be lovely for a change or to alternate as it is lovely to see the colours when you slice into it. These are just $4 for two at the moment.
The 2L ice cream was more than enough to create this recipe, if you used both sponges you could even use less, then the eggs and caster sugar whip up to make a generous smothering of meringue. It is really a treat that is not hard to make. The only thing you require is patience, there is a lot of downtime to freeze the stages.
In fact this made it super relaxing to make as it is so quick to prepare but you can make this days ahead of when you need it. The most important thing is to ensure you have room in your freezer to store the ice cream in the bowl and the plate or tray you store it on.
Baked Alaska’s are notable for their lovely lightly toasted meringue. This step is much easier than you imagine. For those without a blow torch you simply pop it in the oven! Believe it or not the meringue and ice cream is frozen solid so you can easily brown it in the oven – just a few minutes, to achieve a light golden crust.
As long as the meringue has completely covered and sealed the ice cream it will not seep out. It will not be as even as if you use a kitchen blow torch but still lovely. Just keep an eye on it.
I cannot wait to see others enjoy this recipe as much as we do and the substitutions you try now you know the basic recipe. I already have ideas to create more versions.
So onto the recipe for my version of Easy Baked Alaska.
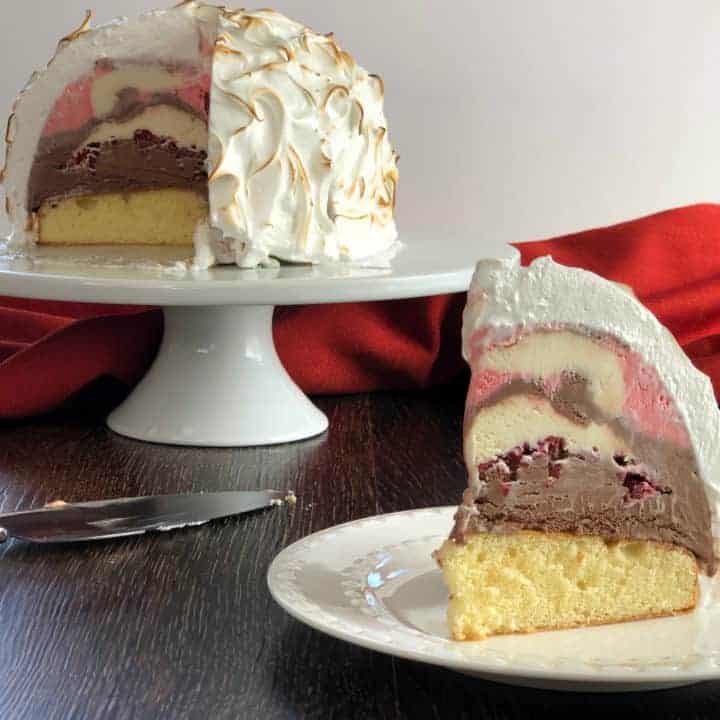
Easy Baked Alaska
The options are endless, once you master the basic techniques you can use other combinations of flavours and textures to wow your friends and families.
Ingredients
- 2 Litres Ice Cream, slightly softened
- 1 or 2 In-store Bakery Sponges
- 5 Egg whites, 175 grams
- 1 Cup Caster Sugar, 220 grams
Optional
- Pinch of Cream of Tarter
- Frozen Raspberries
Instructions
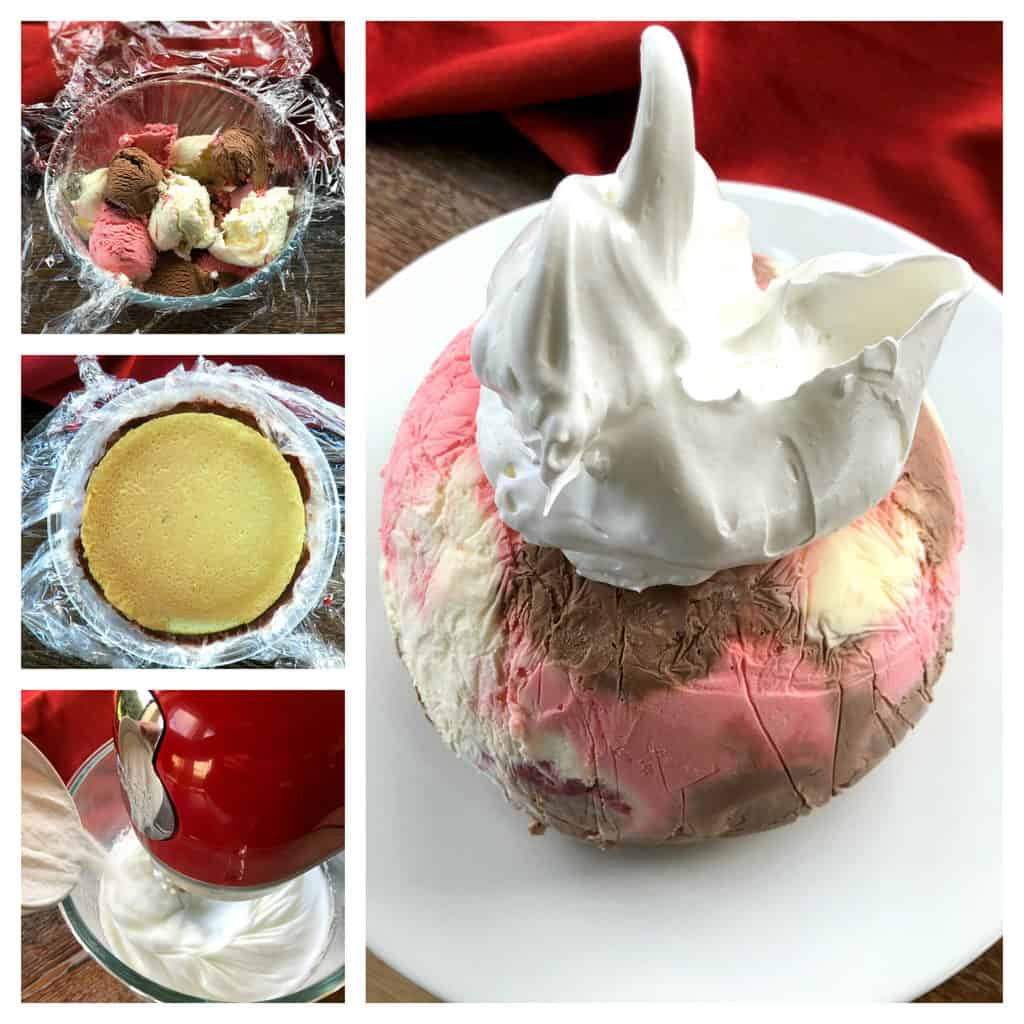
- In a 2 litre capacity glass bowl spray with cooking spray or oil and line with plastic wrap in both directions, leaving a generous overhanging amount on each side to make removing the dessert easy later on
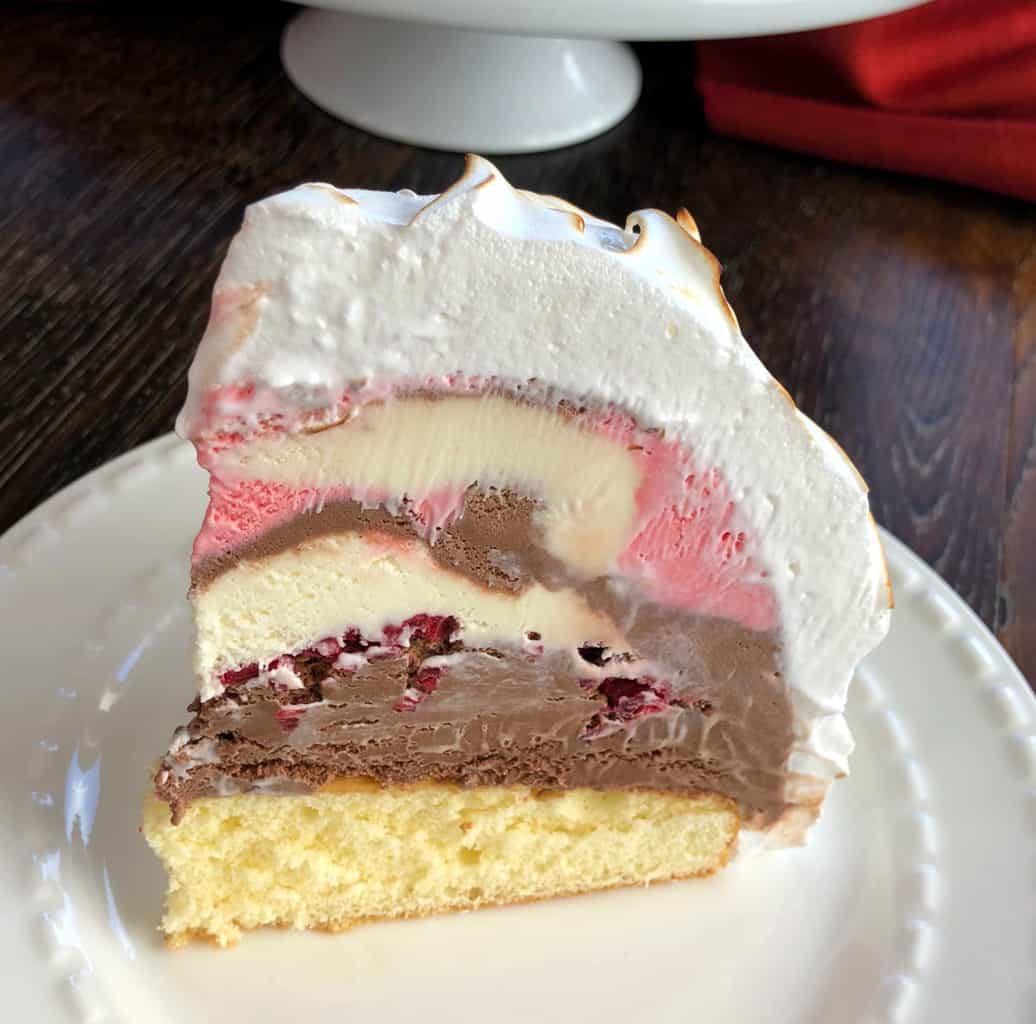
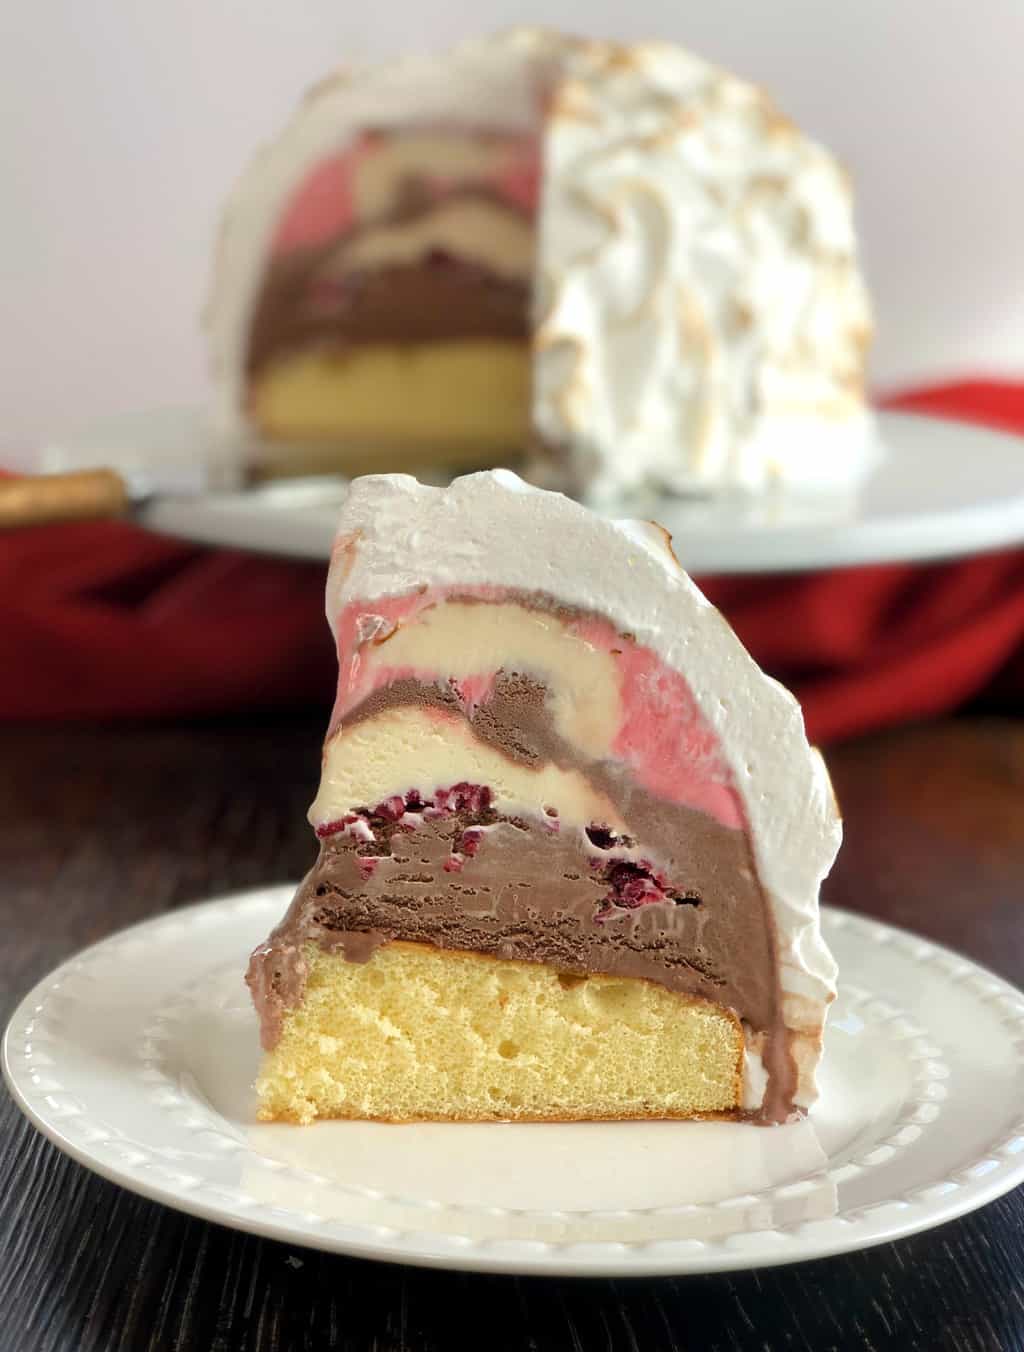
- Add the slightly softened ice cream a scoop at a time, approximately half a tub, if using Neapolitan alternate the scoops to form a pattern of colours.
- Place a large piece of plastic wrap over the scoops of ice cream and press down with the palm of your hand to create a packed, flat and smooth surface.
- Add the frozen raspberries if using by sprinkling and crushing as you cover the ice cream layer and if using both sponges add the first now. Otherwise add another thick layer of softened ice cream over the raspberries, in this case I used just the chocolate ice cream. (Leave enough room at the top of the bowl for the last sponge)
- With a piece of plastic wrap press down this final ice cream layer with your hand until it is smooth and flat.
- Place the remaining sponge over this and cover the entire top tightly with plastic wrap and pop in the freezer for a minimum of 3 hours or overnight.
- When your ice cream is completely frozen prepare the meringue
- In a clean food mixer bowl add the egg whites (Optional add a pinch of cream of tarter if using to stabilize the meringue and assist with the heat later on)
- With a whisk attachment on a food mixer begin to whisk the egg whites until they foam and then go on to form soft white peaks.
- With the mixer still going on medium/high very slowly add the caster sugar a little at a time, mix well until firm peaks form
- If baking in the oven prepare an oven tray with baking paper or a serving plate if using a blow torch, ensuring both of these can fit in the freezer
- Remove the ice cream from the freezer, you will need to slightly warm the base of the bowl to remove the ice cream cake, you can do this with warm water or your blow torch to heat the outside of the bowl.
- Invert the ice cream cake onto the prepared surface.
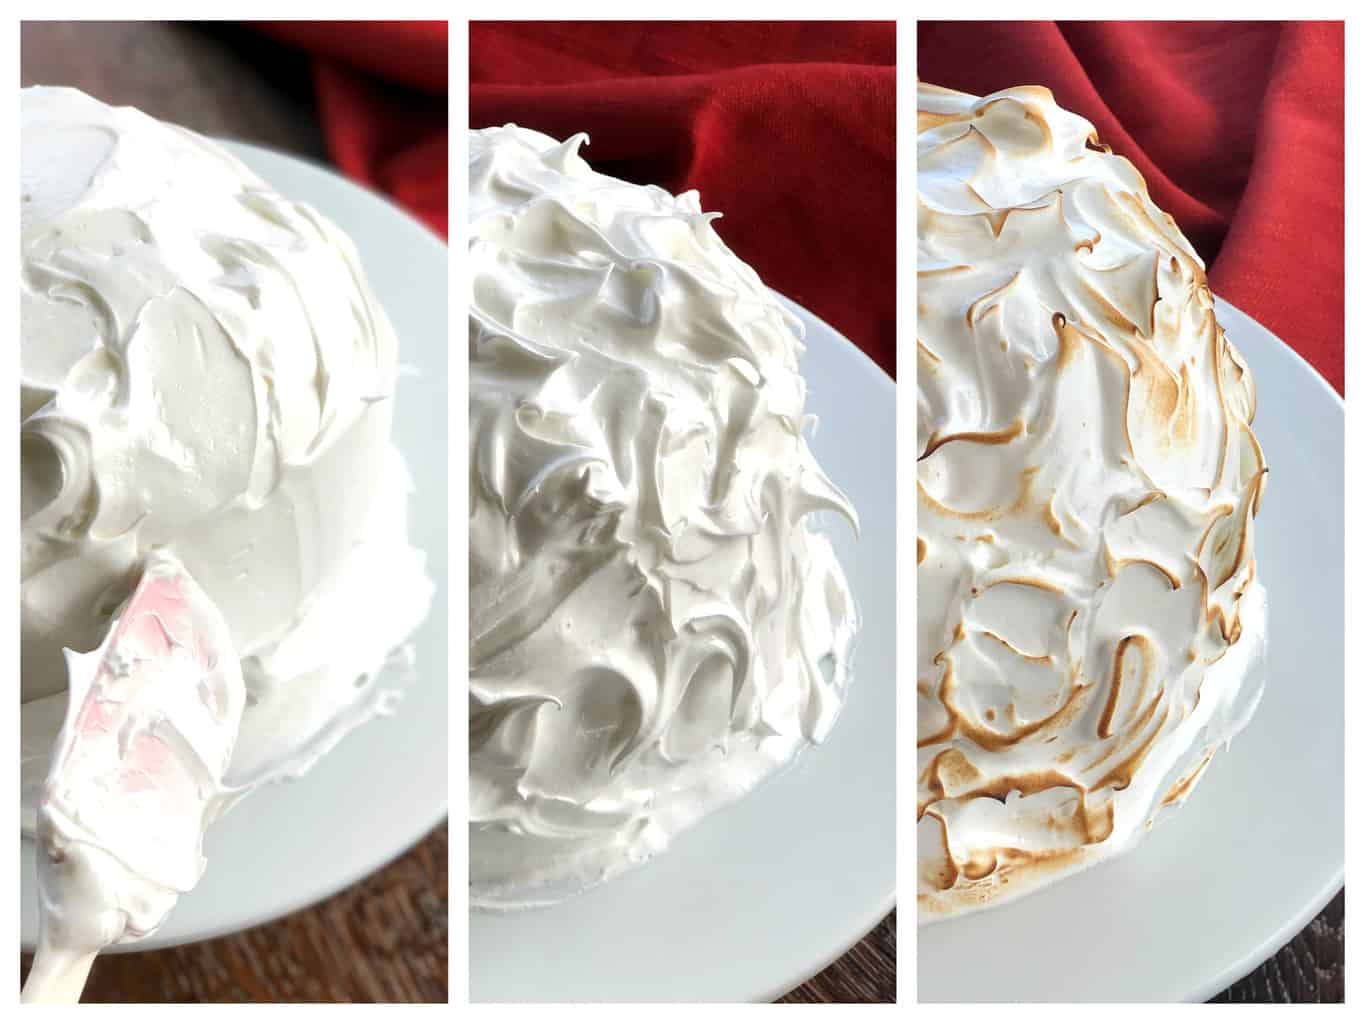
- Smother the cake with an even layer of meringue ensuring no ice cream is showing and it is completely sealed.
- You can make decorative swirls with a spoon or spatula to create tiny peaks.
- Place the meringue covered dessert in the freezer for a further 2-3 hours or until you are ready to serve - this can be days ahead.
- When you are ready to lightly toast the meringue you can use your oven or a kitchen blow torch
- If using the oven preheat the oven on bake to 220C (425F)
- Place the frozen dessert on a low shelf in the oven and bake for approximately 5 minutes, or until the tips begin to lightly brown, remove and serve straight away or freeze
- If you are using a blow torch, from a distance lightly evenly brown the meringue, taking care not to burn the tips, serve immediately or freeze
- Allow to stand at room temperature for 5-10 minutes before slicing to serve.
- Enjoy!
Notes
You will need to freeze the entire dessert twice for 3 hours at a time - first before it is coated in meringue and second once it is coated in meringue, allow for this in your preparation time
Nutrition Information:
Yield: 20 Serving Size: 1Amount Per Serving: Calories: 77Total Fat: 2gSaturated Fat: 1gUnsaturated Fat: 1gCholesterol: 50mgSodium: 18mgCarbohydrates: 13gSugar: 13gProtein: 2g
JustAMumNZ.com, occasionally offers nutritional information for recipes contained on this site. This information is provided as a courtesy and is an estimate only. This information comes from online calculators. Although justamumnz.com attempts to provide accurate nutritional information, these figures are only estimates.
It really is so easy and will become your favourite go to dessert to impress a crowd! It makes such a special looking dessert, that is quite simple once you know how.
Thank you so much for stopping by to check out this recipe, you can follow me on Facebook & Instagram and also follow this blog via email to receive all my recipes as I publish them so check out the subscription box below.
Happy Baking!
Anna
Soraya says
I was really nervous about the idea of baking ice cream. Thank you so much your recipe was easy to use and follow. my family loved it so much I am making a second one a month later!
justamumnz says
Wonderful! Thank you for trusting me and glad it all worked out!
Nimmi says
Hi Anna, this sounds like a great version of last-minute Baked Alaska, thank you so much! I have never tried to prepare the whole thing ahead of time and then freeze the dessert with the meringue on it too. I can’t believe it’s possible! What about the sponge cake layer, does that not freeze and turn hard? Will the few minutes in the oven be enough for it to defrost and soften? And is the meringue not affected in any way by going straight from the freezer into the oven?
justamumnz says
The sponge seems to thaw quickly and as you are serving it. The meringue holds its shape well in the oven as you are just quickly browning the outside.